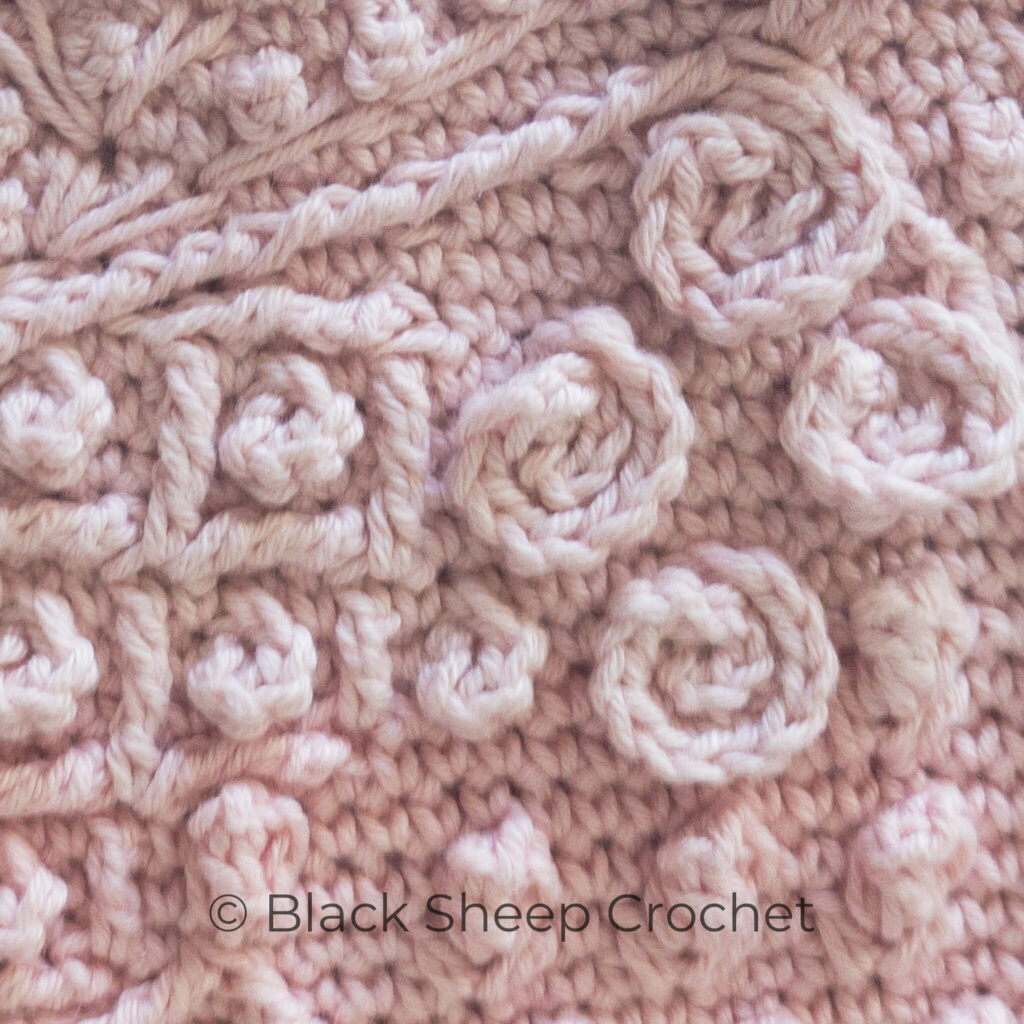
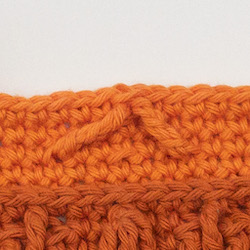
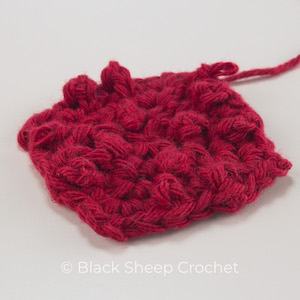
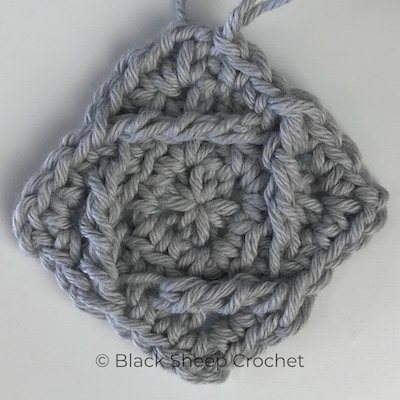
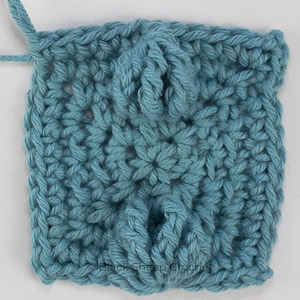
Many of the Black Sheep Crochet projects, for example, all Wrapped in Jamie squares many Heirloom squares and some Afghan squares, are designed in ‘overlay crochet’ technique.
In order to easily describe where to place the overlay stitches, I have created a special way of writing these patterns. A member of my facebook group called this way of stitch placement description ‘Petranese’ and the name stuck.
Petranese, at first glance, may look quite complicated, but in fact, it is not!
You will most likely already know most of the stitches used and I will explain how to read the abbreviations for any special stitches and how to make them step-by-step in “Petranese” explained – Basics – Part 1 and in this tutorial.
You will also be able to follow a continuously growing number of video tutorials for these and other stitches on this website and the YouTube channel.
- Crochet Terminology, Abbreviations and Punctuation
- Basic stitches – Abbreviations and Definitions
- Petranese “Overlay” Crochet Terminology
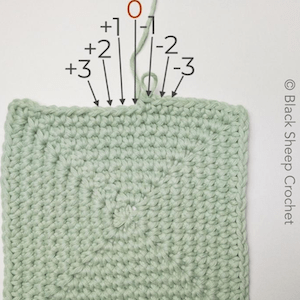
- Counting Stitches & Rounds, Finding Free Front Loops
- Combining Stitch and Round Counting to make Special Stitches
- The Exception to the Rule
The “Petranese” explained – Basics PDF document can be downloaded for free here:
Stitches worked in Front Loops Only (FLO)
Example:
dc in FLO – double crochet worked in the Front Loop Only of the indicated st
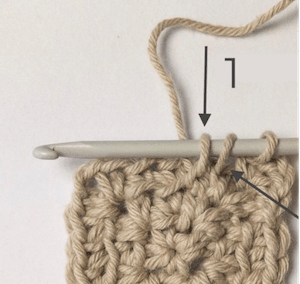
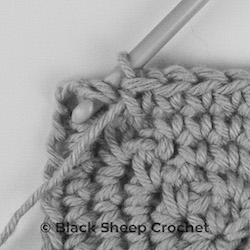
dc_+1-2 in FLO –
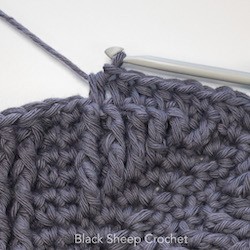
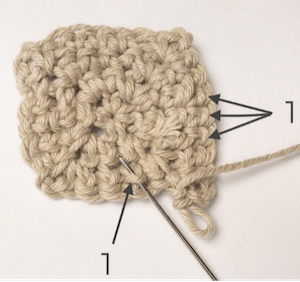
double crochet is worked in the front loop only of the stitch 1 ahead and 2 rounds below the next stitch
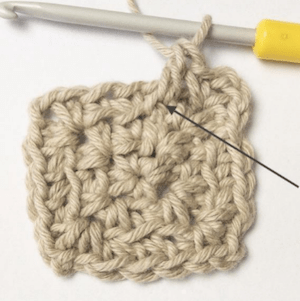
Finished double crochet in front loop only of the stitch 1 ahead and 2 rounds below the next stitch
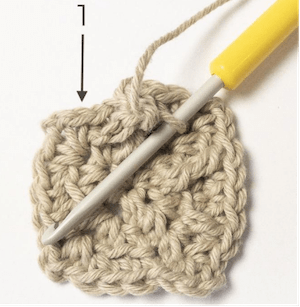
1 – indicates the stitch of the previous round (behind the special stitch) that needs to be skipped
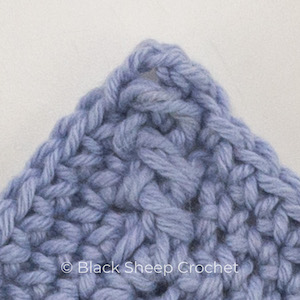
The next stitch made will be a sc into the ch2 corner space
Stitches Worked in Back Loops Only (BLO)
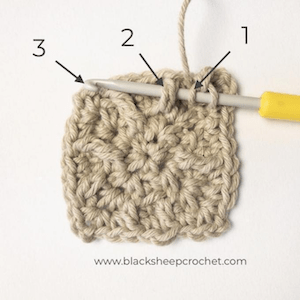
sc in BLO – single crochet made in the Back Loop Only of the indicated stitch
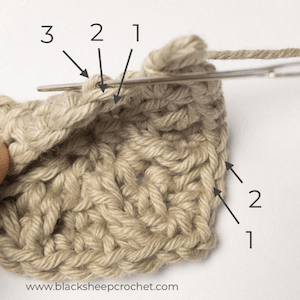

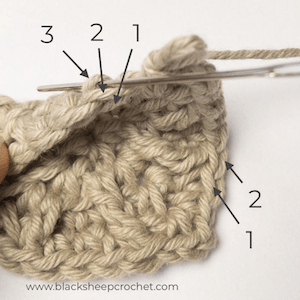
1 – indicates the front loop
2 – indicates the back loop
3 – indicates the 3rd loop
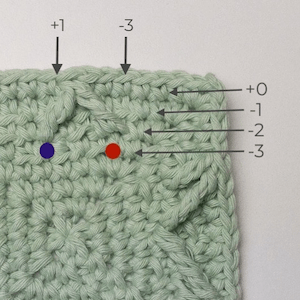
All four sides of the square show 3 sc that have been worked in back loops only in the previous round (-1)
The front loops from the round before (-2) are still available and can be used for a FLO stitch in one of the next rounds
The picture shows a dc_+1-2 in FLO worked in the free front loop of the stitch 1 ahead and 2 rounds below the next stitch – the back loop was used by a sc in BLO
Third Loop Stitches (3rd loop sts)
Round 14 in most, as well as Round 20 of the inside square and Round 30 of the border in all Wrapped in Jamie patterns and those that are compatible with it are worked as sc in the 3rd loop of the stitches (unless you choose to work it otherwise). They have a very distinctive and – in my humble opinion – gorgeous look, but they can be a bit more challenging to work. (See alternative suggestions below)
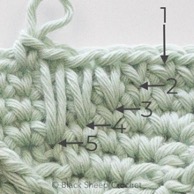
A stitch has 2 loops that form something like a V-shape, consisting of a Front Loop (FL) and a Back Loop (BL). The 3rd loop lies directly behind the back loop. It is the ‘bump’ at the open side of the V, a tiny bit left/right of center (right-handed / left-handed crocheter). Please refer to the (right-handed) pictures below for a visual reference.
Right side of work (RS)
1 – Front Loop (FL)
2 – Back Loop (BL)
3 – 3rd loop

Wrong side of work (WS)
1 – 3rd loops
Hints to help make working 3rd loop stitch rounds easier
If you find making sc in the 3rd loop (in Rounds 14, 20 and 30) difficult, here are some ideas on how to make this easier:
- use a bigger hook to work the round before the 3rd-loop round,
- make an effort to work the sc loosely in the round before the 3rd-loop round,
- use a smaller hook for the 3rd-loop round or
- make hdc (half double crochets) instead of sc in the round before the 3rd-loop round. If you choose this option, please be aware that making hdcs may alter the height of the round and that you should work the round before the 3rd-loop round in the same manner in all squares.
Angular Stitches
Breakdown of angular stitch abbreviations
| tr_ | +2 | -3 | tr_ | -2 | -3 |
| kind of stitch | st(s) ahead | rounds below | kind of stitch | st(s) behind | rounds below |
| forward angular stitch | backward angular stitch | ||||
| treble | 2 stitches ahead and | 3 rounds below the next stitch | treble | 2 stitches behind and | 3 rounds below the next stitch |
| tr_+2-3 | tr_-2-3 |
Angular Stitch Examples
| tr_+1-2 in FLO | treble in FLO of the st 1 ahead and 2 rounds below the next stitch |
| tr_-1-2 in FLO | treble in FLO of the st 1 behind and 2 rounds below the next stitch |
| htr_+2-3 in FLO or tr_+2-3 in FLO | half treble or treble in FLO of the st 2 ahead and 3 rounds below the next stitch |
| htr_-2-3 in FLO or tr_-2-3 in FLO | half treble or treble in FLO of the st 2 behind and 3 rounds below the next stitch |
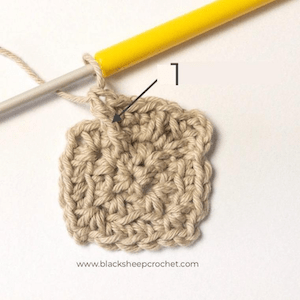
1: tr_-2-3 in FLO =
treble worked in the FLO of the st
2 behind (-2) and
3 rounds below (-3) the next st
Front Post Stitches
fp – front post stitch
Insert the hook around the stem of the indicated st, from front to back and then to the front again, then finish the stitch as instructed.
You work the stitch on the RIGHT side of your work.
Example:
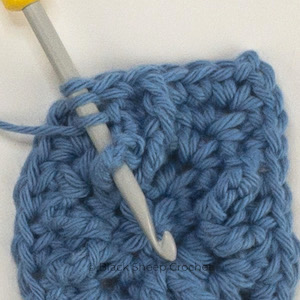
fpdc – front post double crochet around the st 1 round below the next stitch:
yo, insert hook from front to back and then to front again around the post of the indicated st, so that the hook pushes the st “forward”, yo and finish the dc as usual.
Front post stitches can be made around any kind of normal stitches and other front or back post stitches in previous rounds.
| fpsc | front post single crochet |
| fphdc | front post half double crochet |
| fpdc | front post double crochet |
| fphtr | front post half treble crochet |
| fptr | front post treble crochet |
| fphdtr | front post half double treble crochet |
| fpdtr | front post double treble crochet |
Example: front post double crochet
1 – yarn over
2 – bring hook behind the post part of the stitch
3 – yarn over and pull through
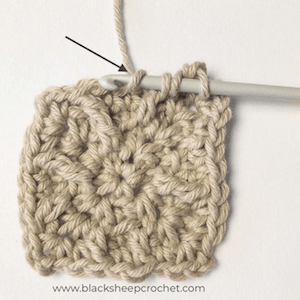
yarn over and pull through 2 loops
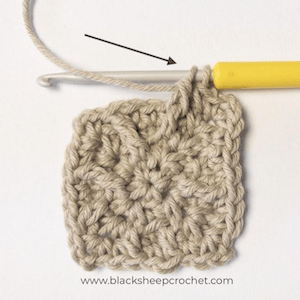
yarn over and pull through 2 remaining loops
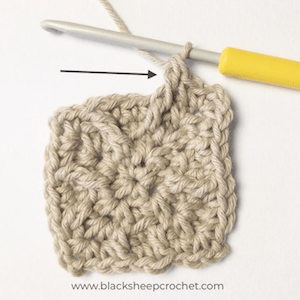
finished fpdc – front post double crochet (indicated)
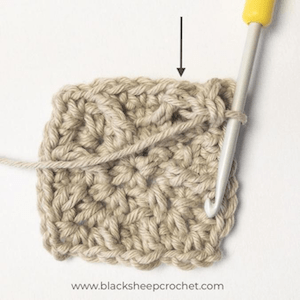
skip the stitch behind the fpdc (indicated), continue in the next
Back Post Stitches
bp – back post stitch
Insert the hook around the post of the indicated st, from back to front and to the back again, then finish the stitch as instructed.
Example:
bpdc around the stitch 1 round below the next stitch – back post double crochet around the i.e. double crochet of the previous round:
yo, insert hook from back to front and then front to back around the post of the indicated st, so that the hook pushes the st “backward”, yo and finish the dc as usual.
Like front post stitches, back post stitches can be made around any kind of normal stitches or other front or back post stitches in previous rounds. Abbreviations are the same as in the table above for fp stitches, only with ‘bp’ instead of ‘fp’.
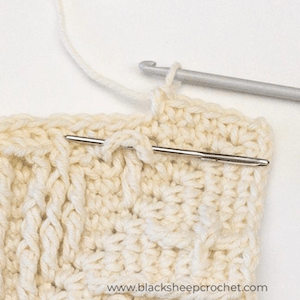
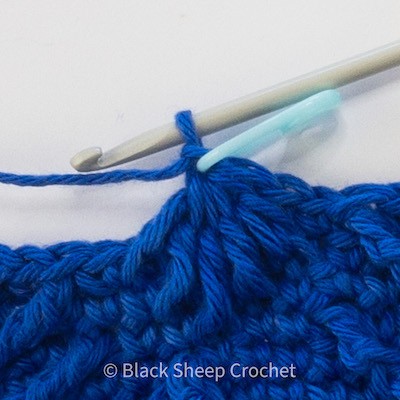
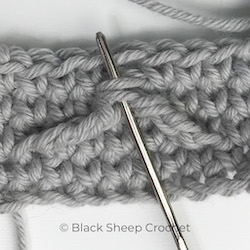
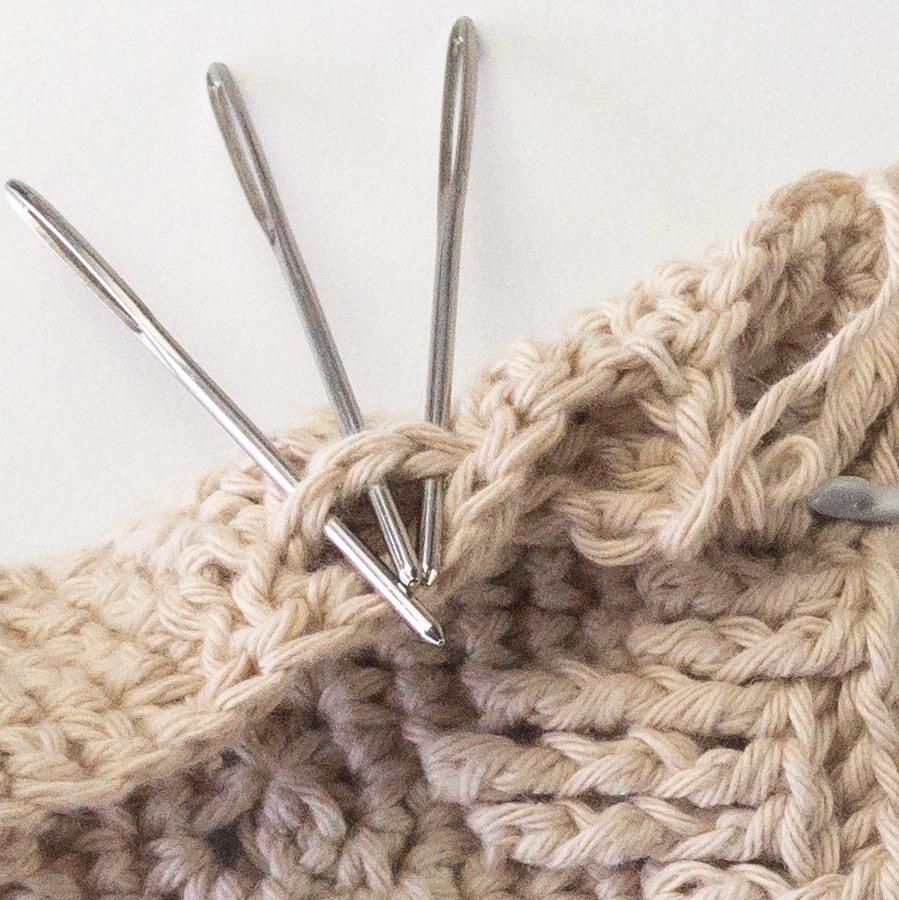
Here a back post stitch has to be made around a treble of a previous round; this tr has a ch2 on each side
The photo shows how to insert the hook (indicated by the needle) around the post part of the stitch
Variations to (Special) Stitches
Sometimes we change basic or Special Stitches slightly, in order to fill a gap or anchor a stitch neatly in place.
These variations are explained in detail before the round in which they are to be used.
We mark them with an “-x” at the end of the stitch abbreviation to indicate the variation of a known stitch – you’ll see and understand when you encounter them!
"Padding" Stitches
Padding stitches are the only stitches that use a third dimension of placement – behind in the meaning of “on the back side of” a special stitch.
These stitches use the free top loops of a stitch that was skipped for a special stitch in a previous round. They are made into the stitch behind that special stitch (without turning your work!). The special stitch stays in front. Flip the top edge of the work slightly down so that you can see the free / skipped stitch in the back. Sometimes the skipped stitch can be a bit hidden. Make sure you find the correct loops to work into.
Padding stitches increase the special 3D effect of an overlay crochet pattern and bring the skipped stitch behind the special stitch up to the level of the current round.
Wrapped in Jamie’s square, triangle and border patterns as well as most Heirloom and Afghan patterns use two different padding stitches (and occasional, especially explained variations of those) – hdcbb and dcbb.
hdcbb – technically this is a hdc_0-2-b, half double crochet behind the st 2 rounds below the next stitch
dcbb – technically this is a dc_0-2-b, double crochet behind the st 2 rounds below the next stitch
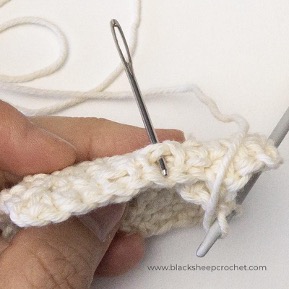
hdcbb or dcbb into the free top loops of the st
2 rounds below the next stitch
= behind and below the next stitch of the previous round (indicated loops)
You can find a detailed tutorial for the dcbb and hdcbb here:
More free 'Petranese' explained Tutorials
‘Petranese’ explained –
dcbb – double crochet behind and below
‘Petranese’ explained –
hdc/hdcbb or double hdc tutorial
‘Petranese’ explained –
Long dc Star (5 legs) tutorial
