Long dc - long double crochet
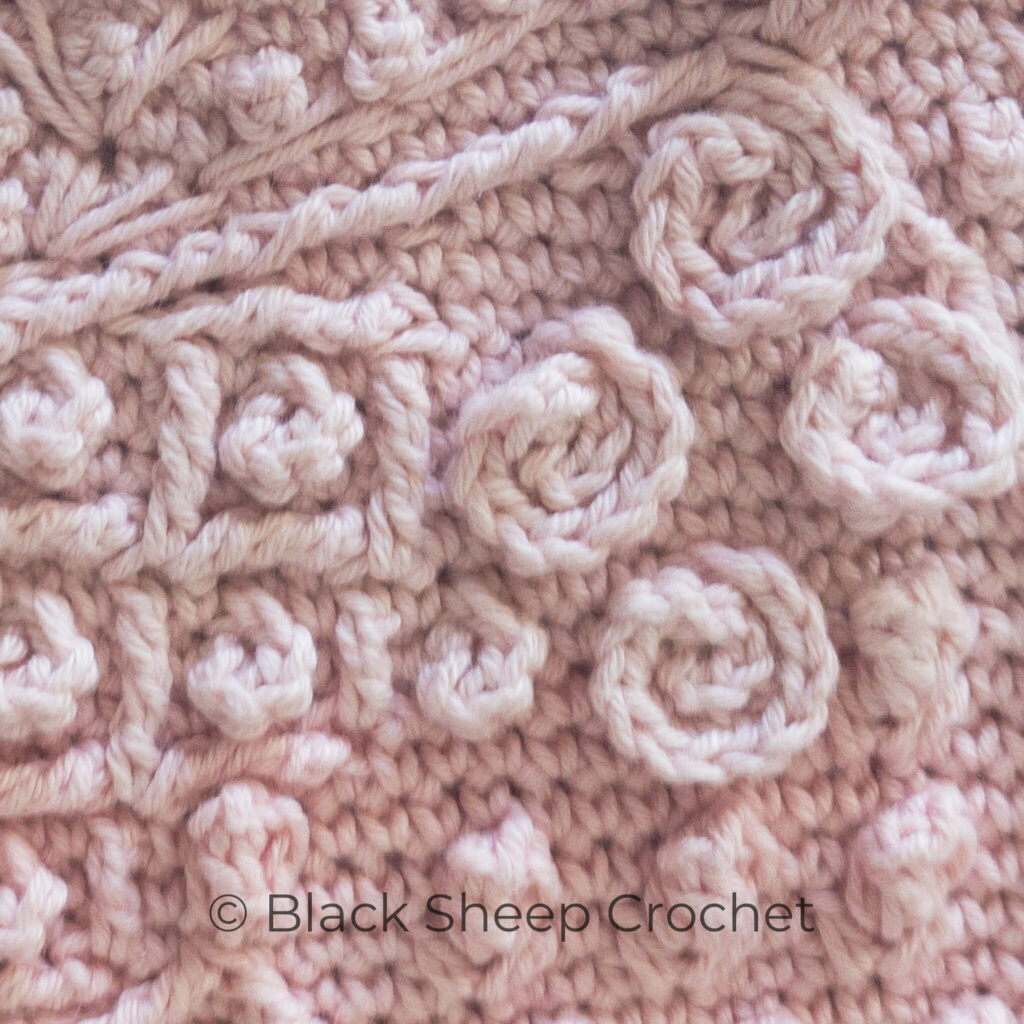
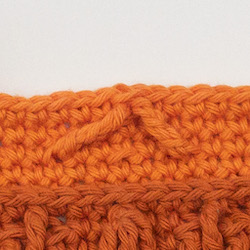
A long dc is a variation of a normal double crochet.
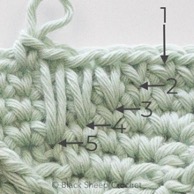
While a double crochet has a specific height which is the same throughout a project, it is the special characteristic of a long double crochet that it is elongated in order to cover the distance between the front loop / stitch it is worked into and the current row.
The long dc is preferable over a treble, double treble or triple treble, when a less ‘twisted’ stitch structure is required than those stitches provide.
In comparison with these long stitches, the long dc is wider, looser and slighter more elastic.
Due to the twisting from working through the several yarn overs, standard long stitches have a very regular, repetitive structure. The long dc_Star maintains the same form and the typical features of the double crochet, no matter how long it is stretched.
Long dc_Star - long double crochet star
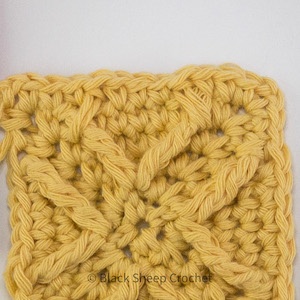
A long dc_Star is a combination of several unfinished long double crochets, combined with a final ‘yarn over and pull through’ into one stitch.
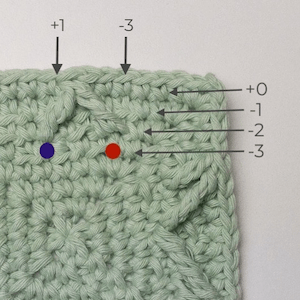
In preparation for the long dc_Star, front loops in form of a triangle are left free over 5 stitches and three rows, into which the legs of the long dc_Star are worked into in the final (fourth) round.
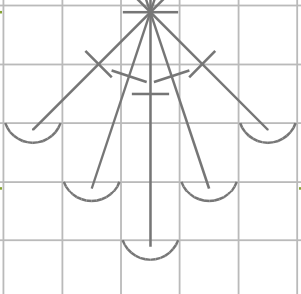
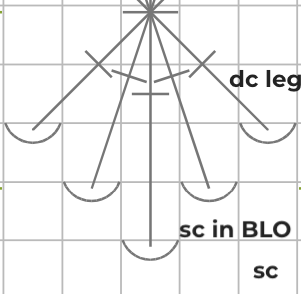
The picture above shows how the stitch appears within the charted pattern
Preparation and Set-up
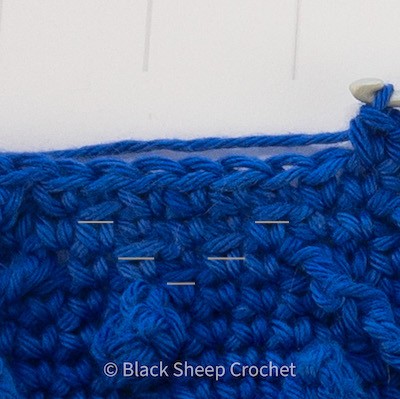
Prepare 3 rows of free front loops (white underline) over 5 stitches as shown in the chart
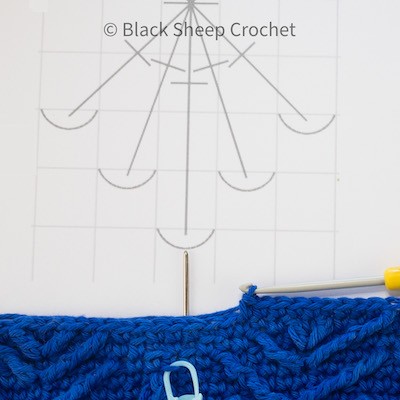
Row 1:
2 sc,
sc in BLO (leaves a free front loop, marked with stitch marker),
2 sc
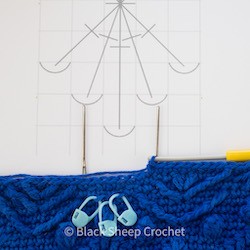
Row 2:
sc,
sc in BLO (1 st before the sc in BLO from previous round),
sc (above the sc in BLO from previous round),
sc in BLO (1 st after sc in BLO from previous round)
sc
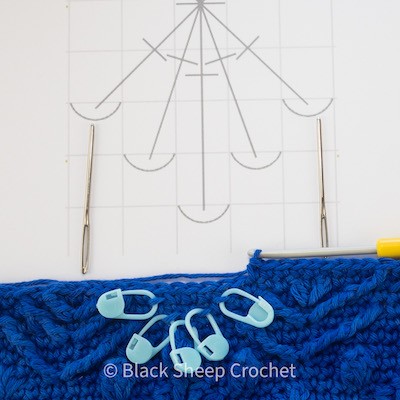
Row 3:
sc in BLO (1 st before the sc in BLO from the previous round),
3 sc (above the sc in BLO, sc, and sc in BLO from the previous round),
sc in BLO (1 st after sc in BLO from the previous round)
The placing of stitch markers can help to find the free front loops more easily.
Set-up video right-handed
Set-up video left-handed
Working the long dc_Star
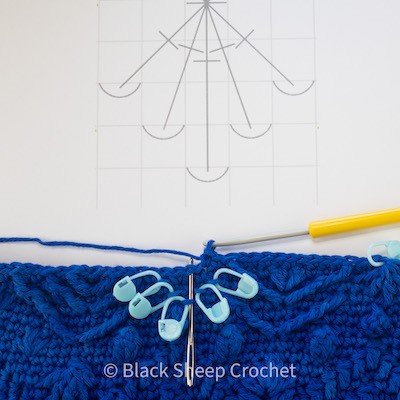
The long dc_Star is made exactly above the free front loop in the first row, so start with 2 sc (above the first sc in BLO and the next st in Round 3)
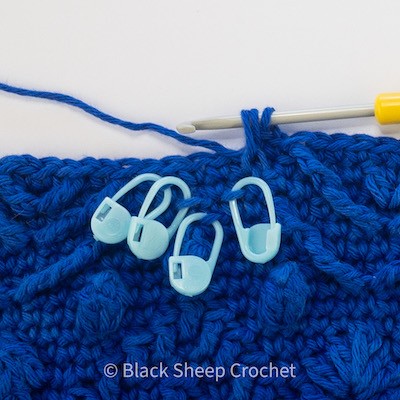
Yarn over, insert hook into the front loop of the st 2 behind and 2 rounds below the next st, yarn over, pull through and pull loop up to the height of the current round
(3 loops on the hook)
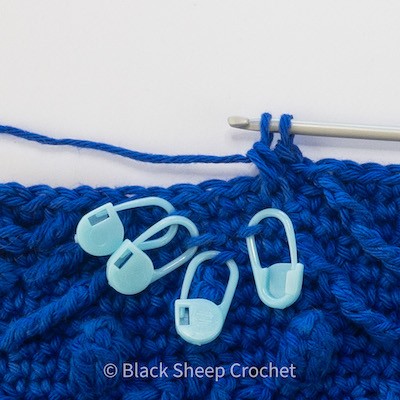
Yarn over and pull through 2 loops
(2 loops on the hook)
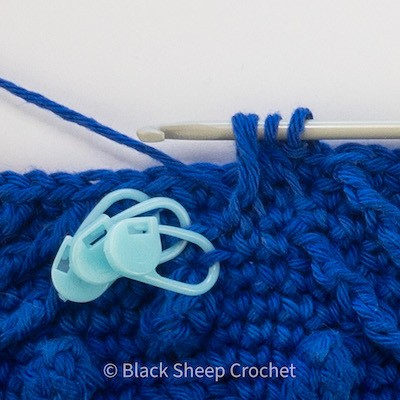
Yarn over, insert hook into the front loop of the st 1 behind and 3 rounds below the next st, yarn over, pull through and pull loop up to the height of the current round
(4 loops on the hook)
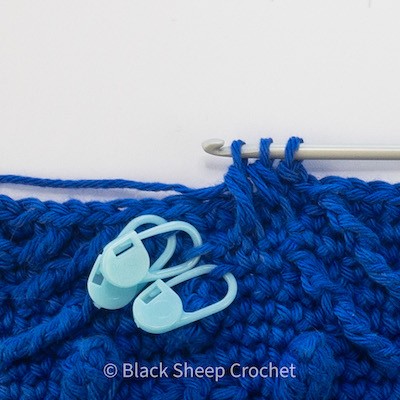
Yarn over and pull through 2 loops
(3 loops on the hook)
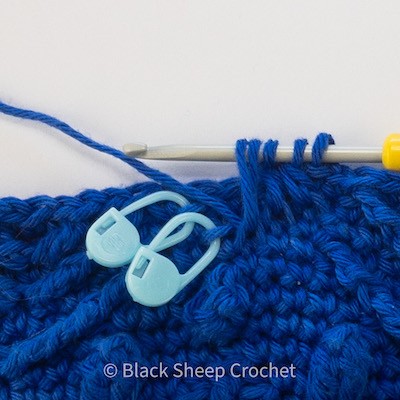
Yarn over, insert hook into the front loop of the st 4 rounds below the next st, yarn over, pull through and pull loop up to the height of the current round
(5 loops on the hook)
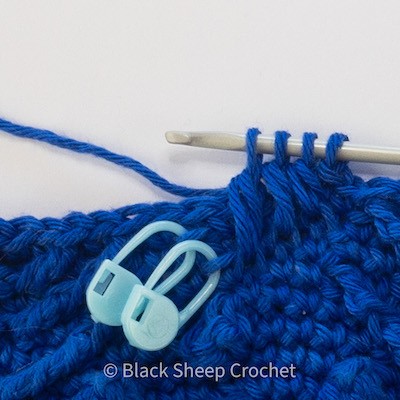
Yarn over and pull through 2 loops
(4 loops on the hook)
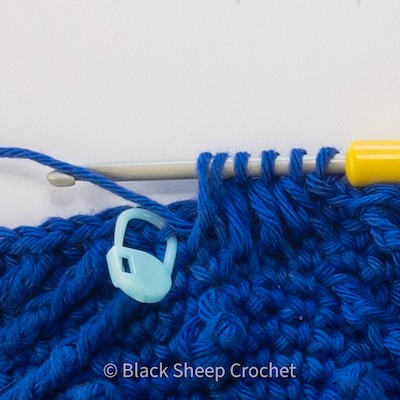
Yarn over, insert hook into the front loop of the st 1 ahead and 3 rounds below the next st, yarn over, pull through and pull loop up to the height of the current round
(6 loops on the hook)
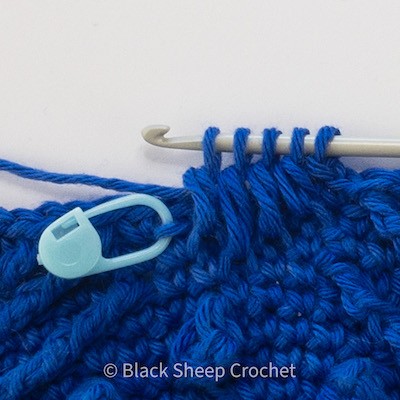
Yarn over and pull through 2 loops
(5 loops on the hook)
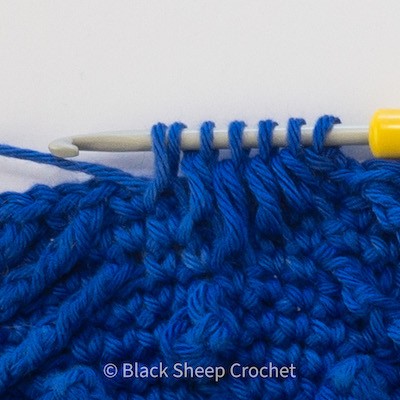
Yarn over, insert hook into the front loop of the st 2 ahead and 2 rounds below the next st, yarn over, pull through and pull loop up to the height of the current round (7 loops on the hook)
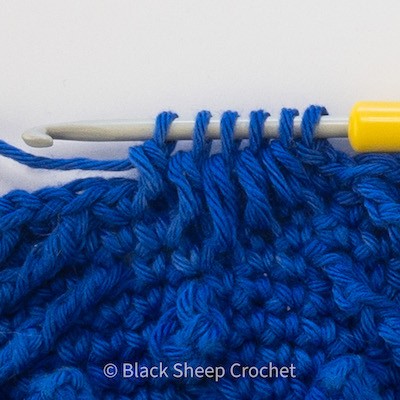
Yarn over and pull through 2 loops
(6 loops on the hook)
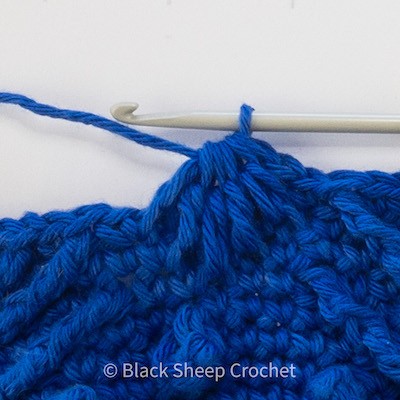
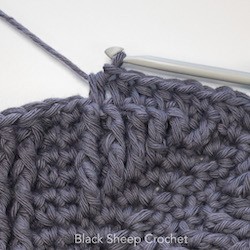
Yarn over and pull through all loops on the hook
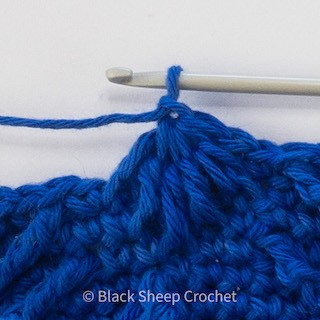
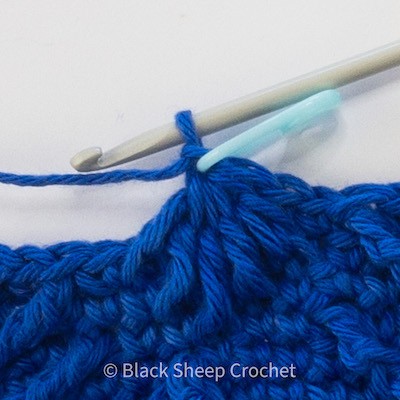
Ch1 (the chain closes the st and is part of it; it does not count as an extra st)
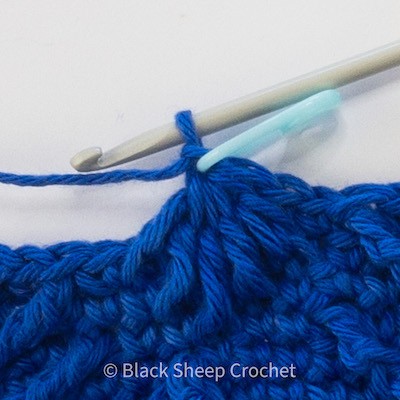
A stitch marker in the ch1 can be placed as a reminder to skip it in the next round

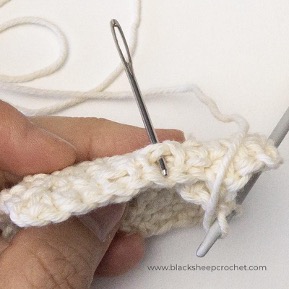
Skip the st behind the long dc_Star (indicated by the needle), continue in the next (indicated by the hook)
Right-handed video
Left-handed video
Working over the long dc_Star in the next round
Now that you made one or more long dc_Stars, let’s have a look how to continue in the next row. There are four options:
sc in main loop
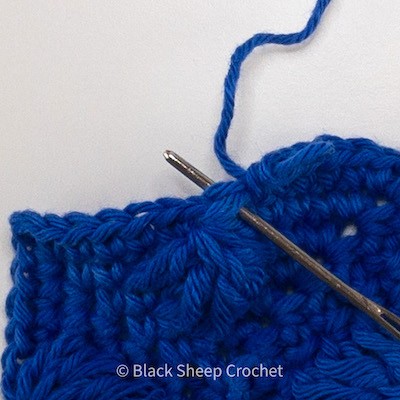
work a sc into the main loop of the long dc_Star (indicated)
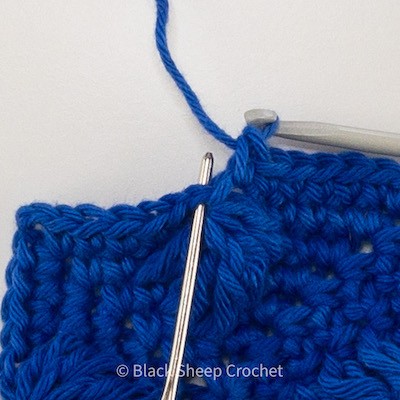
skip the closing chain (indicated)

creates a neat and straight-ish finish
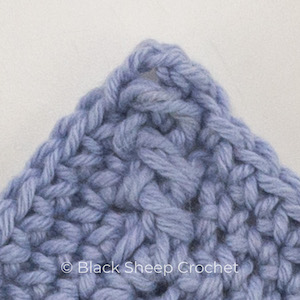
sc in closing chain
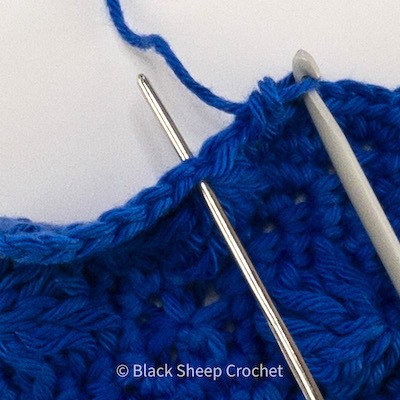
skip the main loop and work a sc into the closing chain (indicated)
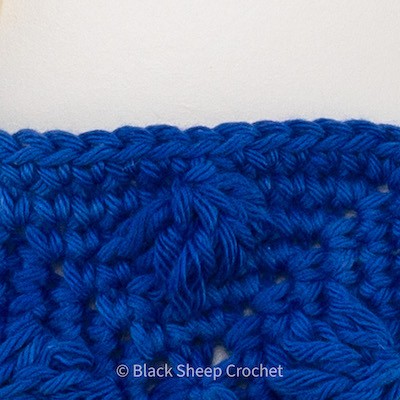
creates a neat and ever so slightly slanted finish
The top is pointy because the stitch is ‘raffled’ a bit.
If you wanted, you could work into the main loop. In that case, placing a stitch marker in the main loop before working into the closing chain is recommended
dcbb
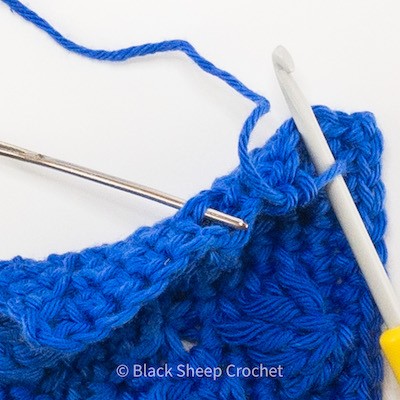
work a dcbb in the free loops behind the long dc_Star (indicated)
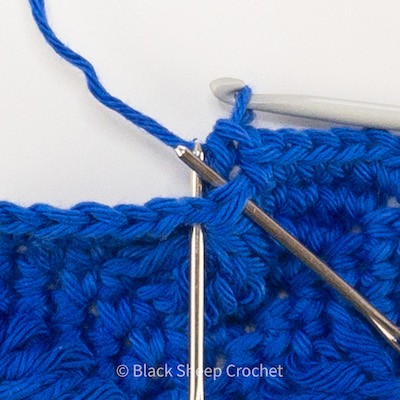
skip the main loop and the closing chain (indicated), continue in the next st
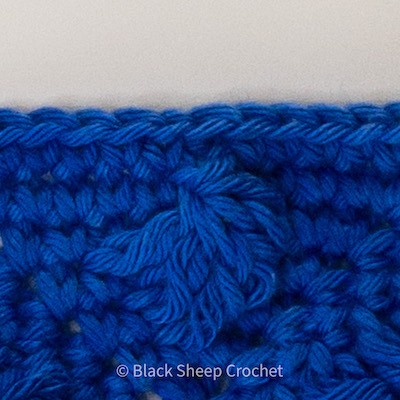
the long dc_Star stays ever so slightly twisted
main loop and closing chain stay free and can be worked into later on, if desired
fpsc
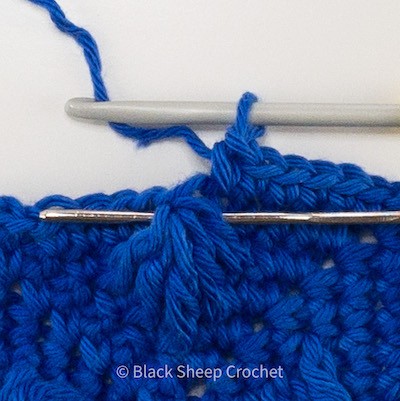
work a fpsc around the long dc_Star
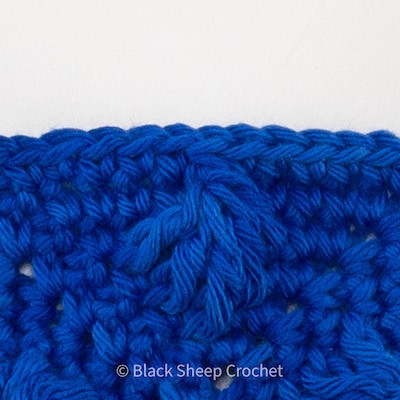
the long dc_Star is pull up a bit
Technically, the top of the long dc_Star stays free, so that you could work into it.
It is now on the wrong side of the work and very squished, so if the design requires you to work into the top loop (or the closing chain or both), placing a stitch marker is highly recommended to make finding those loops easier/possible

All four options at a glance:
left – sc in main loop
bottom – sc in closing chain
right – dcbb
top – fpsc
Now that you know how to work the Long dc_Star, I hope you will incorporate it into your crochet project.
Further written instructions, photo tutorials and links to video tutorials as well as PDF downloads for special stitches can be found here:
Special Stitch Tutorials
https://blacksheepcrochet.com/crochet-tutorials/
You can meet me and other makers here:
Facebook Black Sheep Crochet group
https://www.facebook.com/groups/blacksheepcrochet
Facebook Wrapped in Jamie group
https://www.facebook.com/groups/blacksheepcrochet/
Black Sheep Crochet on Ravelry.
https://www.ravelry.com/designers/petra-creutziger—black-sheep-crochet
You can ask any pattern questions there, share the pictures of your project and get inspiration from others.
Please use hashtags @black_sheep_crochet, #overlaycrochet, #wrappedinjamiecal or #heirloompattern in case you share your project progress in your favourite network, so I can see your work and can give you a like or a thumbs up.
More Free Tutorials
‘Petranese’ explained –
dcbb – double crochet behind and below
‘Petranese’ explained –
Long dc Star (5 legs) tutorial
‘Petranese’ explained –
Clover Blossom
coming soon
