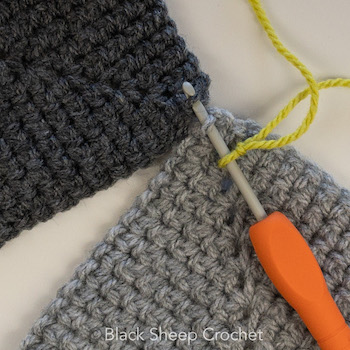
If you have made any of the Wrapped in Jamie CAL squares you are by now familiar with the 3rd loop single crochet.
You will probably dread making these rounds, but love the effect it gives you.
Well, this join is likely to evoke the same love/hate relationship you have for the 3rd loop rounds in your WIJ square.
If you have not done any WIJ squares, you can find them all linked here:
Wrapped in jamie squares overview
3rd Loop Slip Stitch Join Features
As the name suggests, this join is worked in the 3rd loop. This can be a challenge for crocheters with a tight tension, however there are a few trick to make this easier.
You could for example make your last round in hdc, use a bigger hook than you usually would or make an effort to crocheting very loosely in this round. Alternatively, choosing a small hook for the join is very helpful too.
Though slow to work, the 3rd loop slip stitch join is a very easy yet effective way to connect squares.
It is particularly great to join squares of different colours, because it is invisible while at the same time creating a stunning 3D effect on the right side of your work.
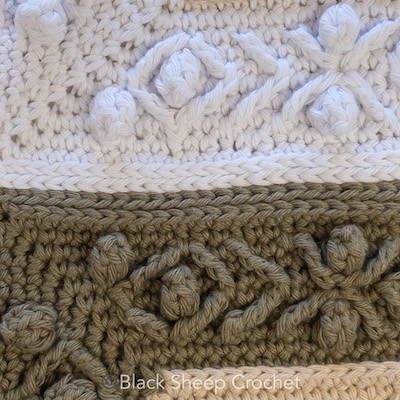
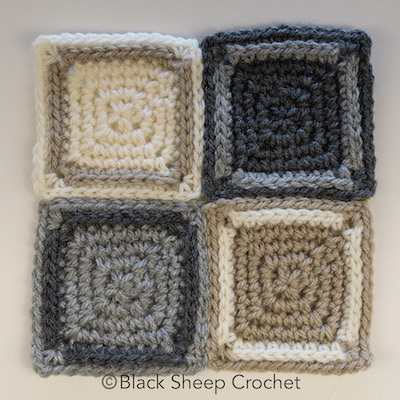
As you can see in the picture above, you get a similar effect as if making a regular slip stitch join, but instead of having only one ‘line’ of stitches you get two.
Another feature of the 3rd loop slip stitch join is that it creates a tight, invisible connection between two squares. At the same time this join is smooth and flat, yet elastic.
If you can’t decide on a colour to join squares of differently coloured squares or if you are looking for a subtle effect, this could be the perfect join for your project.
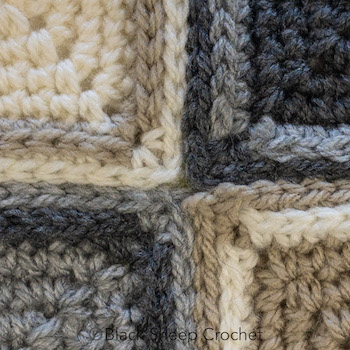
Did I mention that it makes the most impeccable corner join?
How to work the 3rd loop slip stitch join
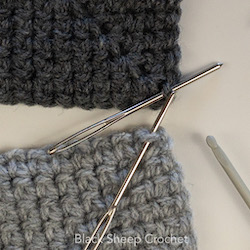
Find the 3rd loop (‘bump’ on the backside) of the chain nearest to the next sc (for WIJ squares) (indicated)

With a slip knot on your hook and the wrong side facing you, insert the hook through both 3rd loops…
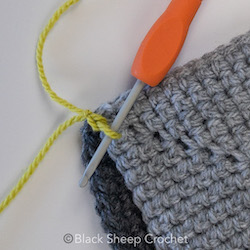
… yarn over and pull through all loops on the hook (two 3rd loops plus starting loop)
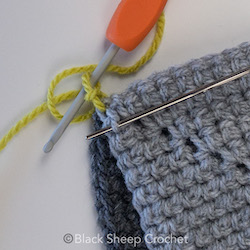
To continue, find the next 3rd loop on the wrong side of the square facing you … (indicated)
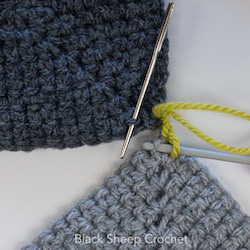
… then the 3rd loop of the next stitch on the wrong side of the square facing away from you… (indicated)
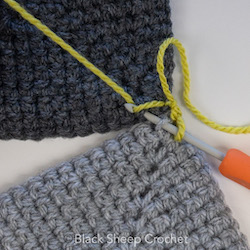
… yarn over and slip stitch through all loops on the hook again (two 3rd loops plus starting loop)
Continue like this until you come to the next corner.
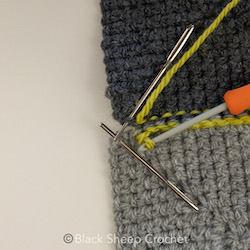
When you are at the next corner, find the 3rd loops of the chain nearest to the last stitch you just connected … (indicated) and slip stitch through them again.
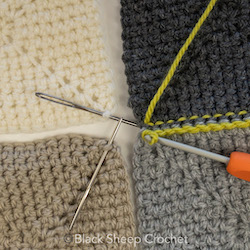
To continue with the next square, repeat as in the beginning; find the 3rd loops of the chains (indicated) and slip stitch continuously without an additional chain

If you do this on the perpenticular side: -VOILÀ! Perfect corners 😉
For automated notifications when I post new videos and tutorials subscribe to my YouTube channel (and active the bell)
https://www.youtube.com/channel/UCJ3yOPrTEqkOFPZjrCCovbQ
