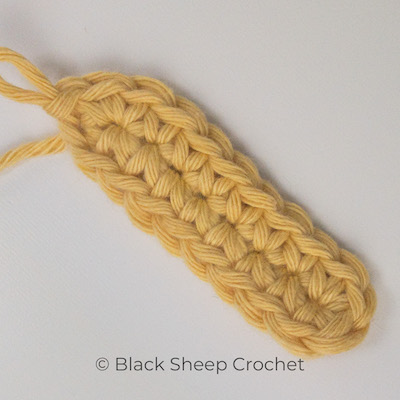
How to… Crochet Tutorial – 2-sided Foundation Row

This website uses US crochet terminology. Please refer to the US-UK terminology chart to translate US terminology into UK terms.

This technique is introduced by Black Sheep Crochet for the “Hug-Me Carrier”, a Peg Doll Accessories Collection item. 

Pattern available here:

Hug Me Carrier

Product available shortly


What is a 2-sided Foundation Row?

A 2-sided foundation row is a more solid alternative to a starting chain that can be used to begin a crochet piece that is worked from the bottom up, to make the bottom of a bag or to start a rectangular block.

Prefer an add-free PDF version of this page?

Why use a 2-sided Foundation Row?

If you are looking for a fantastic crochet technique that creates a dense set of starting stitches that offers more substance, is easier to work into but at the same time is almost as quick and easy to make as a row of chains, the 2-sided foundation row is the perfect solution.

How to work the 2-sided Foundation Row

A 2-sided foundation row is easy to work.

It is almost as easy as working chains or single crochets.


2sFR
2-sided Foundation Row


Prefer an add-free PDF version of this page?

1 – start with a slip knot, leaving a tail at least 2 – 2.5 times longer than you want the finished foundation row to be (1 loop on hook)

2 – bring the tail over the hook from front to back (2 loops on hook)

3 – yo from the continuing side of the yarn (as in the photo) and pull through both loops

Tip: pinch the knot with your fingers to make this step easier

4 – first foundation sc finished

repeat step (tail over hook)

repeat step (yo from the continuing yarn)

keep on repeating steps and until you have the desired number of sts

Prefer an add-free PDF version of this page?

3 Reasons for using a 2-sided Foundation Row instead of a starting chain

Below you find a comparison between a normal chain (top pictures) and a 2-sided foundation row (bottom pictures with needles indicating the ‘V’s) and three reasons for choosing a 2-sided foundation row over a starting chain. 

1) Easier to work

Notice how the 2-sided foundation row offers much more substance than the normal row of chains. This makes holding the chain, finding the ‘V’s and working into them a lot easier in the foundation row than it is in the row of chains.

top view

side view

underside view

Prefer an add-free PDF version of this page?

2) Neater Finish
Because the foundation row offers a set of ‘V’s at the top AND on the underside (and even on the side) where the row of chains only offers a ‘bump’ on the underside, the finish at the bottom will look the same as the finish at the top without the need to work into them again. 

3) Straight and Even First Round
When working an oval or a rectangle that is started in the middle and worked around the beginning foundation row, the  stitches on the opposing sides are directly vis-a-vis (left sample).

Stitches worked around a row of chains, where one side is worked through the ‘V’s and the opposing side in the ‘bump’, are slightly offset (right sample). 

The foundation row sample again is easier to work, looks neater and is also more straight and even.

Prefer an add-free PDF version of this page?

Video Tutorials

2-sided Foundation Row RH

and here:

2-sided Foundation Row RH

and here:

You can find a collection of all available free tutorials here:

Black Sheep Crochet Tutorials

More Free Tutorials

‘Petranese’ explained –
dcbb – double crochet behind and below

‘Petranese’ explained –
hdc/hdcbb or double hdc tutorial

‘Petranese’ explained –
Long dc Star (5 legs) tutorial