Wrapped In Jamie Square 6 Pattern

Welcome to week 7 of the Wrapped In Jamie CAL, where you are going to learn how to crochet Square 6 – L’université.

There is a new stitch collection, now called the Outlanding Stitch Compendium (for the NEW ‘Petranese’), with

  • a list of abbreviations for the most common stitches we use,
  • pre-requisite stitches and how to make them,
  • how to count stitches and rounds,
  • stitch variations,
  • working stitches in front, back and 3rd loops and ideas for alternatives if you don’t like the latter,
  • a breakdown of angular stitch abbreviation and how to work them, (with step-by-step samples), 
  • front- and back-post stitches explained
  • and three different kinds of 2-together stitches we regularly use in almost all squares of this CAL

There will also be an updated Introduction – now called Wrapped In Jamie – The Trailer – which will be available very soon.

Both resources can be found free of charge in the shop shortly

Wrapped In Jamie – The Trailer (Introduction) – coming soon

Outlanding Stitch Compendium for the Wrapped In Jamie CAL 

IF YOU ARE ALL SET AND READY TO GET HOOKING, SCROLL DOWN TO GET TO THE FREE PATTERN

If you are interested in the Background Story and Designer’s Thoughts to Square 6 – L’Université you can read them here:

Square 6 Background Story and Designer’s Thoughts

Skill Level

Adventurous beginner to intermediate crocheter. (If this is your first square in the Wrapped In Jamie CAL, I recommend starting with another first. Squares 4 or 5 would be ideal).

You should definitely be familiar with the stitches outlined in the Outlanding Stitch Compendium.

Recommended Yarn and Yardage

Drops Baby Merino Fingering/Sock/4ply
Gauge 24 sts x 32 rows with a 3mm/US2.5/D-3/UK 11 hook
175m/50g (191yds/1.75oz)

(available as part of a yarn kit from Wool Warehouse)

Yarn Requirements:
Inner Square: approximately 80m/90yds

Lincraft Homebrand DK/Light Worsted/8ply
Gauge 22 sts x 30 rows with a 4mm/US G/6/UK8 hook
100m/50g ( 110yds/1.75oz)
(sadly, available in Australia only)

Yarn Requirements:
Inner Square: approximately 95m/105yds

Drops Paris Worsted/Aran/10ply
Gauge 17 sts x 22 rows with a 5mm/US-H/8/UK-6 hook
75m/50g (82yds/1.75oz)
(available as part of a yarn kit from Wool Warehouse)

Yarn Requirements:
Inner Square: approximately 113m/124yds

Wool WarehouseWool Warehouse

You will also need:

  • hook as recommended for your choice of yarn
  • scissors
  • darning needle to weave in end
  • stitch markers (optional, but highly recommended; this could even be a yarn scrap, a paper clip or hair boppins)

Terminology used

This pattern uses US terminology throughout. 

Abbreviations and the most basic stitches are explained in the Stitch Collection (which is constantly updated), stitches relevant for this specific pattern are outlined below.

Video Tutorials

A Video Tutorial for this patterns is available here:

Wrapped In Jamie Video Tutorial Square 6 – L’Université right-handed (also embedded below – scroll down to pattern)

Wrapped In Jamie Video Tutorial Square 6 – L’Université left-handed (also embedded below – scroll down to pattern)

You can find all video tutorials for this and other released squares in my YouTube Channel for Black Sheep Crochet, where you can also subscribe for automatic notification when new videos are uploaded.

PDF Download

An ad-free PDF in US terms is available for AUS$2.95. The pattern is on sale within the first week of release for AUS$2 and you can use your VIP Discount Code to reduce the price to $1.60 (approx. US$1.10 at the time of writing)

If you have all the information you need to start with the pattern, simply scroll down. The pattern is provided for free indefinitely (or as long as I or those who take over from me when I am gone can manage to pay for hosting).

If you know of someone who you think might enjoy the patterns, please send them directly to this website. Thank you.

Pattern Notes:

  • We are using basic and pre-requisite stitches as outlined in the Outlandish Stitch Compendium
  • Ch1 at the beginning of a round does not count as a ‘stitch’.
Knit Picks Banner

Feel free to follow your own colourway and make your insides all the same colour or make them solid or mix and match insides and borders to your heart’s content. I would like for you to make this as much as possible your CAL project and I look forward to seeing your photos.

Please tag me in any social media posts and use #wrappedinjamiecal, @black_sheep_crochet or #desingedbyblacksheepcrochet so I can admire your work.

For those of you who asked for it, here are my recommendations for colour choices:

If you follow the Storyteller colourway, I recommend a dark blue for this square. It is the colour of knowledge, learning and study.

Using the yarn kits with six colours for the Diamond Kilt Claire 20, this would be my suggestion:

Jamie: solid square – green; mixed square – green for the inside square, grey for the square border

Claire: solid square – light brown; mixed square – light brown for the inside square, green for the square border

Scotland: solid square – brown; mixed square – brown for the inside square, blue/sea grass/heather for the square border

(Some Scotland colourways contain a light heather, others a light or dark blue or a sea grass colour. The drawing considers those three options)

Jamie

Claire

Scotland

Knit Picks Banner

Pattern Chart

This is my design chart. It is not meant to be understood as a proper crochet chart, but I hope that it will be helpful for stitch placement and counting.

LoveCrafts

Translations

Thanks to a lot of people busily working in the background, there will be translations in different languages. They will be uploaded and linked to here when they are ready.

Remember

Remember to skip a st in the current round for each st worked around or in FLO of a previous round, unless instructed otherwise as explained in the Introduction!

Abbreviations

MC – Magic Circle
ch – chain
sk – skip
st/s – stitch/es
ss or sl st – slip stitch
FLO – front loop only
BLO – back loop only
sc – single crochet
hdc – half double crochet
dc – double crochet
htr – half treble crochet
tr – treble crochet
dtr – double treble crochet
fp – front post
fpdc – front post double crochet
dcbb – double crochet behind and below

LoveCrafts

Special Stitches:

tr-2btreble in FLO of st directly 2 rounds below

fphtr-2bfront post half treble around stitch directly 2 rounds below

fptr-3bfront post treble around the st directly 3 rounds below

fptr-1a-2bfront post treble around st 1 ahead and 2 rounds below 

fptr-1b-2bfront post treble around st 1 behind and 2 rounds below 

fptr-1a-3bfront post treble around st 1 ahead and 3 rounds below 

fptr-1b-3bfront post treble around st 1 behind and 3 rounds below 

dcbbdouble crochet into the stitch behind and below next st (2 rounds below)

dc-1a-1bdc in FLO of st 1 ahead and 1 round below

dc-1b-1bdc in FLO of st 1 behind and 1 round below 

dc-1bdouble crochet worked into FLO of st directly 1 round below

tr-2b-1b/fptr-1a-2b-2tog2 treble together with 1st leg into the FLO of st 2 behind and 1 round below and second leg around the st 1 ahead and 2 rounds below 

fptr-1b-2b/tr-2a-1b-2tog2 treble together with 1st leg around the st 1 behind and 2 rounds below and second leg into the FLO of the st 2 ahead and 1 round below

tr-1b-2b/fptr-1a-2b-tog treble and front post double crochet together with 1st leg (treble part) in FLO of st 1 behind and 2rounds below and 2nd leg around the st 1 ahead and 2 rounds below

fptr-1b-1b/tr-1a-2b-tog – 2 front post treble and treble together with 1st leg around st 1 behind and 1 round below and 2nd leg in FLO of st 1 ahead and 2rounds below 

fpdc-1ba-1b-2tog2 front post double crochet together with 1st leg around st 1 behind and 1 round below and 2nd leg around st 1 ahead and 1 round below 

tr-3ba-1b-2tog2 treble together with 1st leg in FLO in st 3 behind and 1 round below and 2nd leg in FLO of st 3 ahead and 1 round below

The Pattern

Begin with a Magic Circle. If you are unfamiliar with the MC or don’t want to use it and you don’t mind the hole in the middle of the square, you can start with ch 2 and crochet round 1 into the first ch.

Round 1: Ch1, [sc into magic circle, ch2] 4 times. Close your magic circle tightly.

Ss into the first sc to close the round.

Tip: If you crochet over your loose tail, you can save yourself having to weave ends in later.

From here on, please make sure to find the first stitch, as it may sometimes be hidden by the second sc of the corner (sc, ch2, sc)

Round 2:

Round 2: Ch1, [(sc, ch2, sc) into the ch2 corner space, sc in BLO] 4 times.

Ss into the top of the first sc of the starting corner. – 3 sts per side plus ch2 corner space

Round 3:

Ch1, [(sc, ch2, sc) into the ch2 corner space, 3 sc across] 4 times.

Ss into the top of the first sc of the starting corner. – 5 sts per side plus ch2 corner space

Special Stitch in Round 4:

tr-2btreble in FLO of st 2 rounds below (Round 2)

Round 4: Ch1, [(sc, ch2, sc) into the ch2 corner space, sc in BLO, sc, tr-2b, sc, sc in BLO] 4 times. 

Ss into the top of the first sc of the starting corner. – 7 sts plus ch2 corner space per side

4.1tr-2b into FLO 2 rounds below (indicated)

4Finished Round 4

Special Stitches in Round 5:

dc-1b-1bdc in FLO of st 1 behind and 1 round below  (Round 4)

dc-1a-1bdc in FLO of st 1 ahead and 1 round below 

dcbbdouble crochet into the stitch behind and below next st (2 rounds below)

Round 5: Ch1, [(sc, ch2, sc) into the ch2 corner space, 2 sc, dc-1b-1b, dcbb, dc-1a-1b, 2 sc] 4 times. 

Ss into the top of the first st. – 9 sts per side plus ch2 corner space

5.1dc-1b-1b in the FLO of the stitch 1  behind and 1 round below the next stitch.

5.2 – The dcbb is made behind and below the tr-2b of the previous round (see also 5.3).

5.3The dcbb is made into the top loops (indicated) of the st behind and below the tr-2b (same as 5.2, shown on wrong side).


5.4The dc-1a-1b is made directly after the dcbb in the FLO of sitch 1 ahead and 1 round below (indicated).

5.5Skip the stitch behind the dc-1a-1b in the current round, sc in next stitch (indicated).


5.6 – Finished Round 5

Wool Warehouse Wool Warehouse

Special Stitch in Round 6:

dcbbdouble crochet into the stitch behind and below next st (2 rounds below)

Hint for Round 6: make sure to work the ch3 between the 2 dcbb! 

Round 6: Ch1, [(sc, ch2, sc) into the ch2 corner space, sc in BLO, 2 sc, dcbb, ch3 (still skip only 1 st!), dcbb, 2 sc, sc in BLO] 4 times.

Ss into the top of the first st. – 11 sts per side plus ch2 corner space.

Place a stitch marker in each of the tops of the dcbb and 3rd st back from the next corner.

6.1The dcbb is made in the top loops of the stitch directly behind and 2 round below the dc-1b-1b of the previous round (indicated loops).


6.2Ch3 but skip only 1 stitch of the current round (= dcbb behind tr); dcbb behind and below the dc-1a-1b of the previous round (indicated loops).

6.3 – Finished Round 6

6.4 – Place a stitch marker in the tops of the 2 dcbb and the 3rd st back from the next corner of the current round.


Knit Picks Banner

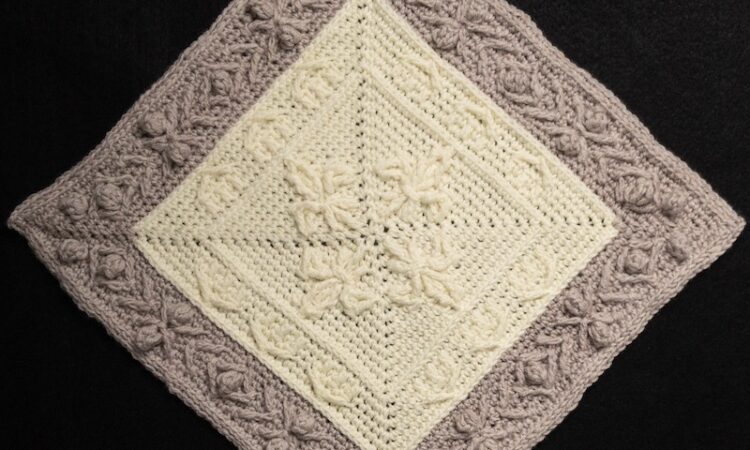
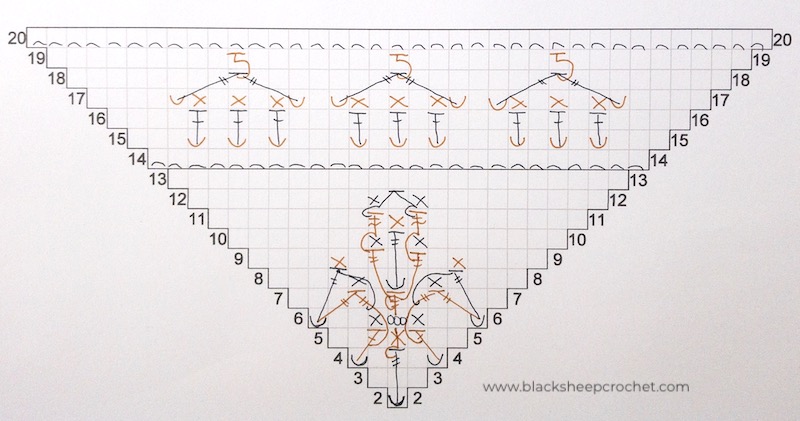
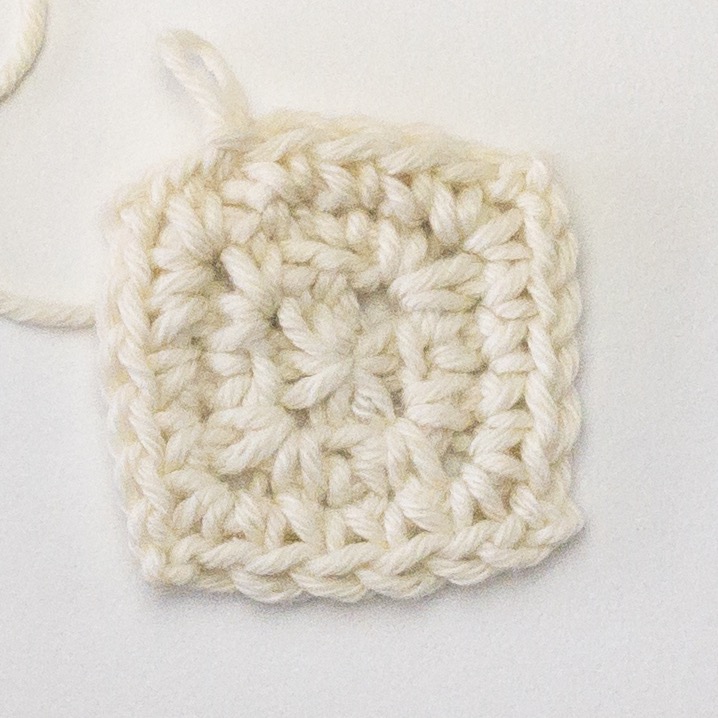
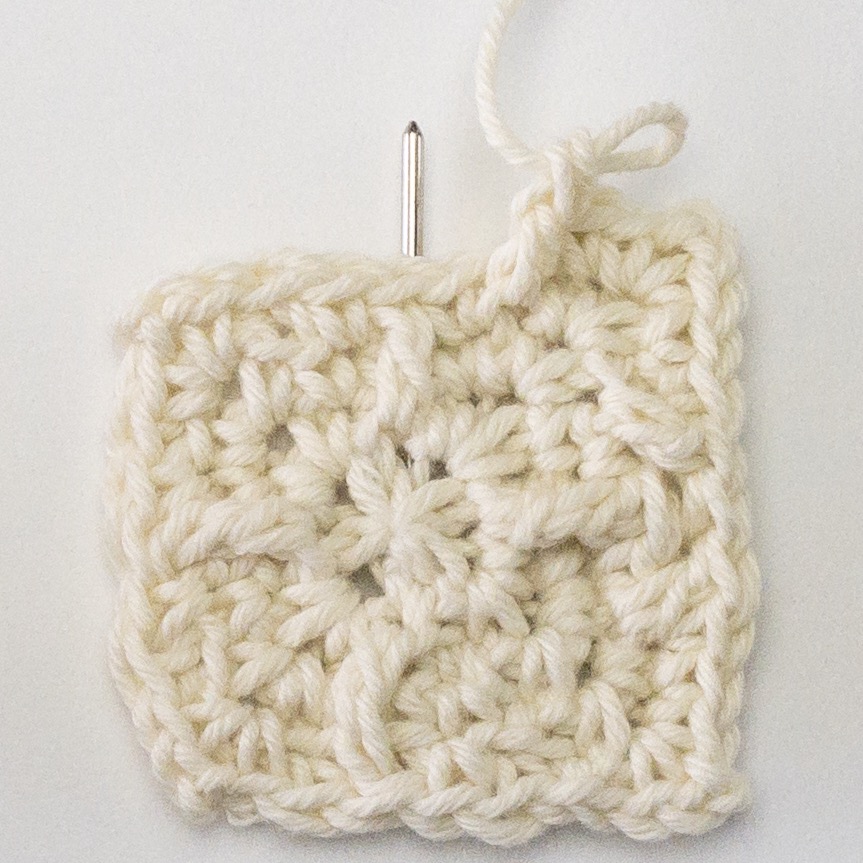
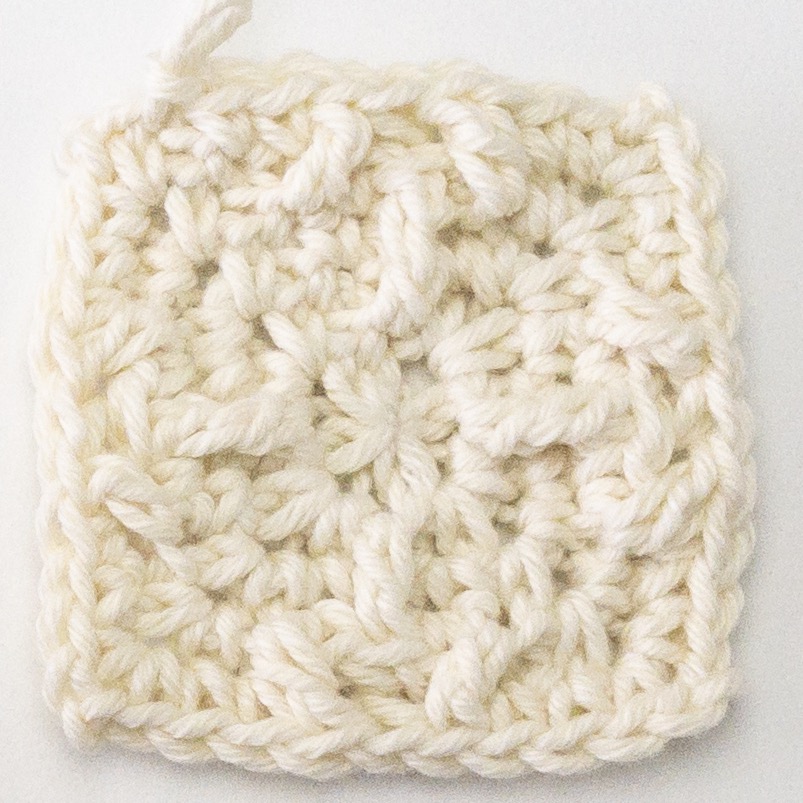
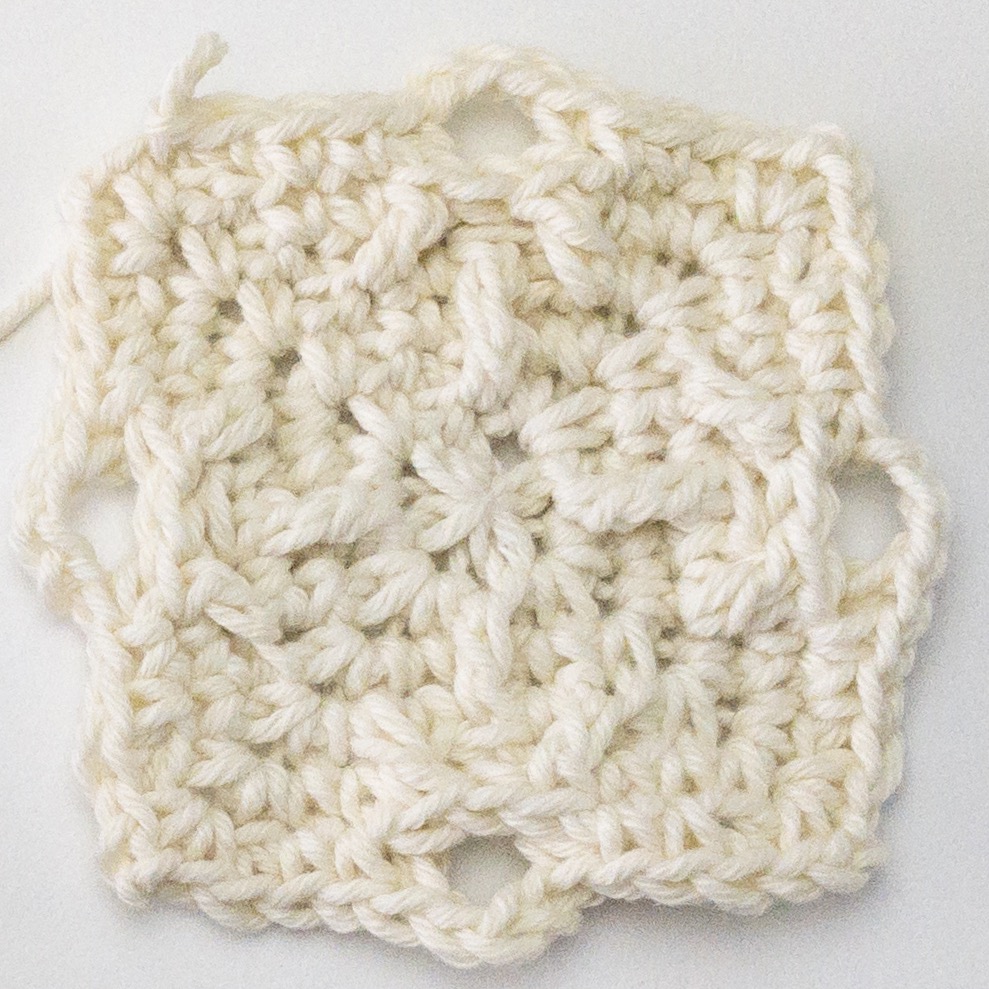
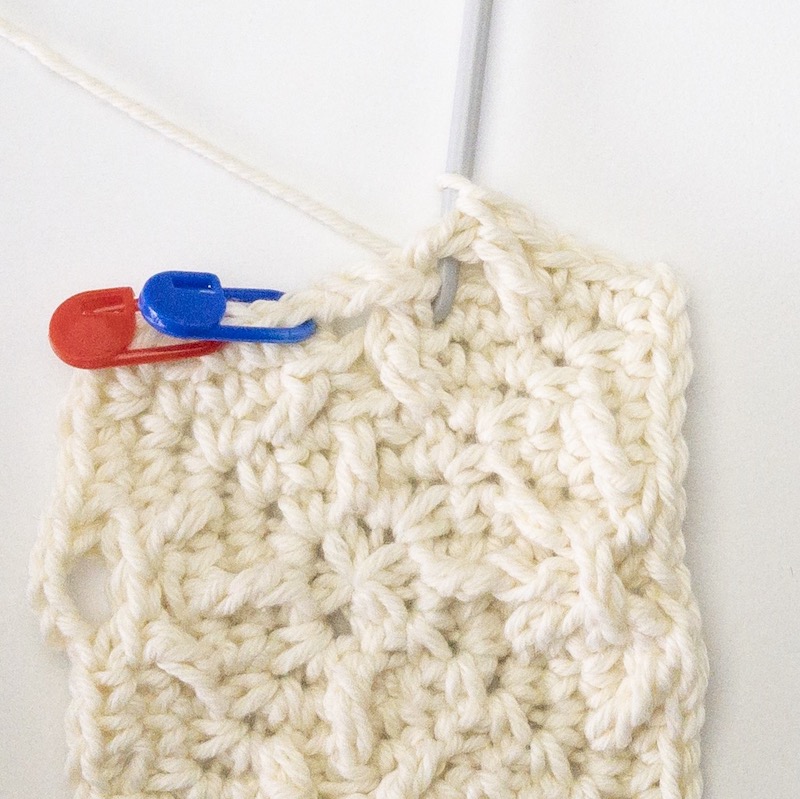
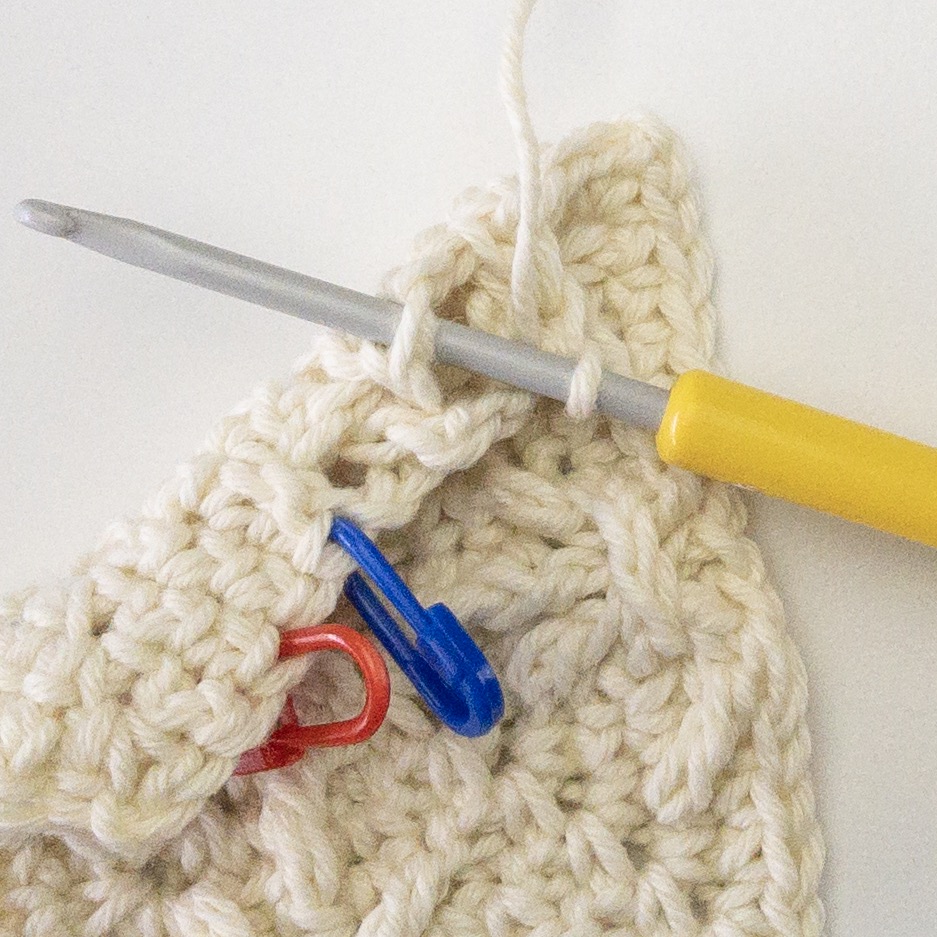
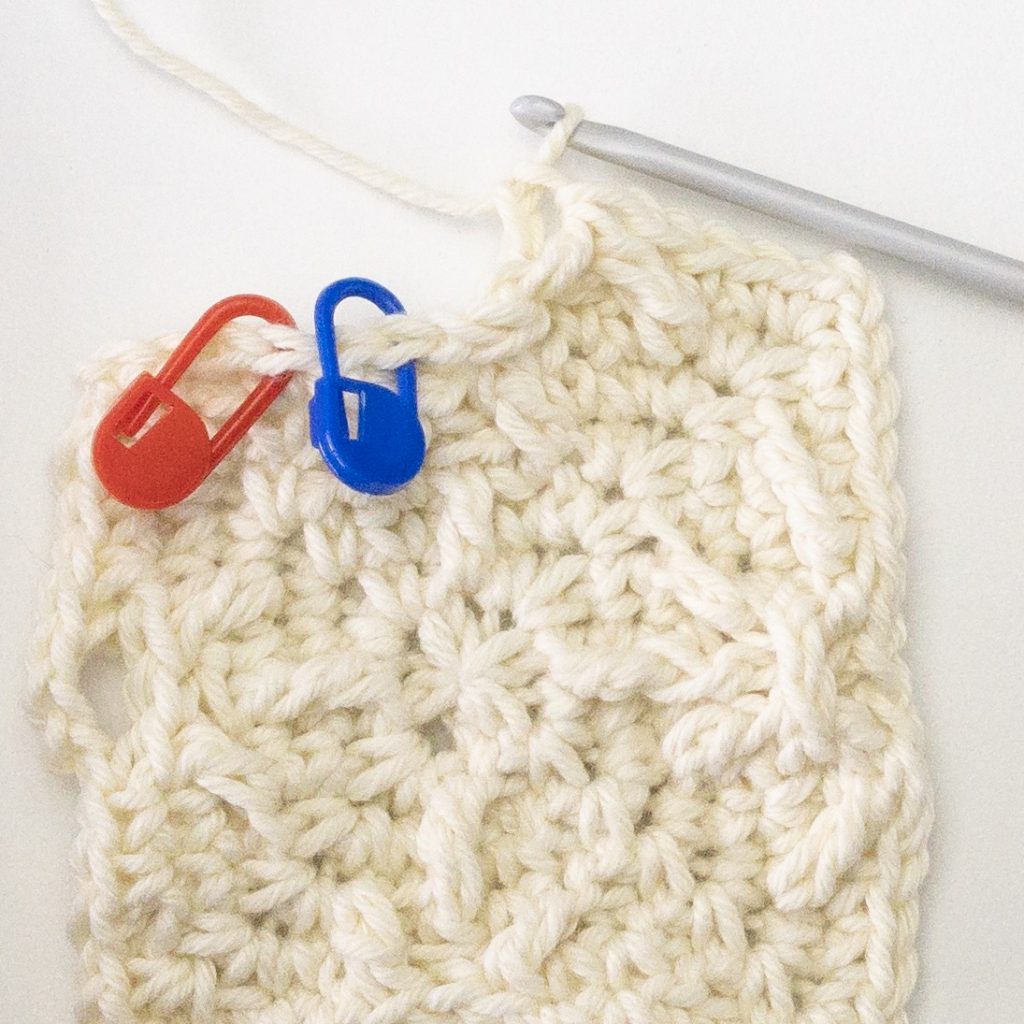
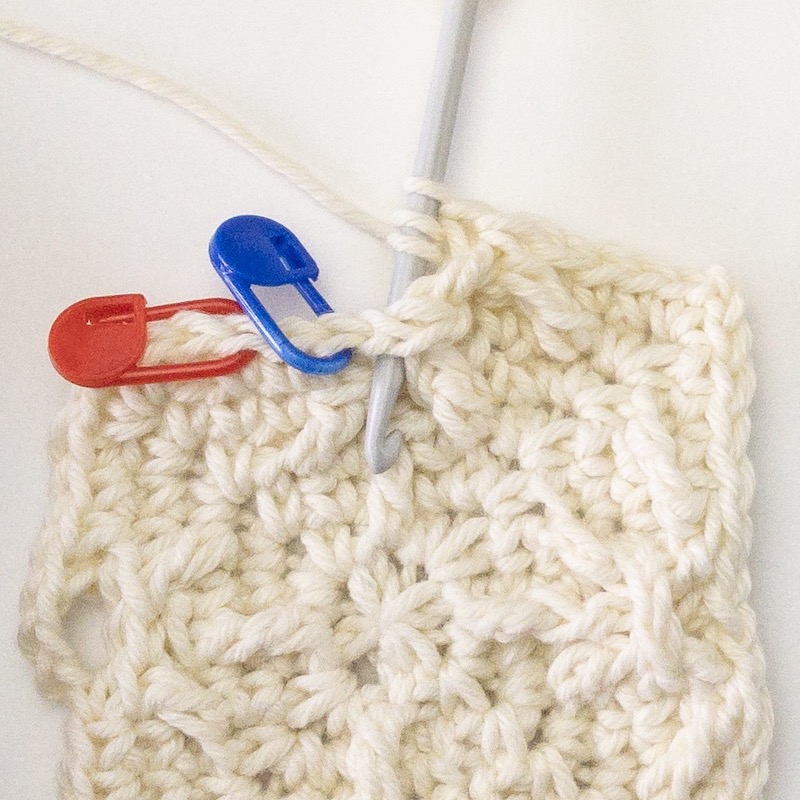
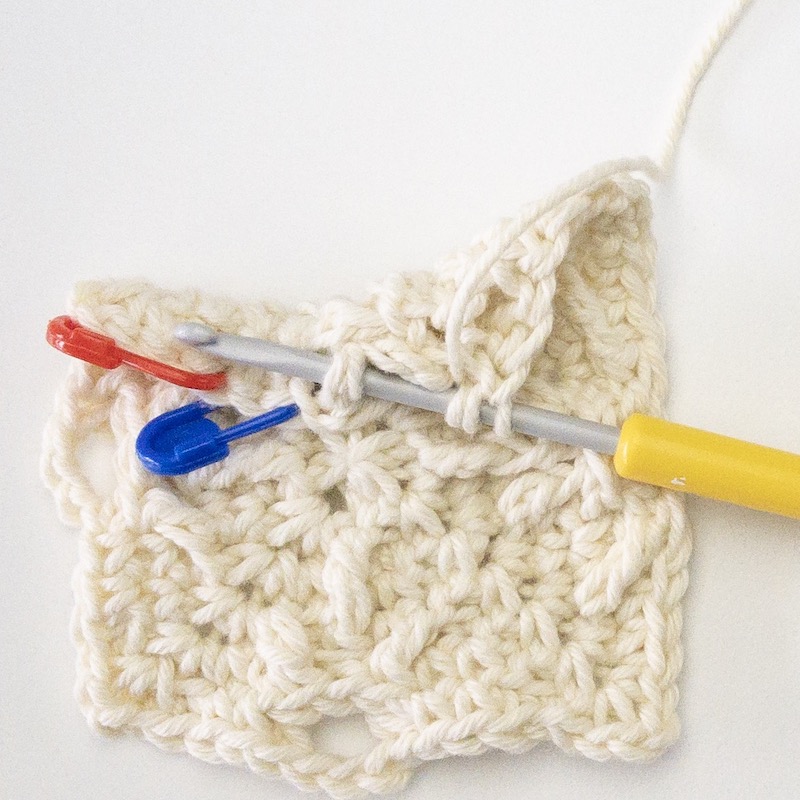
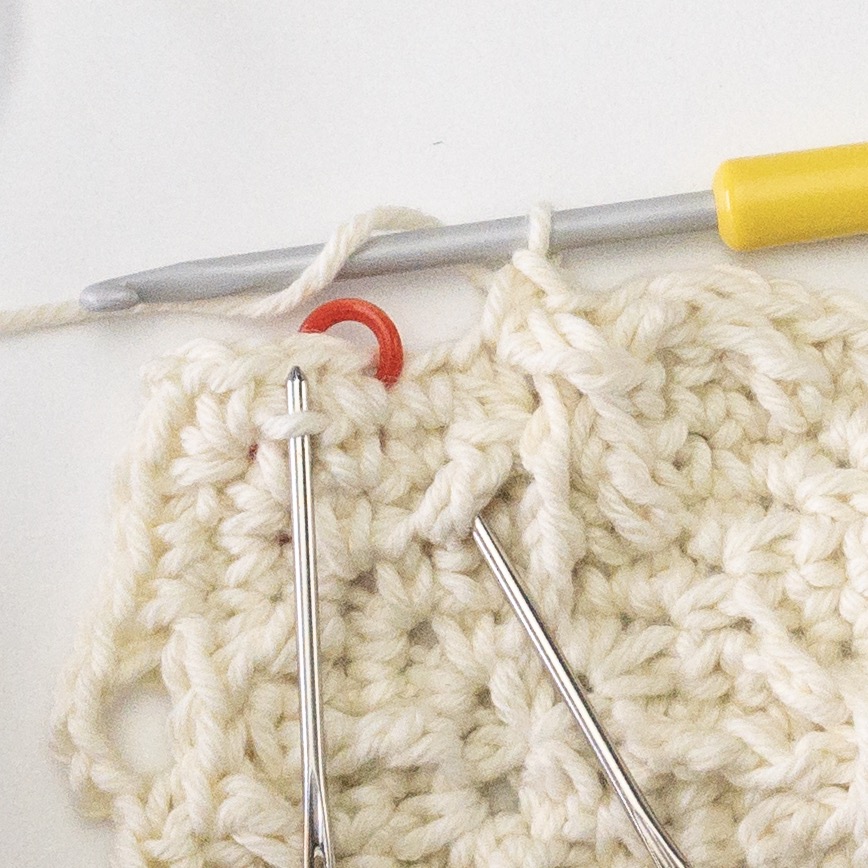
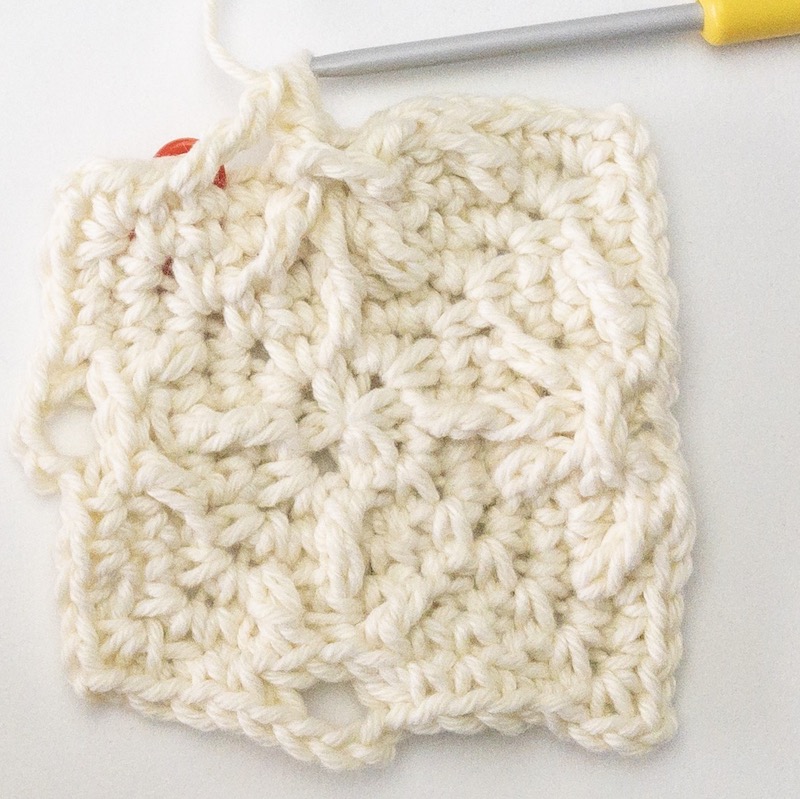
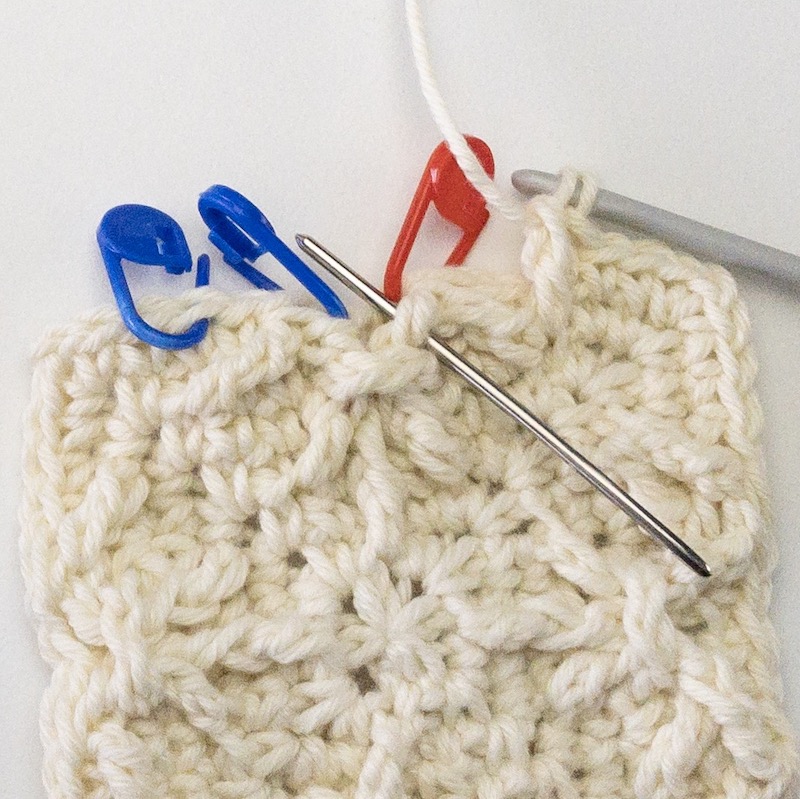
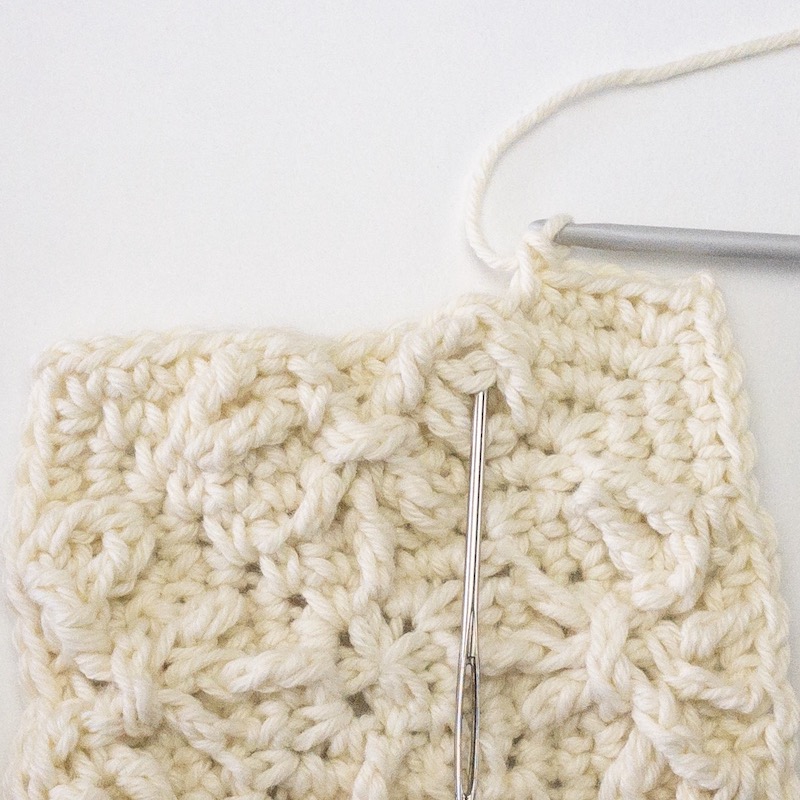
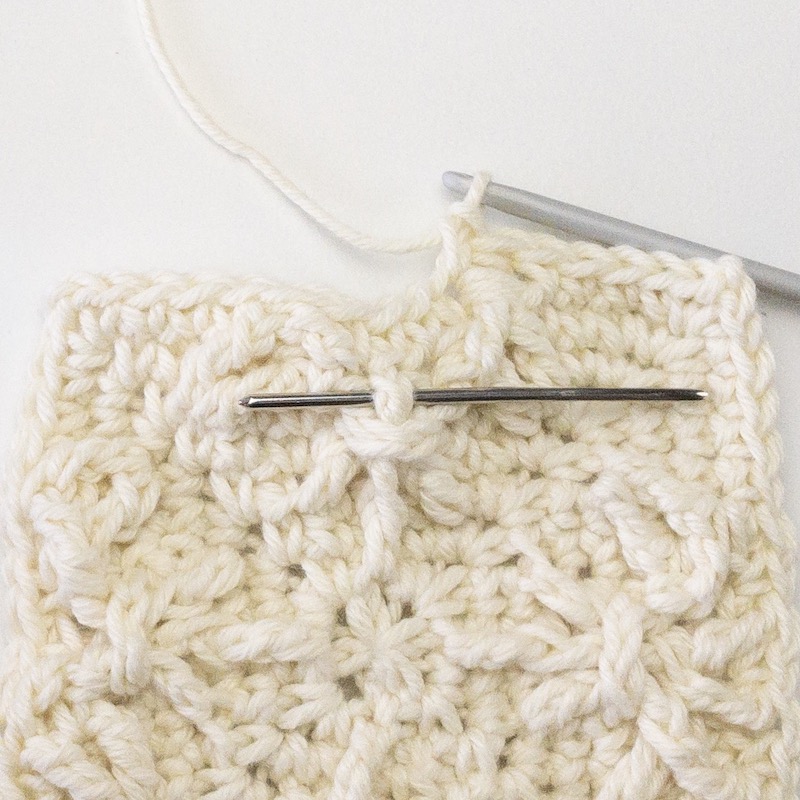
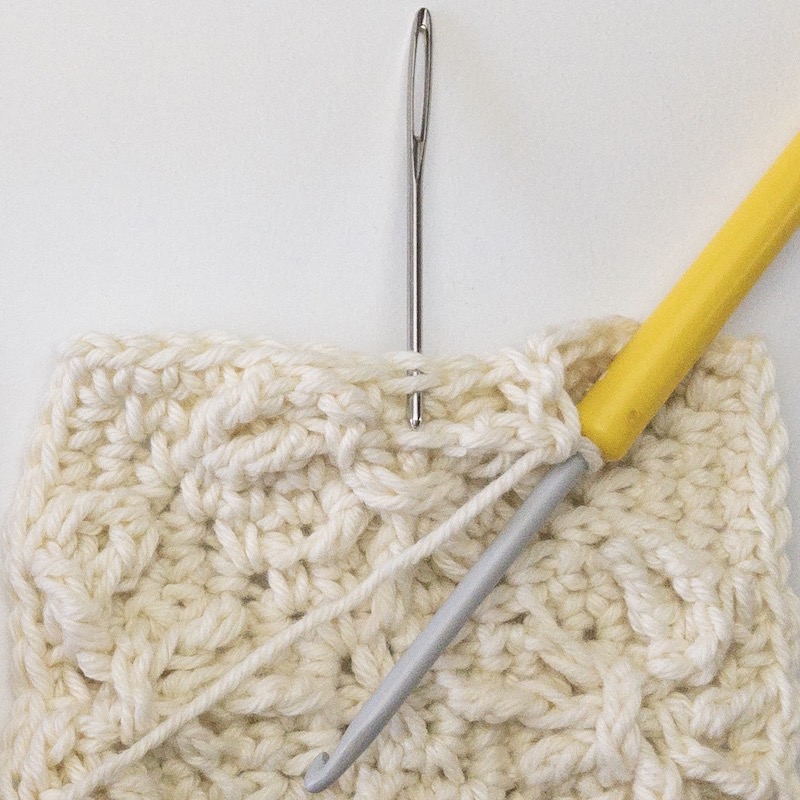
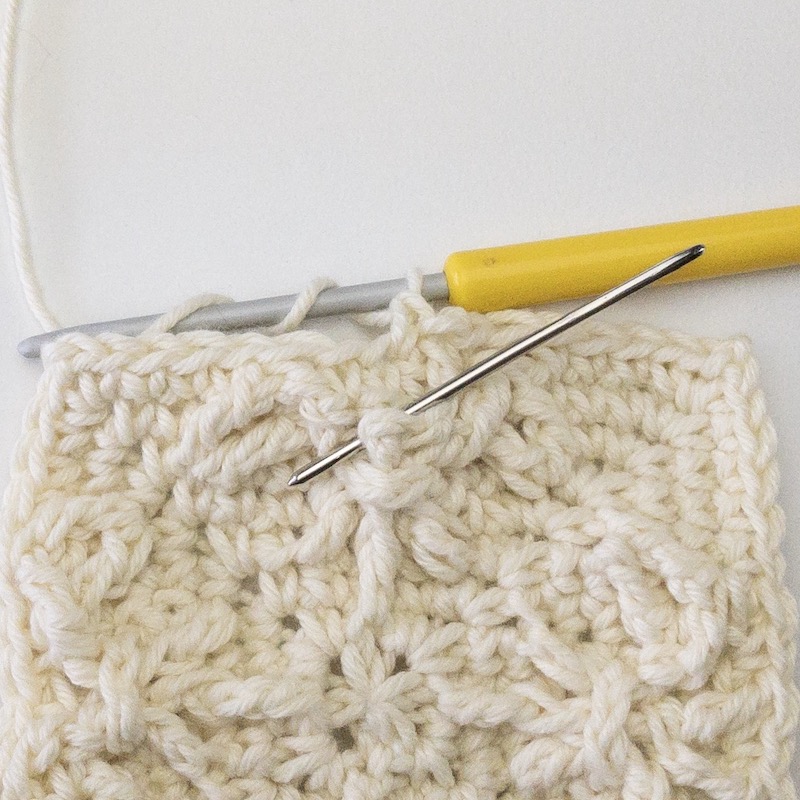
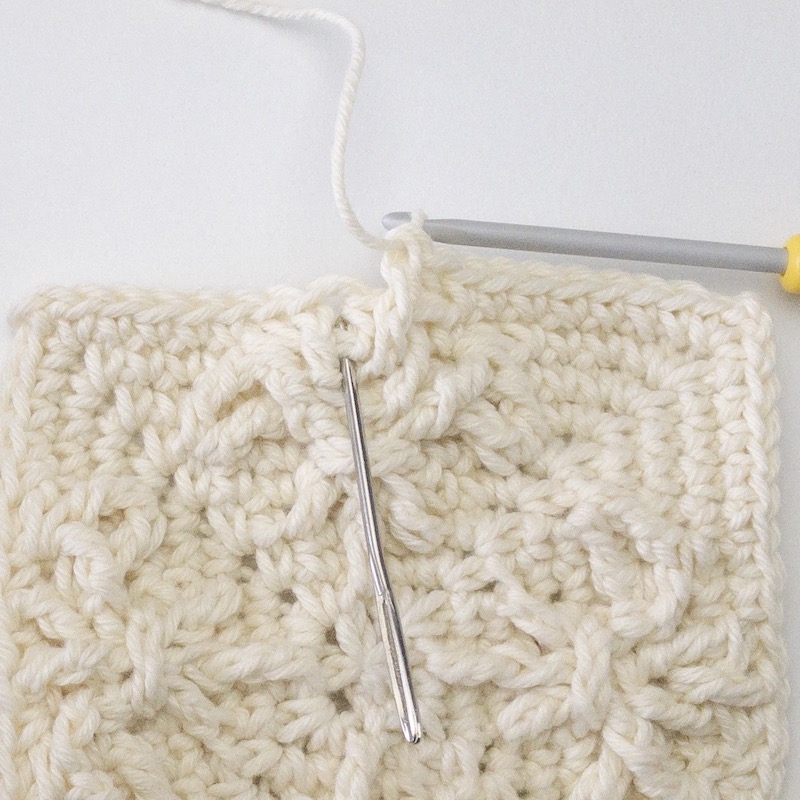
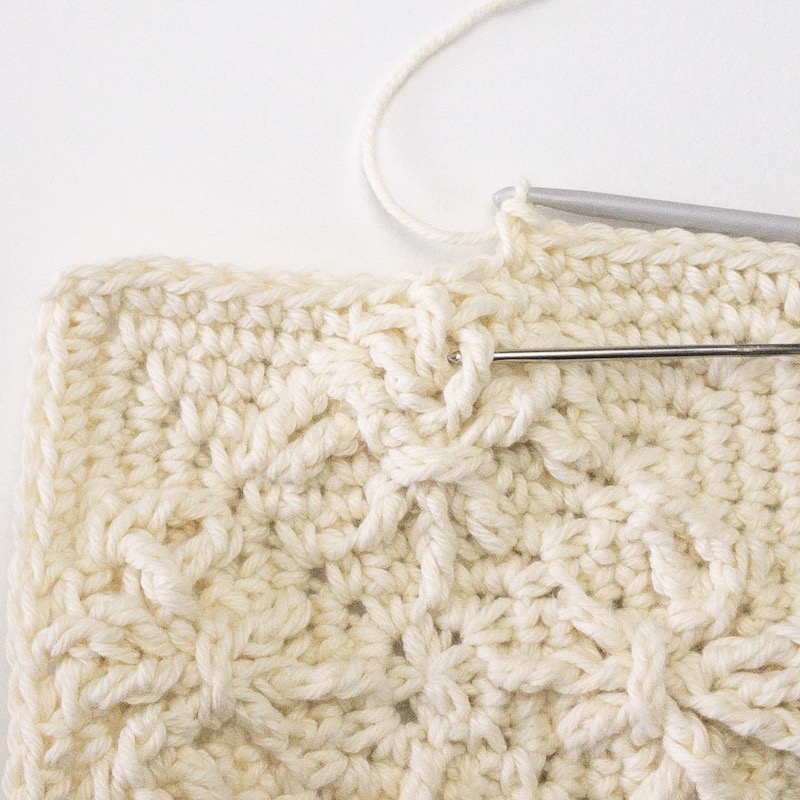
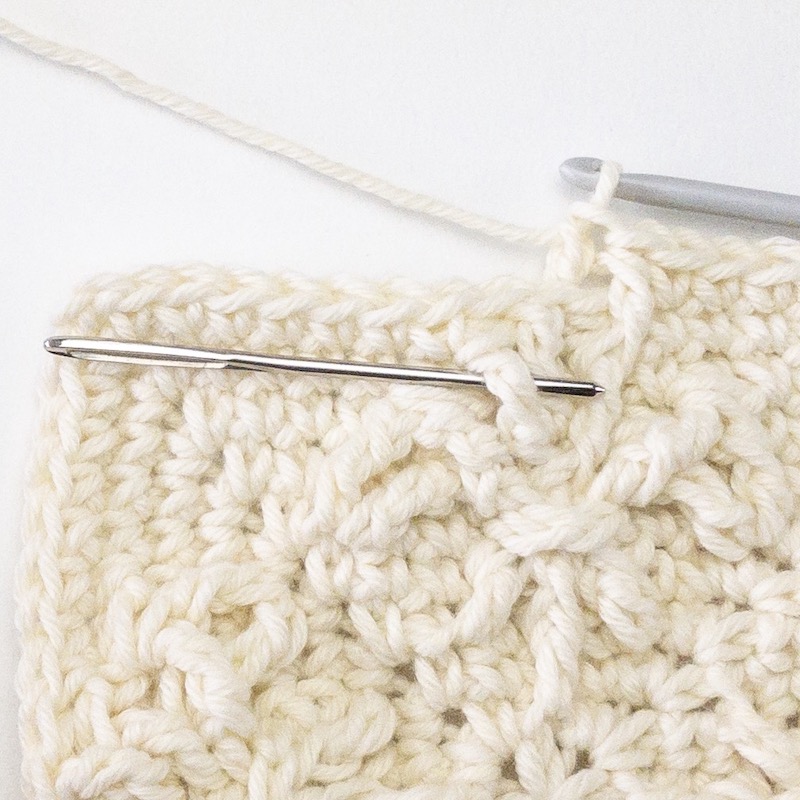
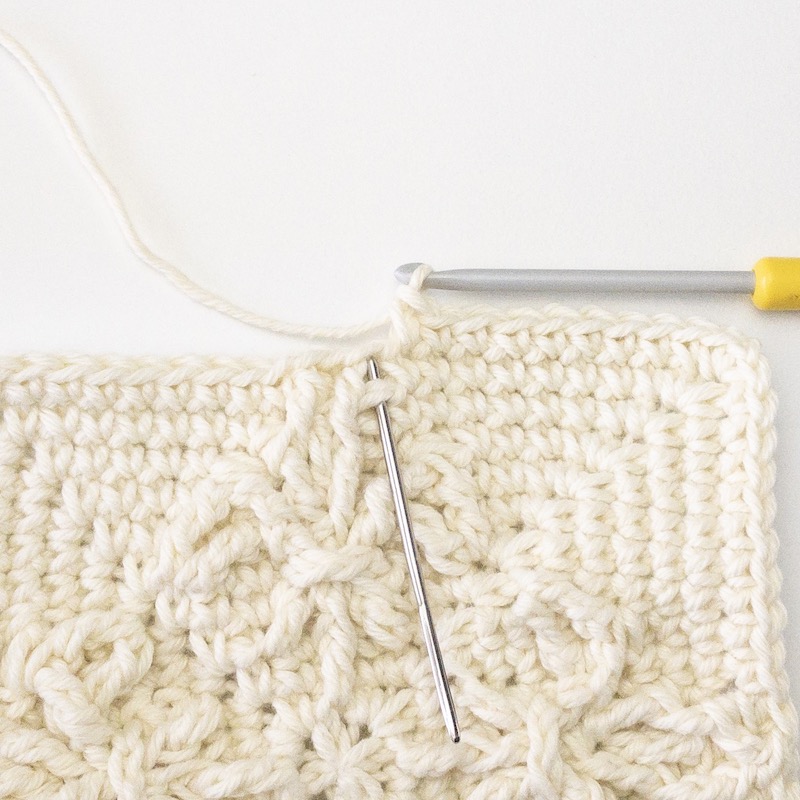
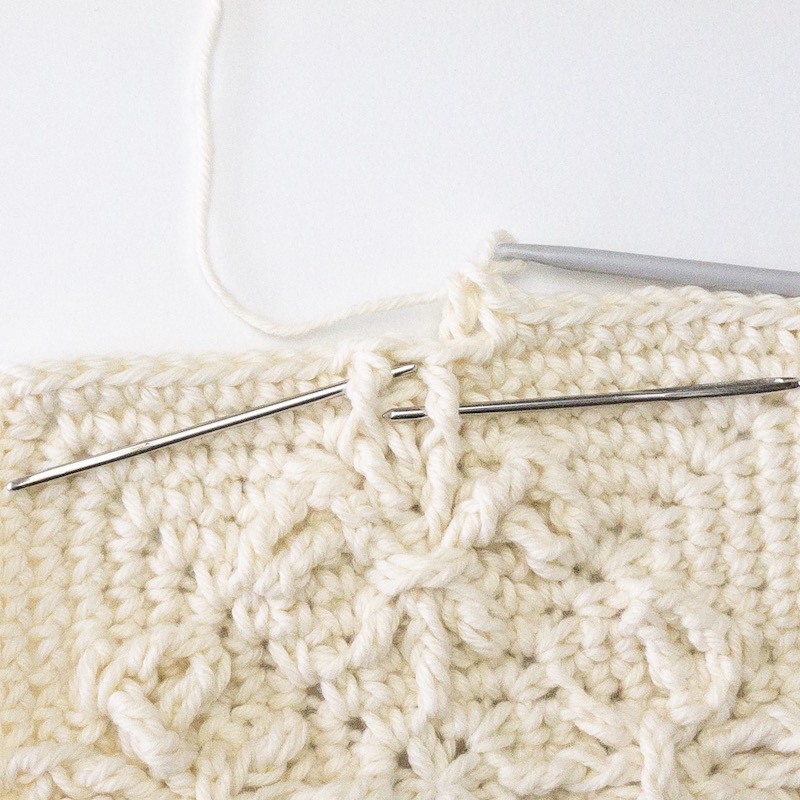
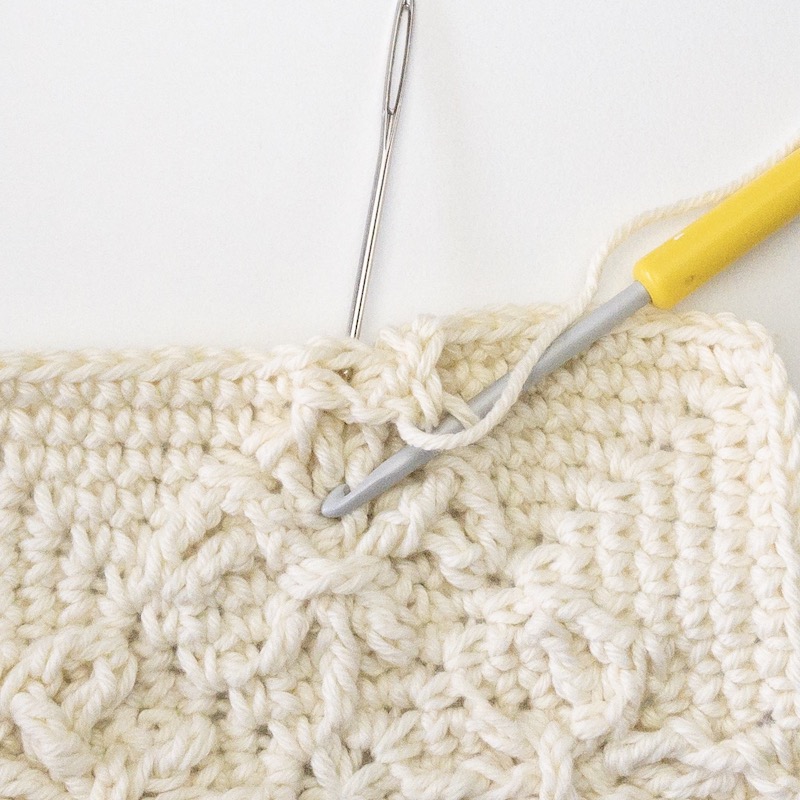
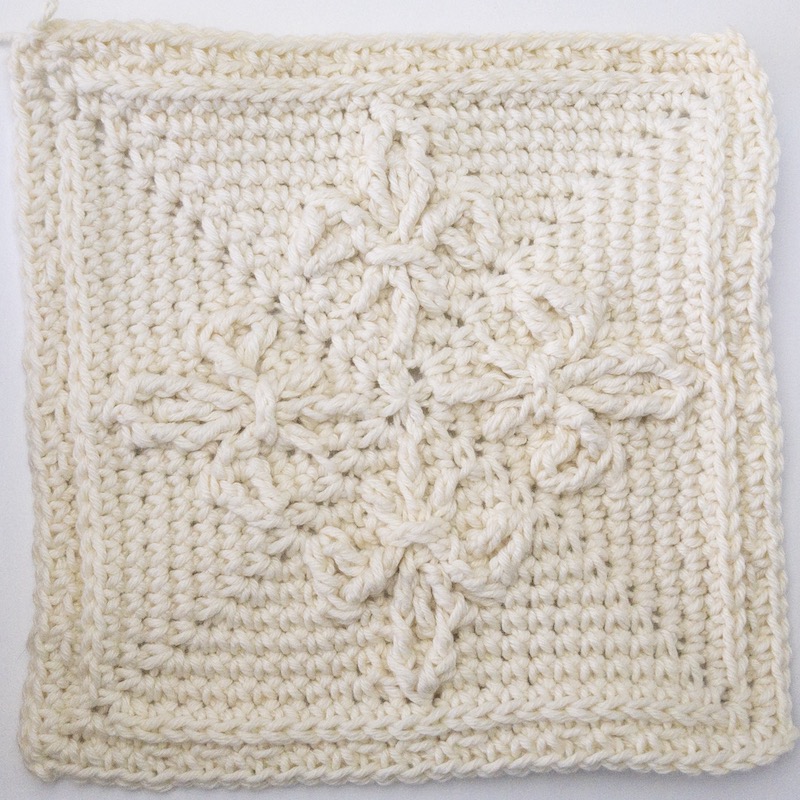
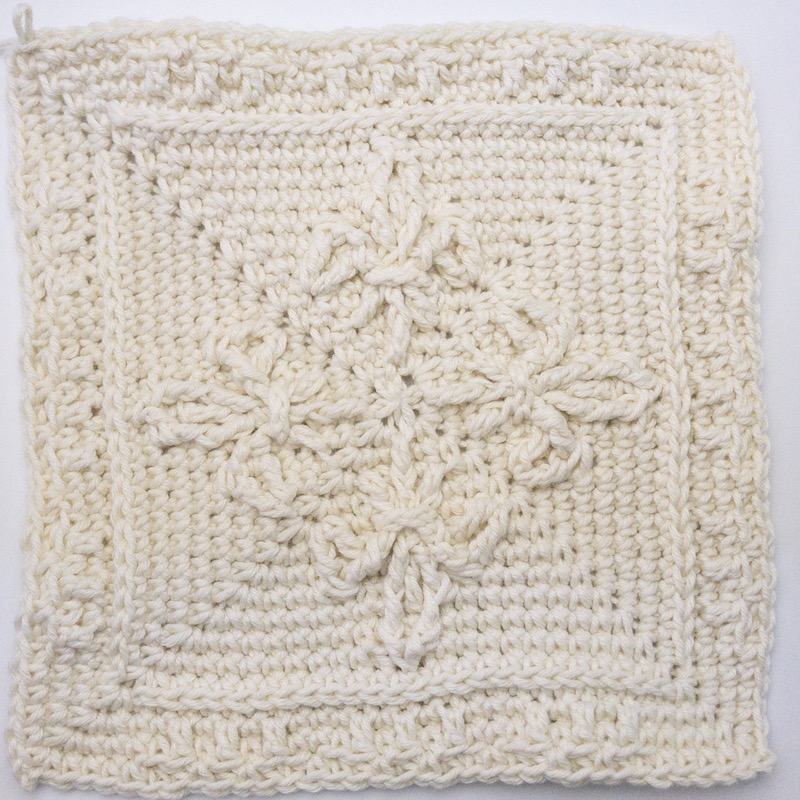
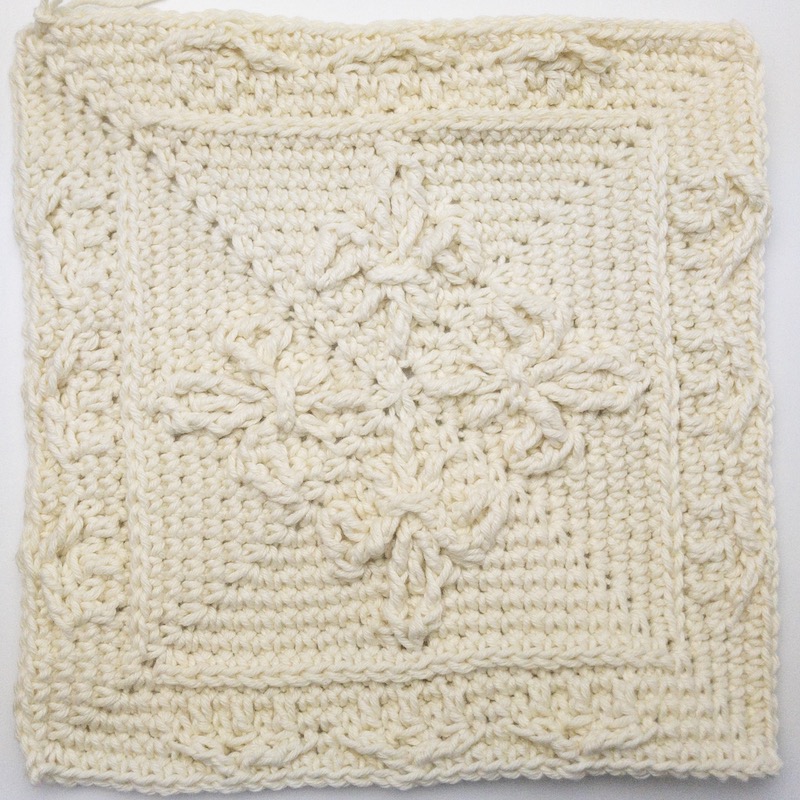
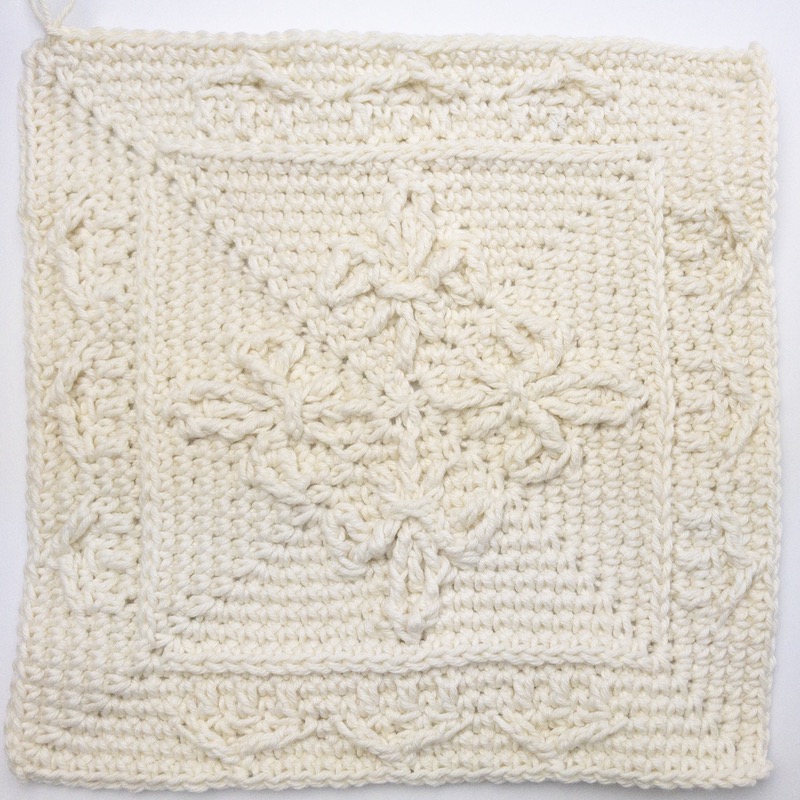
Special stitches in Round 7:
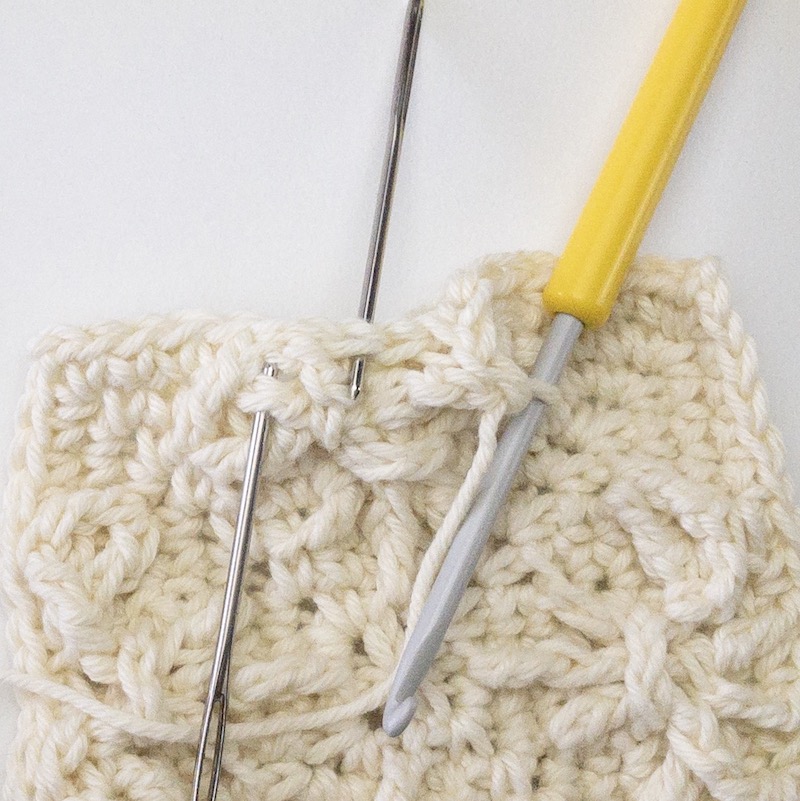
tr-2b-1b/fptr-1a-2b-2tog2 treble together with 1st leg into the FLO of st 2 behind and 1 round below and second leg – worked behind the ch3 – around the st 1 ahead and 2 rounds below (= dc-1b-1b from Round 5)

fptr-3bfront post treble around the st directly 3 rounds below (Round 4) – work this fptr behind the ch3 from Round 6

fptr-1b-2b/tr-2a-1b-2tog2 treble together with 1st leg – worked behind the ch3 – around the st 1 behind and 2 rounds below (= dc-1a-1b from Round 5) and second leg into the FLO of the st 2 ahead and 1 round below

Hints and Checkpoints for Round 7: 

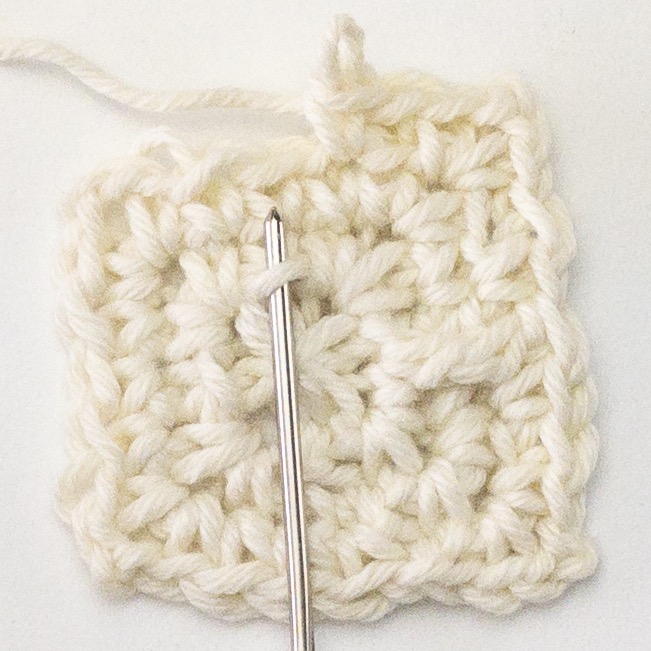
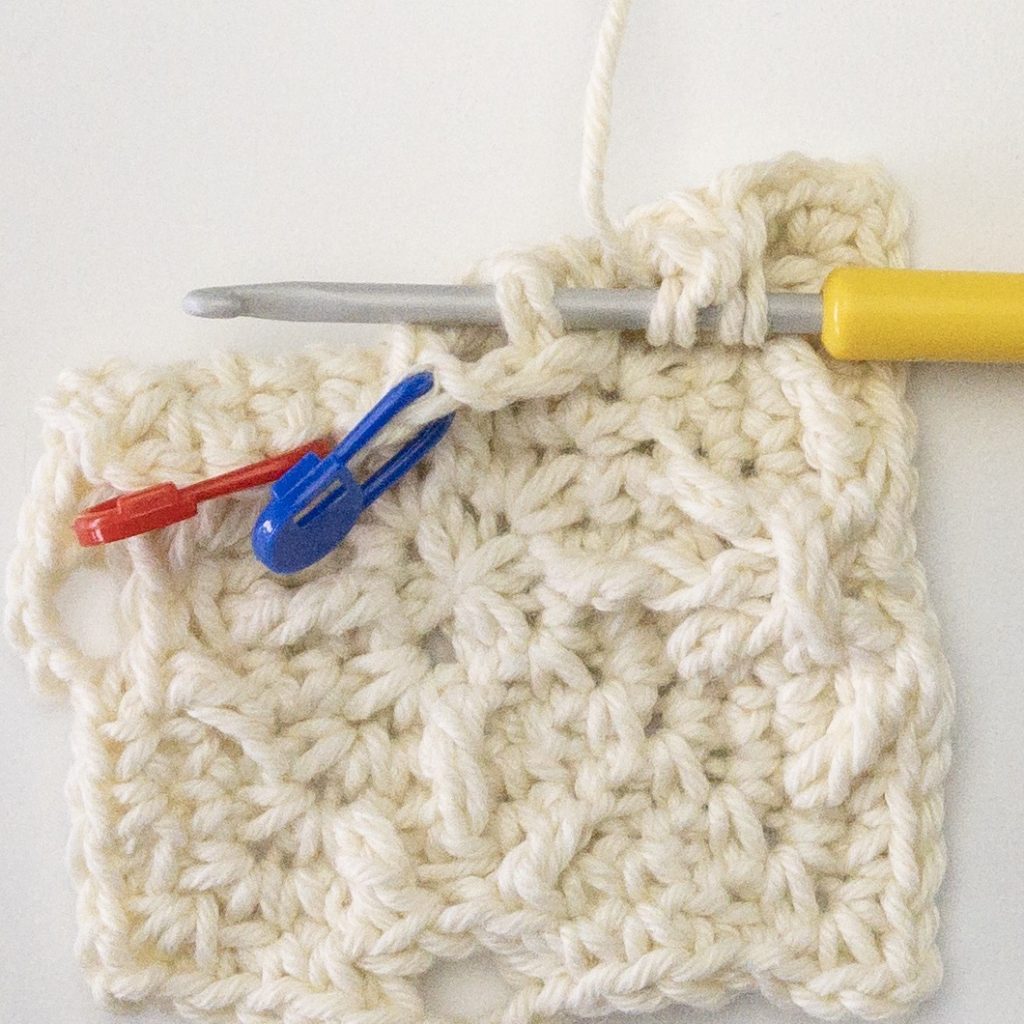
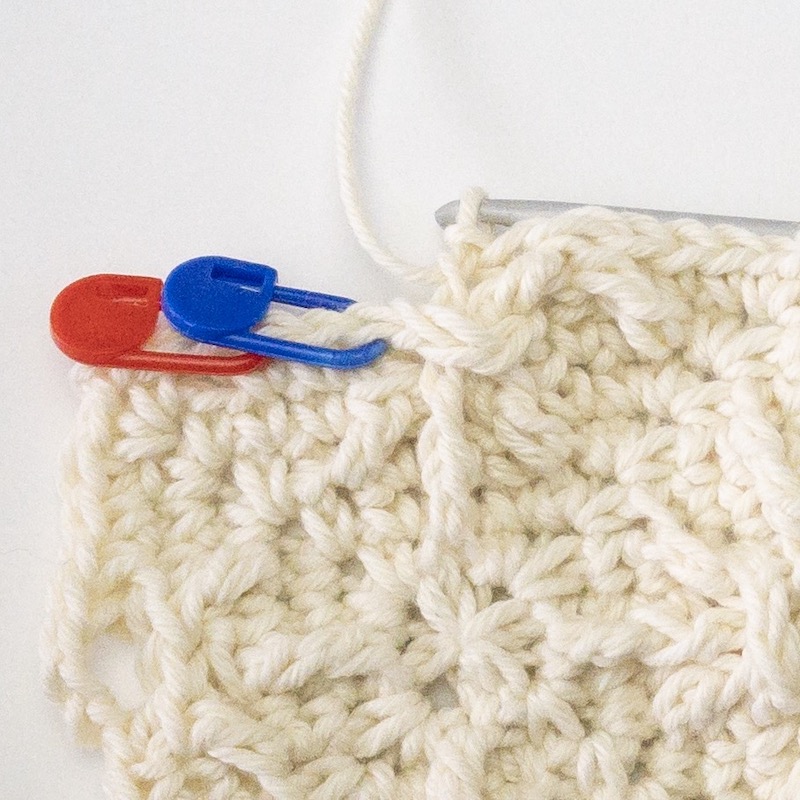
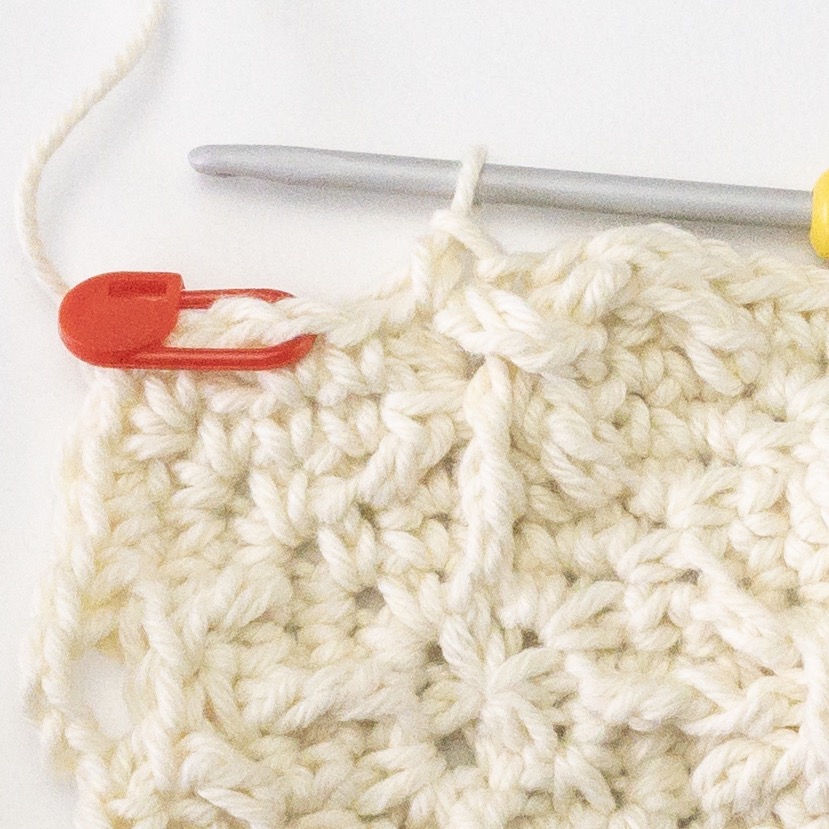
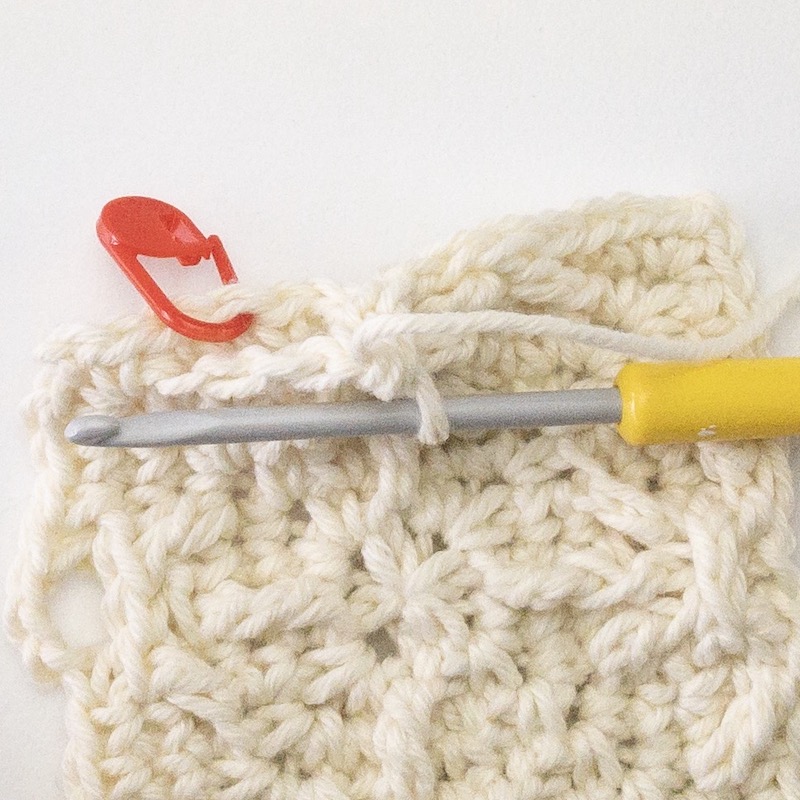
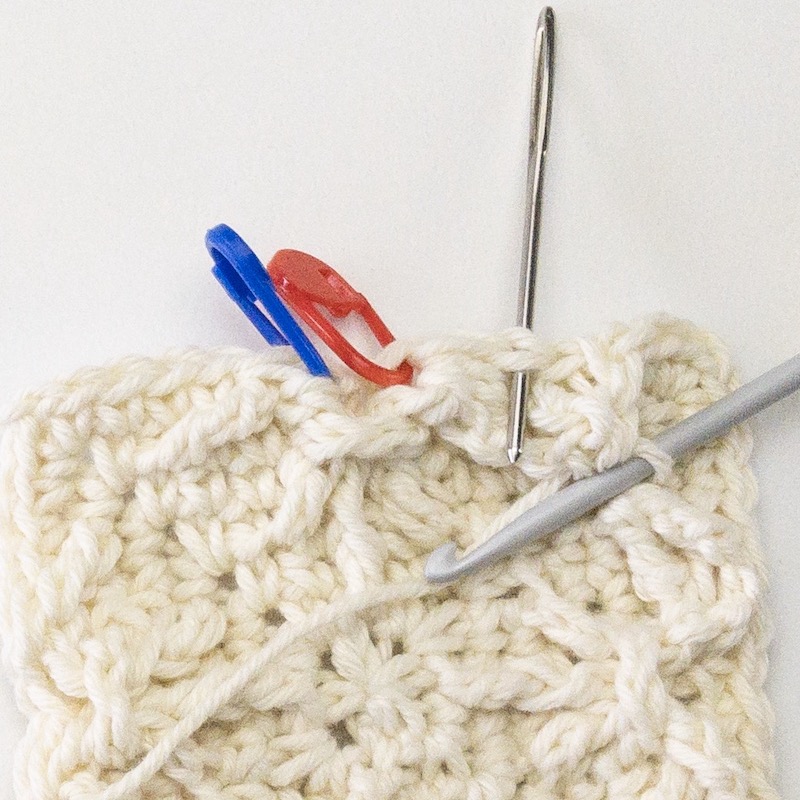
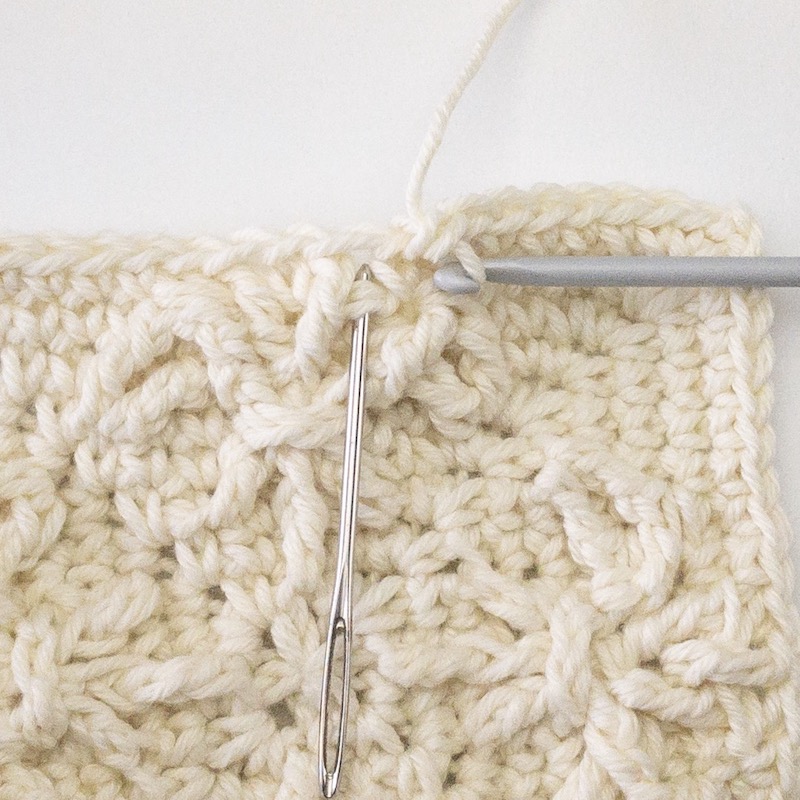
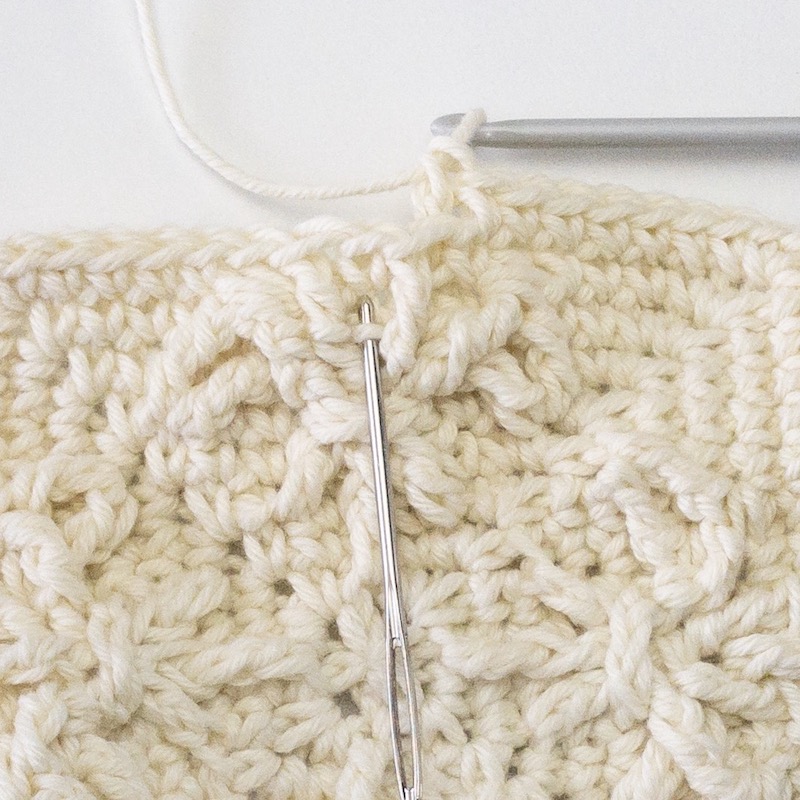
– The sc on each side of the fptr-3b is made into the tops of the dcbb’s from Round 6. 
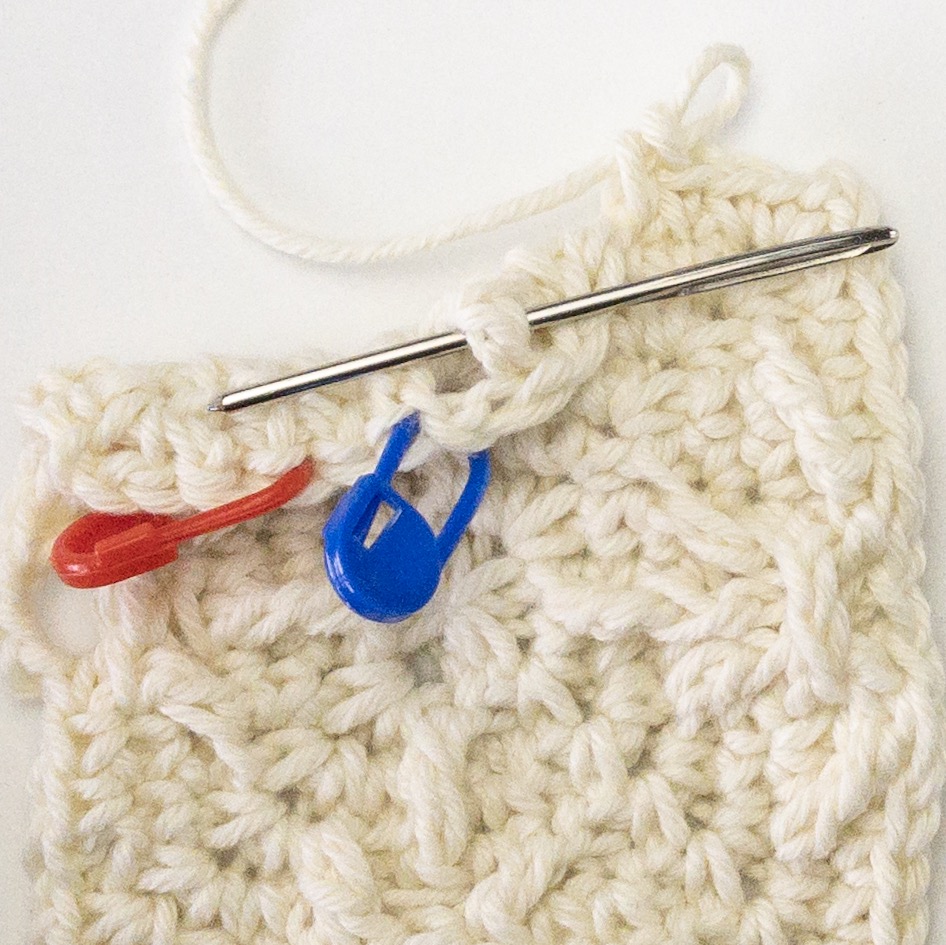
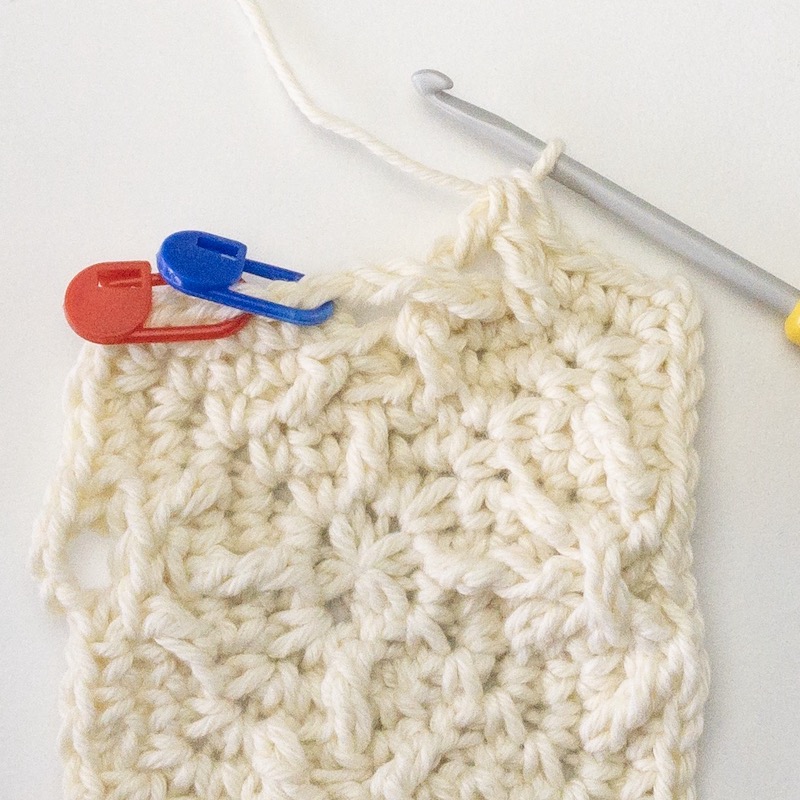
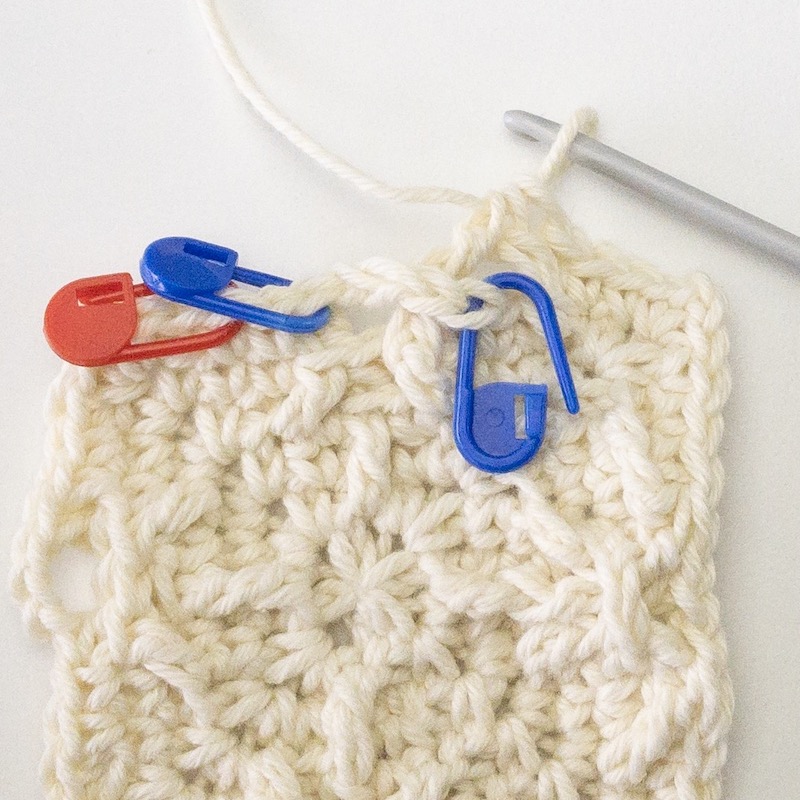
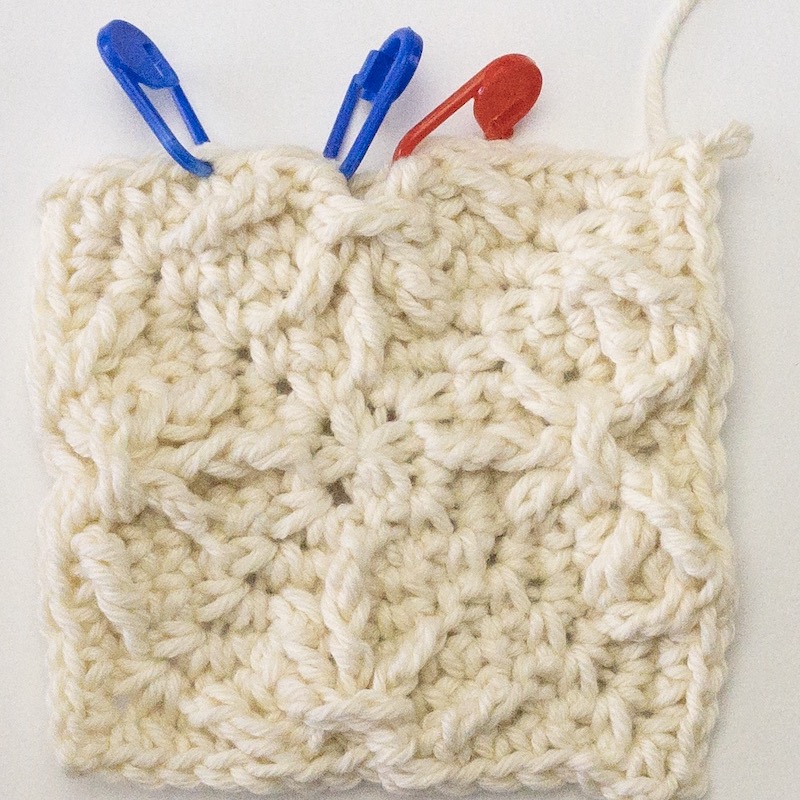
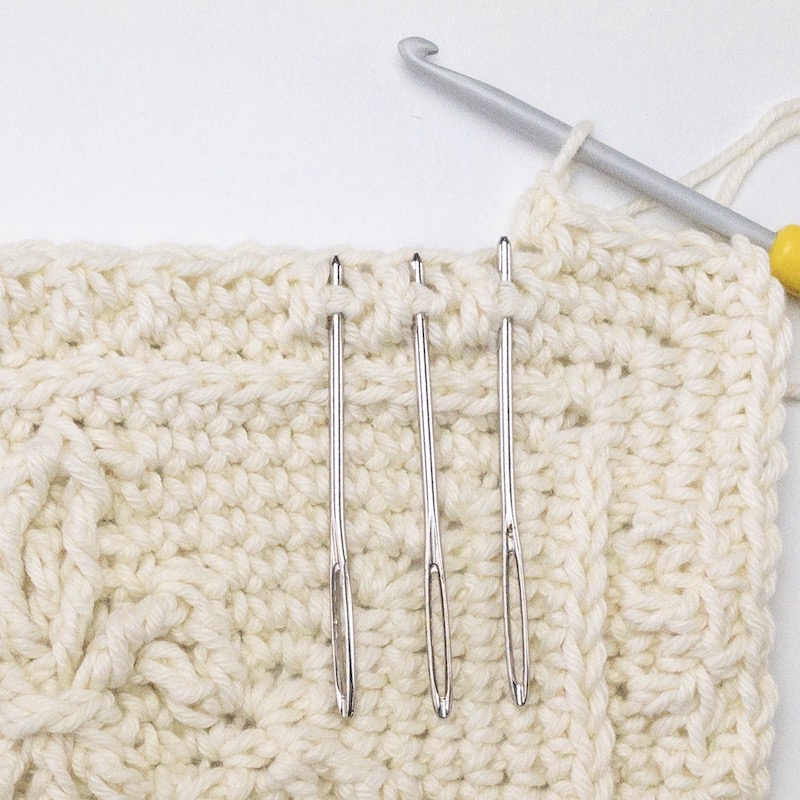
– Place a stitch marker in each of the tops of the dcbb from previous round.
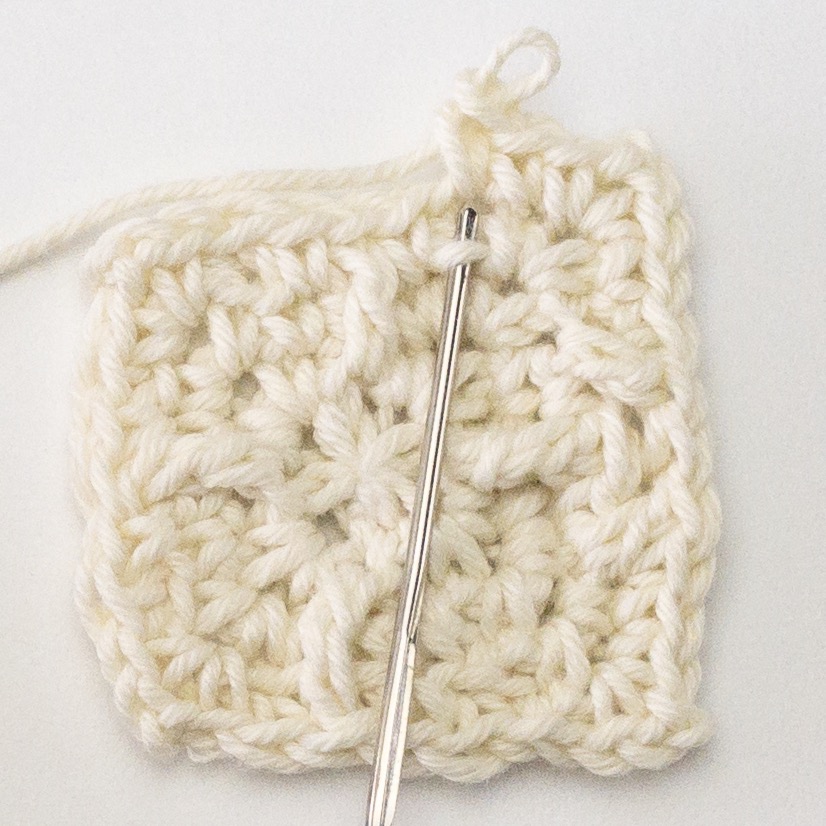
– Make sure the first sc is worked behind the 2nd leg of the tr-2b-1b/fptr-1a-2b-2tog

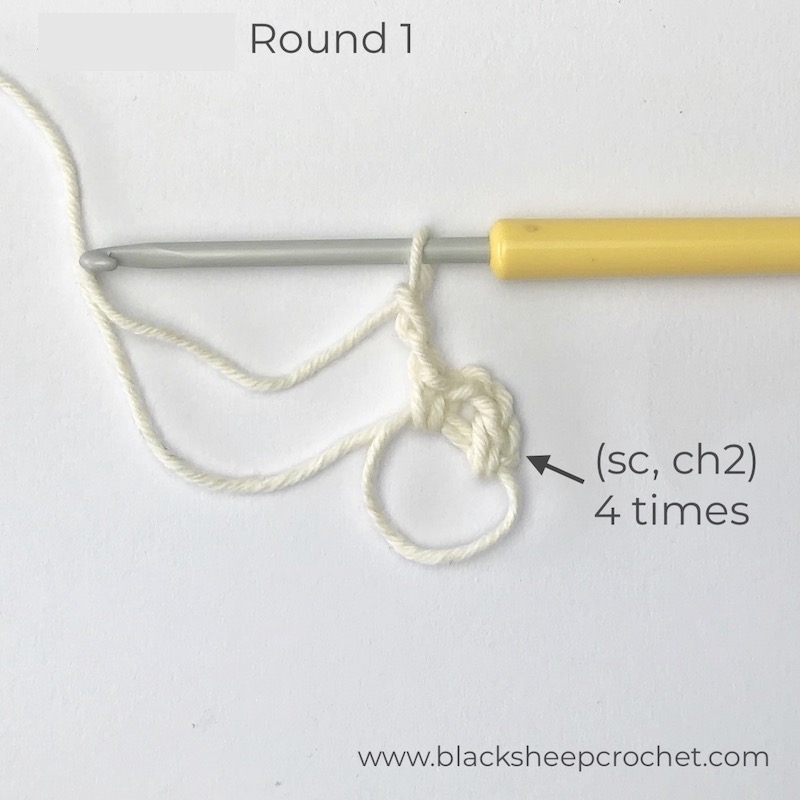
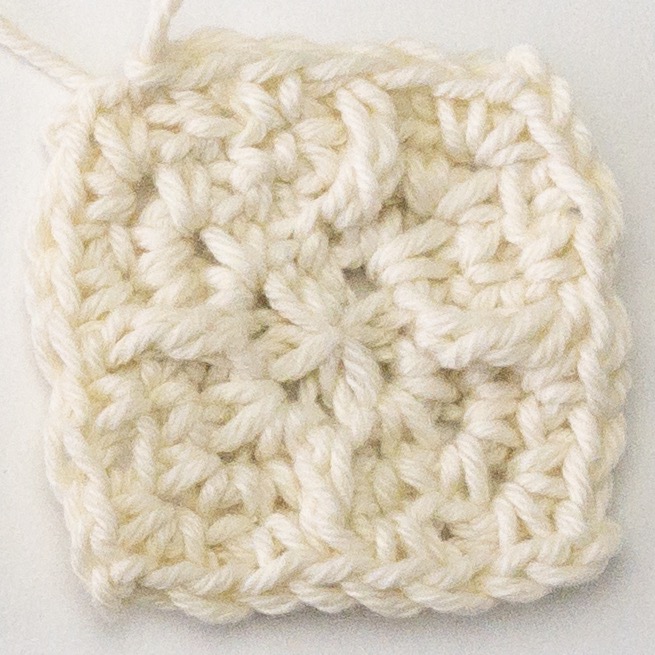
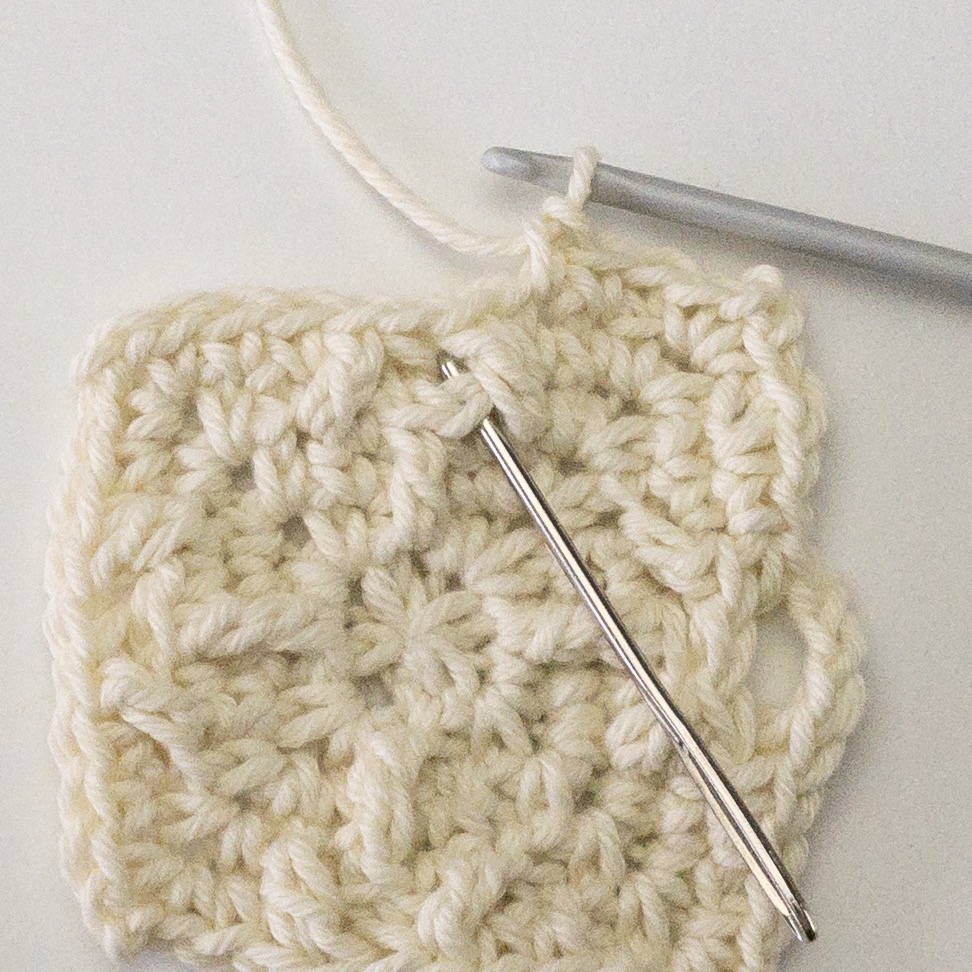
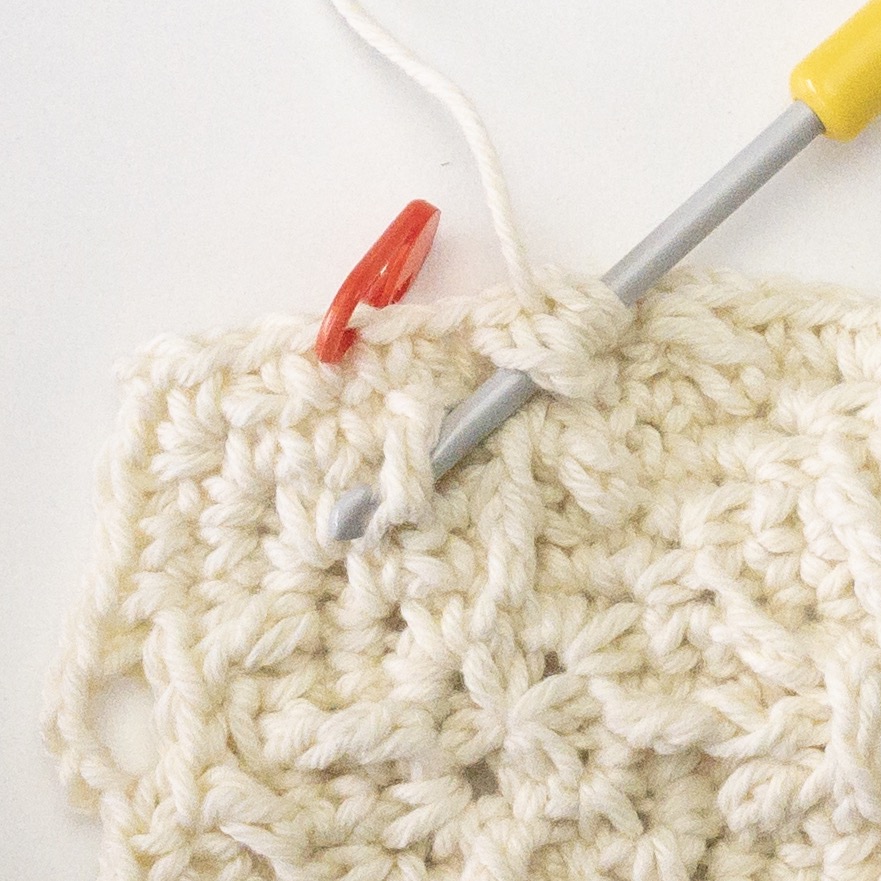
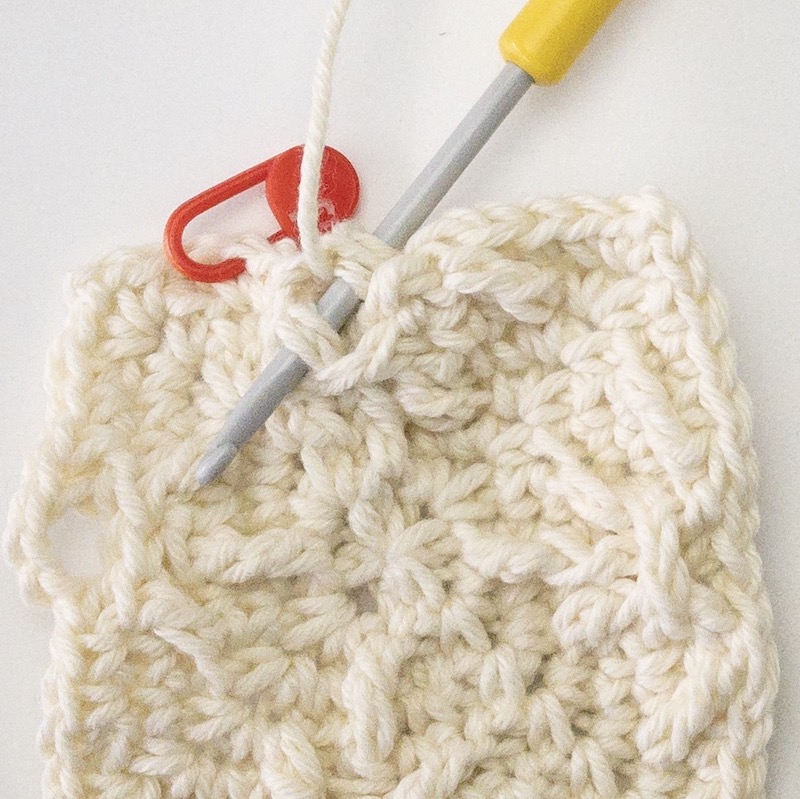
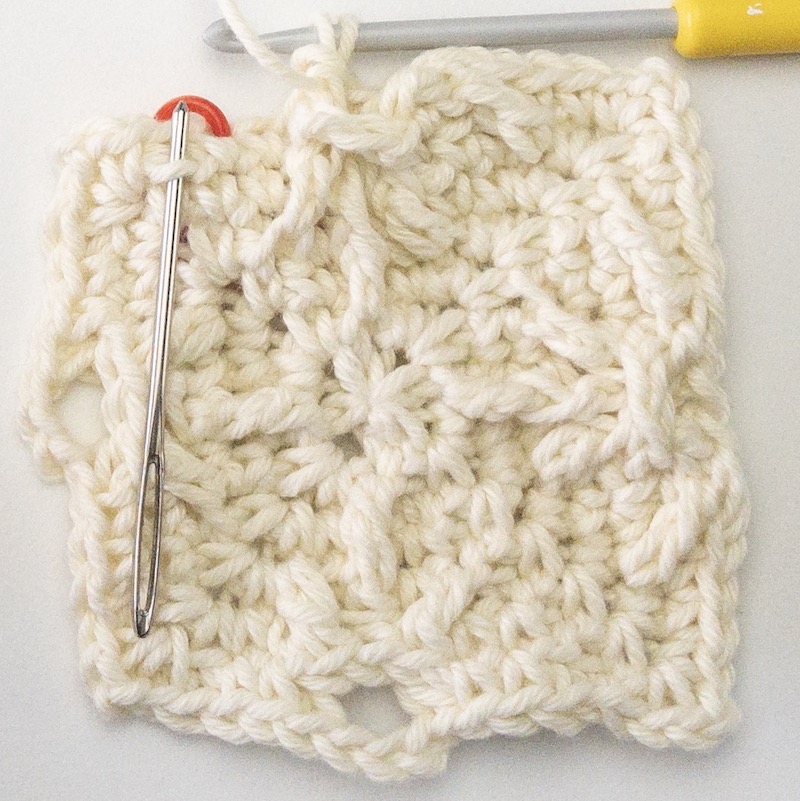
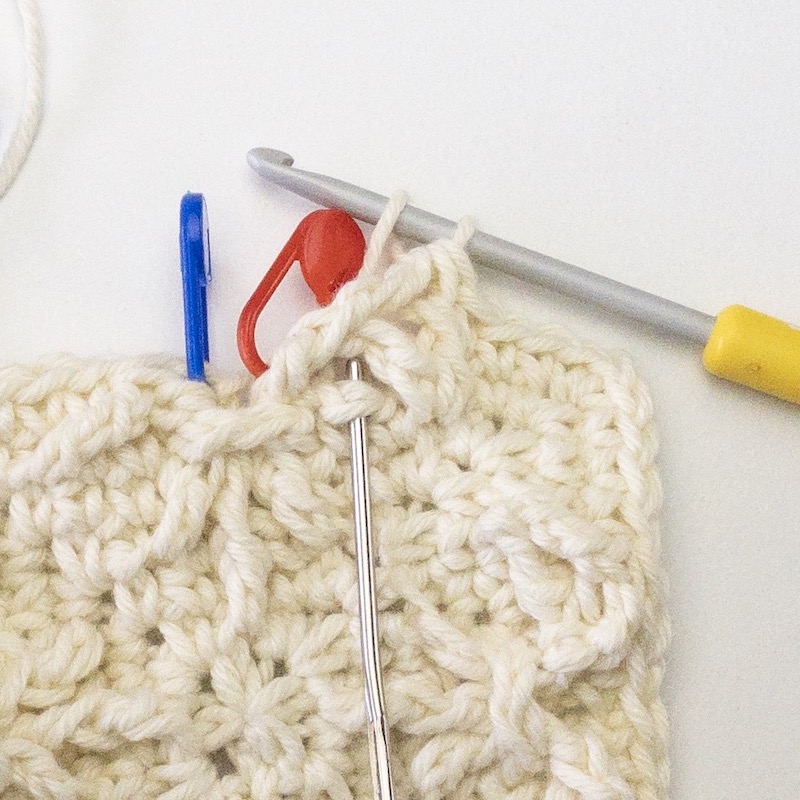
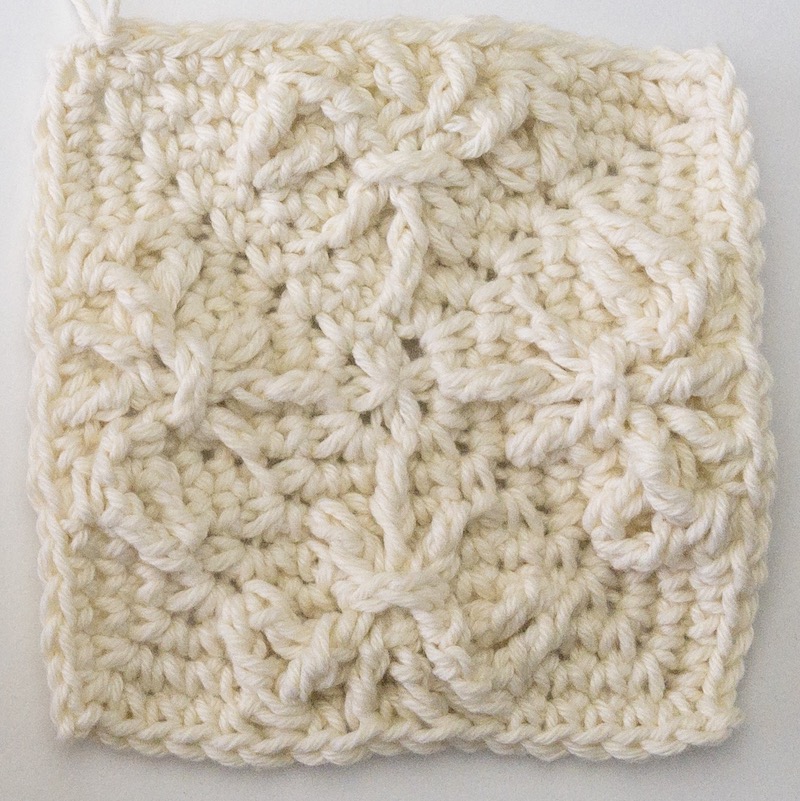
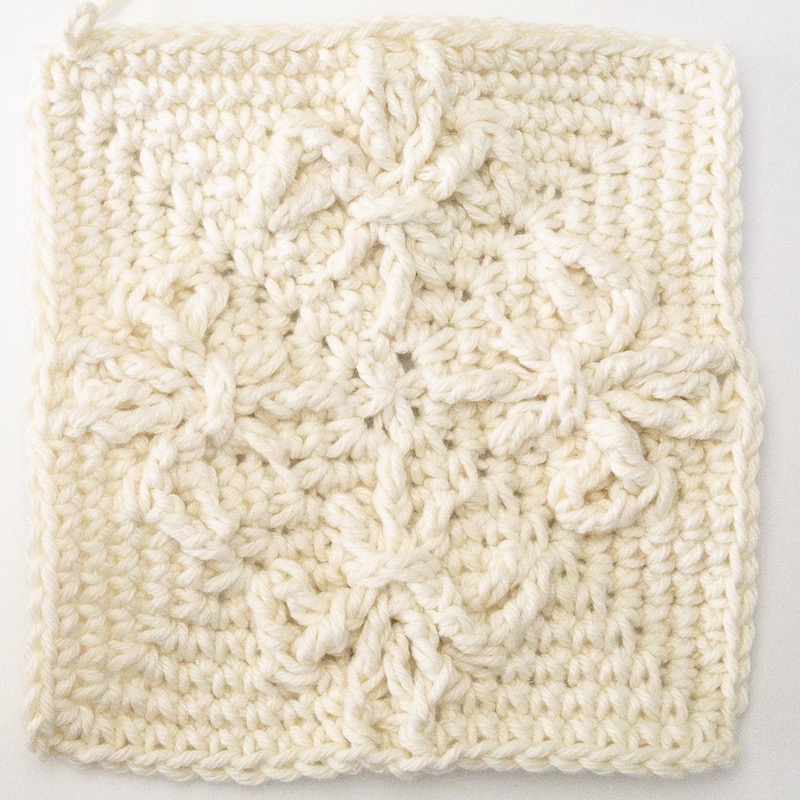
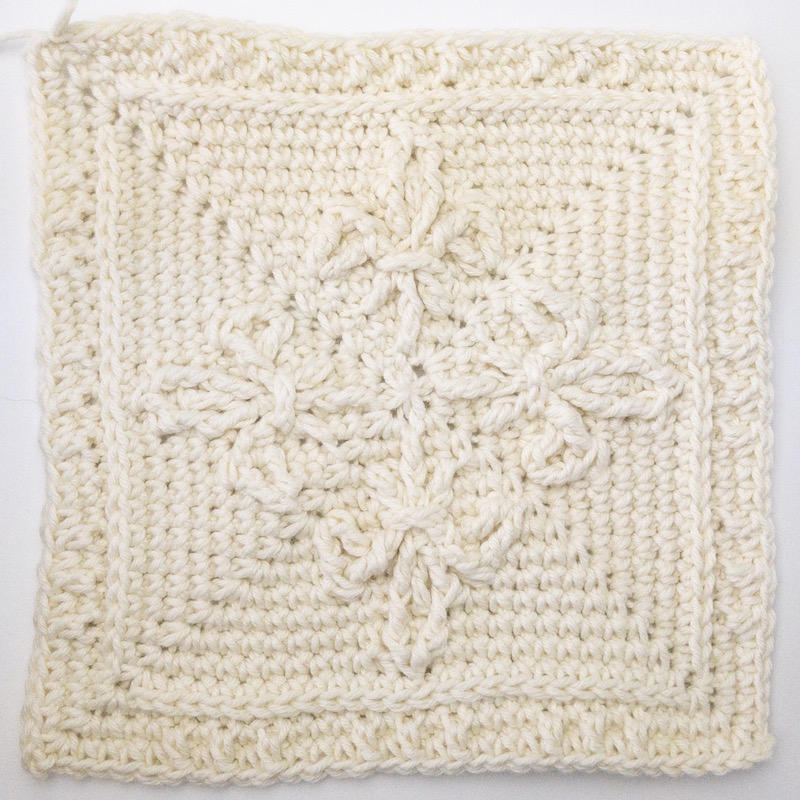
Round 7: Ch1, [(sc, ch2, sc) into the ch2 corner space, 3 sc, tr-2b-1b/fptr-1a-2b-2tog, sc, fptr-3b, sc, fptr-1b-2b/tr-2a-1b-2tog, 3 sc] 4 times.

Ss into the top of the first st. – 13 sts per side plus ch2 corner space

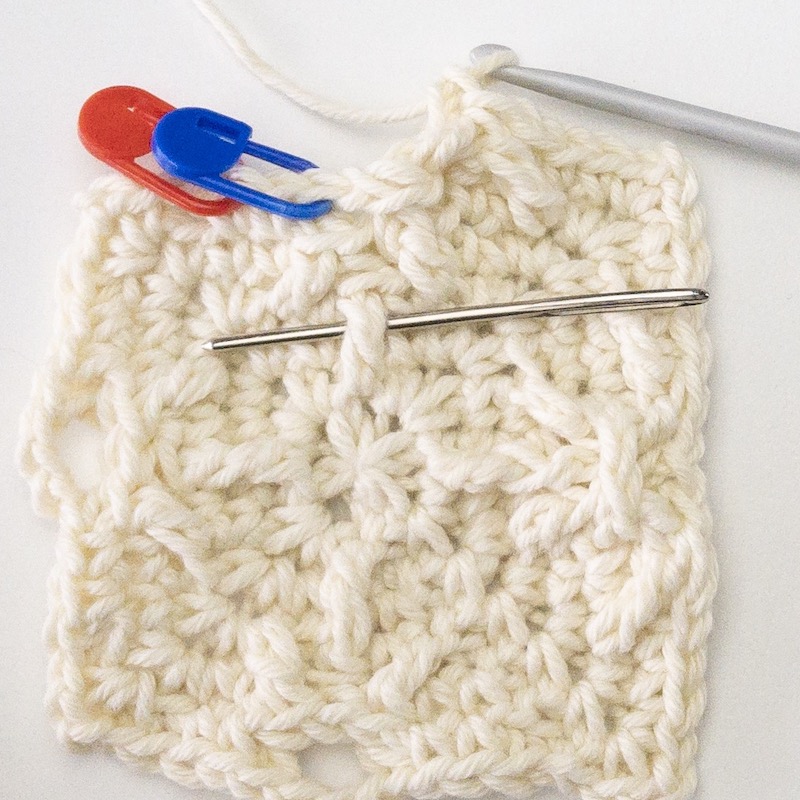
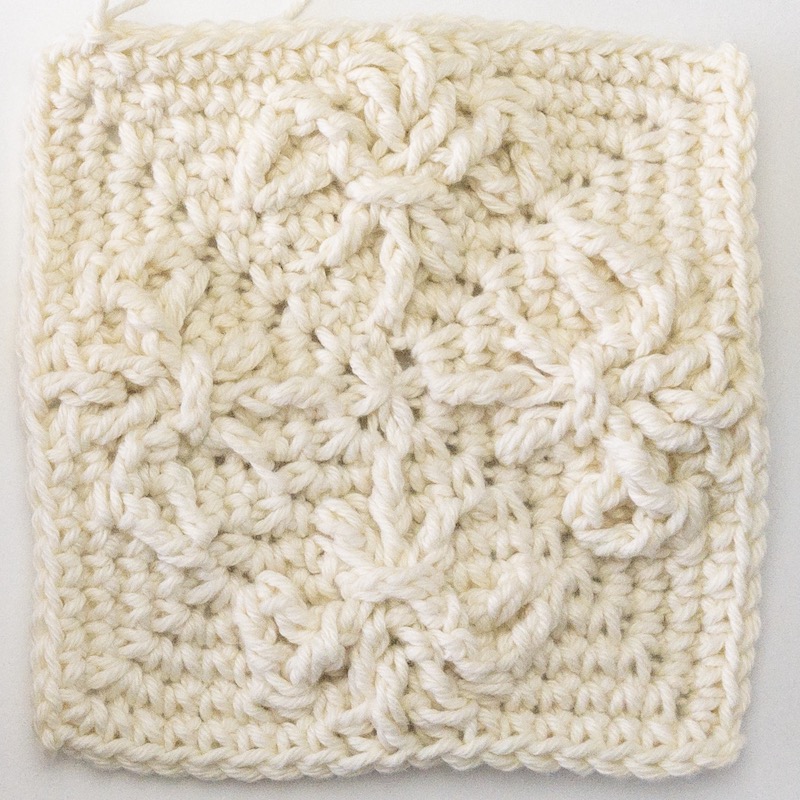
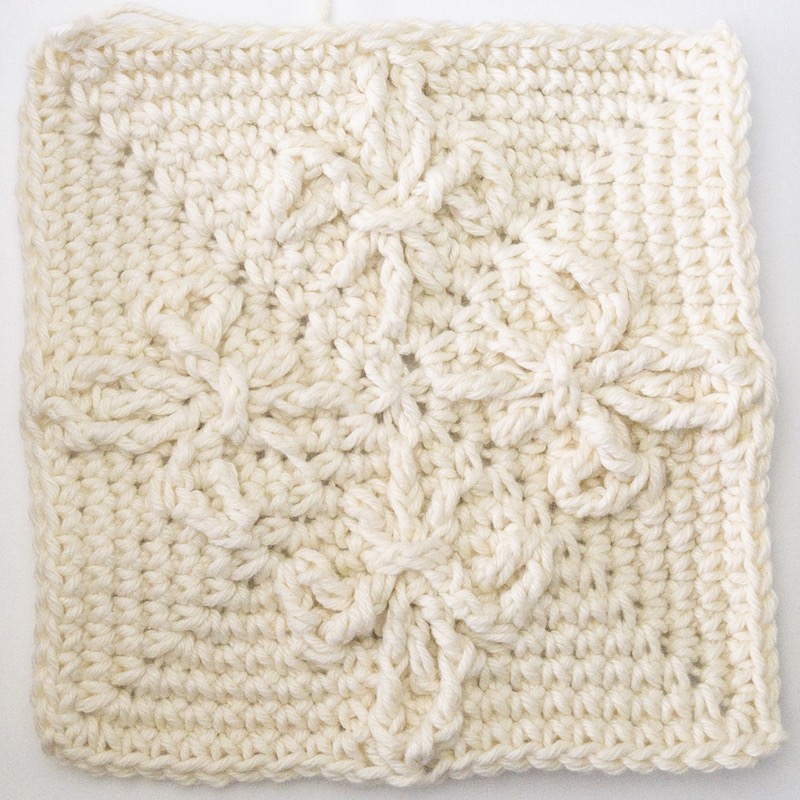
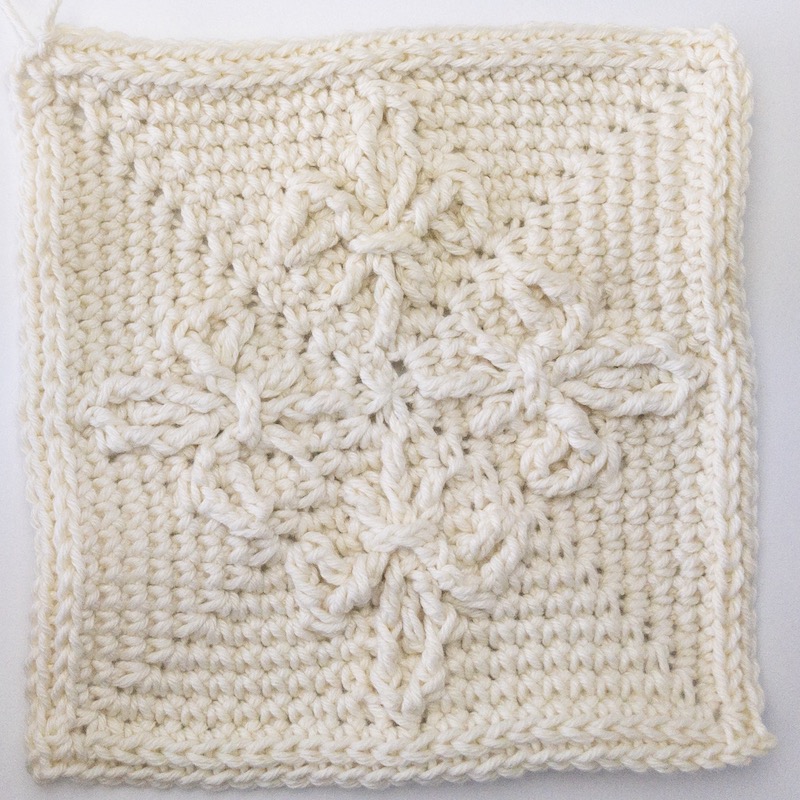
Visual for Round 7 (where x = sc, /\ = fptr and T = tr-3b)

x x x /\ x T x /\ xxx

7.1 –tr-2b-1b/fptr-1a-2b-2tog with 1st leg into indicated FLO and 2nd leg around indicated dc .

7.2 – The second leg has to be worked behind the ch3 – pull the dc-1b-1b to the back, behind the chains.

7.3 – Make the first leg as an uncompleted tr in the FLO 2 stitches behind and 1 round below the next stitch…

7.4 – …then make an uncompleted fptr around the indicated dc-1b-1b that you have pulled behind the ch3…

7.5 – …catch yarn and pull through the remaining 3 loops – the first complicated stitch is done!

7.6 – Skip 1 stitch for the special stitch; the right blue (open) stitch marker shows the next stitch that has to be worked in, it seems a bit backwards.


7.7 – Make a sc in this stitch behind the  legs of the just made special stitch (easy if you do it as shown in 7.8).

7.8 – Check by turning to the wrong side that you have caught the correct stitch loops ( dcbb from previous round).

7.9 – The finished sc, both legs of the special stitch can be seen in front of the sc, the special stitch is a bit “bent around the corner”.

7.10 – The fptr-3b is made around the tr-2b of Round 4 (indicated stitch).


7.11 – Insert hook from back to front behind the ch3, grab the tr….


7.12 – …pull through behind the ch3 so that you can more easily yarn over and finish the fptr.


7.13 – Pull down the ch3 after the fptr-3b is finished.


7.14 – Skip 1 stitch of the current round, make a sc in the next stitch (where the blue sm was in pic 7.13).

7.15 – Next: fptr-1b-2b/tr-2a-1-2tog with 1st leg around indicated dc and 2nd leg into indicated FLO.


7.16 – Yo twice, insert hook behind ch3, grab the dc-1a-1b and pull through ch 3…

7.17 – …yo and work fptr around the dc-1a-1b until there are only 2 loops on hook left….

7.18 – …finished 1st leg; make 2nd leg in indicated FLO until 3 loops are left on hook…;

7.19 – yarn over and pull through the last 3 remaining loops.


7.20 – The fptr-1b-2b/tr-2a-1-2tog is done!

Skip the next stitch in current round behind, make the first of the 3 sc group in the next stitch (stitch marker).


7.21 – You have done it! This was the most complicated round of this square!

7.22 – Place a stitch marker into the 6th, 8th and 11th stitch from the corner. It will make it easier to find the correct stitches in the next round.

Special Stitches in Round 8:

tr-1b-2b/fptr-1a-1b-tog treble and front post double crochet together with 1st leg (treble part) in FLO of st 1 behind and 2 rounds below (same FLO as fptr part from st in Round 7 was made into) and 2nd leg around the st 1 ahead and 1 round below (=fptr part of dc-1b-1b/fptr-2a-2b from previous round)

fptr-1b-1b/tr-1a-2b-tog – 2 front post treble and treble together with 1st leg around st 1 behind and 1 round below (=fptr part of fptr-2b-2b/dc-1a-1b-tog from previous round) and 2nd leg in FLO of st 1 ahead and 2rounds below (= same FLO as fptr part from st in Round 7 was made into)

dcbb double crochet into the stitch directly behind and below next st (2 rounds below)

Round 8: Ch1, [(sc, ch2, sc) into the ch2 corner space, 3 sc, tr-1b-2b/fptr-1a-1b-2tog, dcbb, sc (1st stitch with stitch marker/6th st), sc in BLO, sc (2nd stitch with stitch marker/8th st), dcbb,  fptr-1b-1b/tr-1a-2b-2tog, 3 sc (first of them in 3rd stitch with  stitch marker/11th stitch)] 4 times.

Ss into the top of the first st. – 15 sts per side plus ch2 corner space

8.1 – tr-1b-2b/fptr-1a-1b-2tog with 1st leg into indicated FLO and 2nd leg around indicated leg of the stitch from the previous round.

8.2 – First leg (incomplete treble part) into the FLO of the stitch 1 behind and 2 rounds below (same as fptr leg of the special stitch in Round 7); leave 2 loops on the hook, work 2nd leg around indicated leg 1 stitch ahead and 1 round below and finish the 2-tog. 

8.3 – Skip the stitch behind the special stitch (indicated)…

8.4 – … and work dc behind and below the special stitch of the previous round (into indicated loops).

8.5 – sc in next stitch (1st stitch marker, 6th stitch from the corner), sc in BLO, then sc (2nd stitch marker, 8th stitch from the corner).

8.6 – Make fptr-1b-2b/tr-1a-2b-2tog with 1st leg around indicated st and 2nd leg into indicated FLO. 


8.7 – Skip 2 sts (1 for the dcbb, 1 for the special stitch), then make 3 sc (1st of them in indicated st).

8.8 – Finished Round 8

Tip: Place a stitch marker in the front loop only of the middle stitch, the 8th stitch from the corner.

myBluprint.com

Special Stitches in Round 9:

fptr-1a-2bfront post treble around st 1 ahead and 2 rounds below (around the fptr-3b from Round 7)

fptr-1b-2bfront post treble around st 1 behind and 2 rounds below (around the fptr-3b from Round 7)

dcbb double crochet into the stitch directly behind and below next st (2 rounds below)

Round 9: Ch1, [(sc, ch2, sc) into the ch2 corner space, 4 sc, dcbb, sc, fptr-1a-2b, sc, fptr-1b-2b, sc, dcbb, 4 sc] 4 times.

Ss into the top of the first st. – 17 sts per side plus ch2 corner space

9.1 – 4 sc, then dcbb into indicated st (behind the special stitch of the previous round), skip this special stitch, sc in next.

9.2 – fptr-1a-2b around the fptr-3b of Round 7 (indicated).

9.3 – Skip the stitch behind the fptr, sc in next (indicated).

9.4 – fptr around the fptr-3b of Round 7 (same as before – indicated).

9.5 – Skip the stitch behind the fptr, sc in next (indicated), then dc behind and below special stitch from Round 8 (indicated loops); finish with 4 sc.

9.4 – Finished Round 9

From now on this square will become quite easy to hook!

Special Stitches in Round 10:

tr-2btreble in FLO of the st directly 2 rounds below 

dcbbdouble crochet into the stitch behind and below next st (2 rounds below)

Round 10: Ch1, [(sc, ch2, sc) into the ch2 corner space, 7 sc, dcbb, tr-2b, dcbb, 7 sc] 4 times.

Ss into the top of the first st. – 19 sts per side plus ch2 corner space.

10.1 7 sc, then dc behind and below the fptr from the previous round (indicated loops).

10.2 tr-2b in FLO of the stitch directly 2 rounds below (with the stitch marker, if you placed one there in Round 8).

10.3 – dc behind and below the fptr from previous round (indicated)

10.4 – Finished Round 10

Wool WarehouseWool Warehouse

Special Stitches in Round 11:

fphtr-2bfront post half treble around stitch directly 2 rounds below (Round 9)

dcbbdouble crochet into the stitch behind and below next st (2 rounds below)

Round 11: Ch1, [(sc, ch2, sc) into the ch2 corner space, 8 sc, fphtr-2b, dcbb, fphtr-2b, 8 sc] 4 times.

Ss into the top of the first st. – 21 sts per side plus ch2 corner space

11.1fphtr-2b around the fptr directly 2 rounds below next stitch (indicated).

11.2dc directly behind and below the treble of the previous round (indicated).

11.3 – fphtr-2b around the fptr directly 2 rounds below next stitch (indicated).

11.4 – Skip 3 stitches of the current round for the 3 special stitches, 1st of 8 sc into indicated st.

11.5 – Finished Round 11

Knit Picks Banner

Special Stitches in Round 12:

fpdc-1ba-1b-2tog2 front post double crochet together with 1st leg around st 1 behind and 1 round below and 2nd leg around st 1 ahead and 1 round below (fphtr-2b from Round 11)

dcbbdouble crochet into the stitch behind and below next st (2 rounds below)

Round 12: Ch1, [(sc, ch2, sc) into the ch2 corner space, 9 sc, dcbb, fpdc-1ba-1b-2tog, dcbb, 9 sc] 4 times. 

Ss into the top of the first st. – 23 sts per side plus ch2 corner space

12.19 sc, then dc behind and below fphtr from previous round (indicated).

12.2fpdc-1ba-1b-2tog with 1 leg around each fphtr of Round 11 (indicated).

12.3 – 2nd dc behind and below the 2nd fphtr of Round 11 (indicated), 1st of 9 sc into next stitch.

12.4Finished Round 12

Knit Picks Banner

Hint for Rounds 13/14, 19/20 (and 29/30 of the Border): 

If you find making sc in the 3rd loop (in Rounds 14, 20 and 30) difficult, here are some ideas on how to make it easier:

  • you could use a bigger hook to work Rounds 13, 19 and 29, 
  • make an effort to work the sc very loosely in this round, 
  • use a smaller hook for Rounds 14, 20 and 30 or 
  • make hdc instead of sc in Rounds 13, 19 and 29. If you choose this option, please be aware that making hdcs may alter the height of the round and that you should work Rounds 13, 19 and 29 in the same manner in all squares.

Round 13: Ch1, [(sc, ch2, sc) into the ch2 corner space, 23 sc across] 4 times. 

Ss into the top of the first st. – 25 sts per side plus ch2 corner space

13.1Finished Round 13

Round 14: Ch1, [(sc, ch2, sc) into the ch2 corner space, 25 sc in 3rd loop across] 4 times.

Ss into the top of the first st. – 27 sts per side plus ch2 corner space

14.1 – sc in 3rd loop 

Round 15:

Ch1, [(sc, ch2, sc) into the ch2 corner space, (3 sc, (sc in BLO, sc) twice, sc in BLO) 3 times, 3 sc] 4 times.

Ss into the top of the first st. – 29 sts per side plus ch2 corner space

A visual for Round 15 looks like this (where x = sc and _ = sc in BLO) 

xxx_x_x_xxx_x_x_xxx_x_x_xxx

Special Stitches in Round 16:

dc-1bdouble crochet worked into the FLO of st directly 1 round below

Round 16: Ch1, [(sc, ch2, sc) into the ch2 corner space, sc (3 sc (dc-1b, sc) twice, dc-1b) 3 times, 4 sc] 4 times.

Ss into the top of the first st. – 31 sts per side plus ch2 corner space

A visual for Round 16 looks like this (where x = sc and dc-1b = T)

xxxxTxTxTxxxTxTxTxxxTxTxTxxxx

16.1dc-1b in indicated FLOs (repeat for every group of 3 FLOs).

16.2 – The stitch behind a dc-1b is skipped, the sc is made into the next stitch.

16.3 – (dc-1b, sc) repeat (= small repeat).

16.4 (3 sc (dc-1b, sc) twice, dc-1b) (= large repeat).

16 – Finished Round 16

Watch woodworking classes at myBluprint.com

Special Stitch in Round 17:

dcbb double crochet into the stitch directly behind and below next st (2 rounds below)

Round 17: Ch1, [(sc, ch2, sc) into the ch2 corner space, 3 sc, (sc, sc in BLO, (dcbb, sc) twice, dcbb, sc in BLO) 3 times, 4 sc] 4 times.

Ss into the top of the first st. – 33 sts per side plus ch2 corner 

A visual for Round 17 looks like this (where x = sc, _ = sc in BLO and T = dcbb)

xxxx_TxTxT_x_TxTxT_x_TxTxT_xxxx

17.1The dcbb are worked directly behind the dc-1b of the previous round.

17.21 repeat of (sc, sc in BLO, (dcbb, sc) twice, dcbb, sc in BLO) (= large repeat).

17 – Finished Round 17

Special Stitch in Round 18:

tr-3ba-1b-2tog2 treble together with 1st leg in FLO in st 3 behind and 1 round below and 2nd leg in FLO of st 3 ahead and 1 round below

Round 18: Ch1, [(sc, ch2, sc) into the ch2 corner space, 8 sc, (tr-3ba-1b-2tog, 7 sc) 3 times, sc] 4 times.

Ss into the top of the first st. – 35 sts per side plus ch2 corner space

A visual for Round 18 looks like this (where x = sc and /\ = special stitch)

xxxxxxxx/\xxxxxxx/\xxxxxxx/\xxxxxxxx

18.1 – tr-2tog with 1st leg into FLO of stitch 3 behind and 1 round below and 2nd leg in FLO of stitch 3 ahead and 1 round below (front loops to the right and to the left of the 3 dc-1b group).


18.2Skip the stitch behind the tr-2tog (the “roofs” of l’université buildings – indicated), 1st of 7 sc into the next stitch.

Wool Warehouse Wool Warehouse

Hint for Round 19:

The next round will be sc in 3rd loop, so work Round 19 according to your preferred option outlined in the Outlandish Stitch Compendium and above (before Round 13)

Round 19: Ch1, [(sc, ch2, sc) into the ch2 corner space, 9 sc, (fpsc around top of the tr-3ba-1b-2tog, 7 sc) 3 times, 2 sc] 4 times.

Ss into the top of the first st. – 37 sts per side plus ch2 corner space

Hint: The first stitch after the fpsc might be hidden behind or squeezed by the fpsc! Make sure you have 7 sc between the fpsc. 

A visual for Round 19 looks like this (where x = sc and S = fpsc)

xxxxxxxxxSxxxxxxxSxxxxxxxSxxxxxxxxx

If you choose to use a different colour for the border, now is the perfect time to fasten off the first colour, weave in the tails and attach the new colour in any of the corners. If you are not intending to work the square border, skip to Round 20. If you want to crochet the square border, continue with that pattern now.

You can find the Border Pattern here:

Wrapped In Jamie Border Pattern

Changing colour for Round 20:

Although you could add the new colour in any way you wish, the neatest way is by using a standing sc. If you choose this method, omit the ch1 and the first sc at the beginning of Round 20 and continue with the ch2 after the standing sc.

Round 20: Ch1, [(sc, ch2, sc) into the ch2 corner space, 37 sc in 3rd loop] 4 times.

Ss into the top of the first st or cut yarn and finish with an invisible join. – 39 sts per side plus ch2 corner space

Your Square 6 – L’Université is now finished 🙂

This blog post contains affiliate links. I only link to products or services that I use, would use or that I think are beneficial and of high quality standard for my Black Sheep Crochet flock. 

Did you know that I offer a 20% discount on my products and patterns for my VIP Black Sheep Crochet Flock Members? You can sign up below for the instant discount code. I don’t spam or anything gross like that!

Feel free to share this with your friends on your favourite social media network

Enter Your Email to Claim Your INSTANT 20% Discount Code on Products and Patterns

* indicates required

Black Sheep Crochet will use the information you enter on this form to be in touch with you and to provide updates and marketing. By signing up, you understand that sometimes emails may contain news about to-pay-for products or services, special promotions or sales. However, we do not spam and you can opt-out any time.

Spam sucks, which is why I will treat your information with respect.