While all explanations below are still valid, you may want to refer to the updated and more complete version, which can be found here:
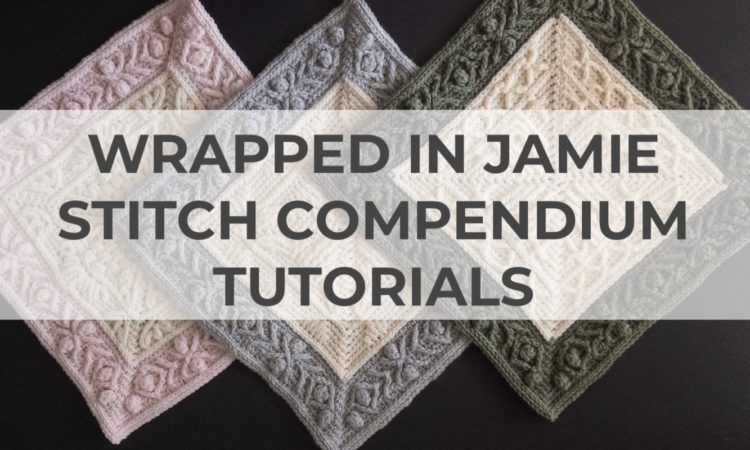
Wrapped in Jamie looks more complicated than it is!
You will most likely already know most of the stitches used and I will explain how to read the abbreviations for any special stitches and how to make them step-by-step in this compendium.
Crochet Terminology, Abbreviations and Punctuation
The crochet technique used in the Wrapped in Jamie squares is called ‘overlay crochet’. Overlay means that there are usually two layers of stitches. In WIJ, the first layer is made up of single crochet stitches. When single crochet stitches are worked in the back loops only, they leave a free front loop. This free front loop can be used to ‘anchor’ a long stitch (i.e. treble or double treble) that will be made in a later round.
The overlay technique allows us to create projects of two or even more layers, to ‘paint’ a picture or to ‘write stories in yarn’. A word of warning though: once you start making overlay projects it gets quite addictive 🙂

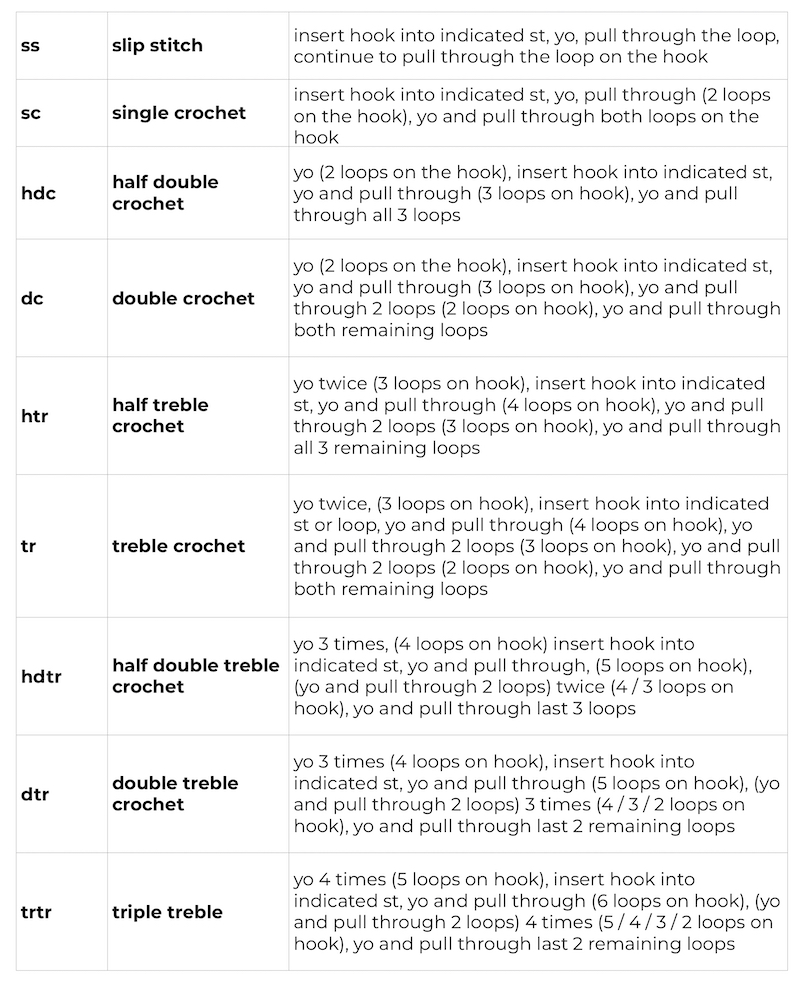
Basic Stitches - Abbreviations and Definitions
"Petranese" Overlay Crochet Terminology
One of my Facebook Wrapped in Jamie CAL group members invented the term “Petranese” to describe the Black Sheep Crochet way of writing the positioning of special stitches. I love the idea and therefore I have adopted it. As far as I know, there is no existing system of describing these special stitches, so I had to make up my own. I hope you find it useful.
Counting Stitches & Rounds, Finding Free Front Loops
Stitches in previous rounds, angular stitches or angular <2-together stitches used in the Wrapped In Jamie squares may look complicated, but they really are not.
Once you know how to count stitches and rounds – or rather how they are counted in the patterns -, everything will become easy and logical. So please have a good look at the explanations below.
Stitch definition abbreviations consist of 3 parts:
stitch _ horizontal placement – round
The stitch description gives you details for each of those three parts in plain text:
- stitch type
- exact horizontal placement (stitches ahead or behind/backwards)
- round placement
Stitch type defines what kind of stitch is going to be worked, whether it is a simple stitch, a front post or a back post stitch or a stitch just in one specific loop.
The placement definitions are added as numerals after the type of stitch and “_”:
- the first numeral always gives the direction and the number of stitches you have to count, starting from the next stitch:
“+” means: count ahead; +3 i.e. means it is the 3rd stitch after the next stitch
“–” means: count backwards; -3 i.e. means it is the 3rd stitch counted backwards / behind the next stitch
- the second numeral always indicates the round where the stitch has to be made, starting from the current round:
-1 means: the last round that you made, the one you would now “normally” crochet into = 1 round below the current round
-2 means: 2 rounds below the current round
-3 means: 3 rounds below the current round
Counting Stitches
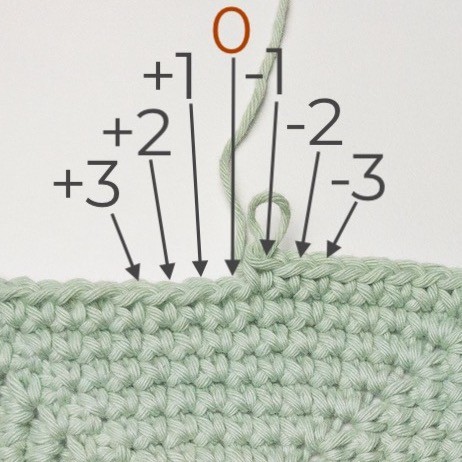
0 = next stitch
+1 = 1 stitch ahead of the next stitch
+2 = 2 stitches ahead of the next stitch
+3 = 3 stitches ahead of the next stitch
-1 = 1 stitch behind /backwards next stitch
-2 = 2 stitches behind the next stitch
-3 = 3 stitches behind the next stitch
Counting Rounds
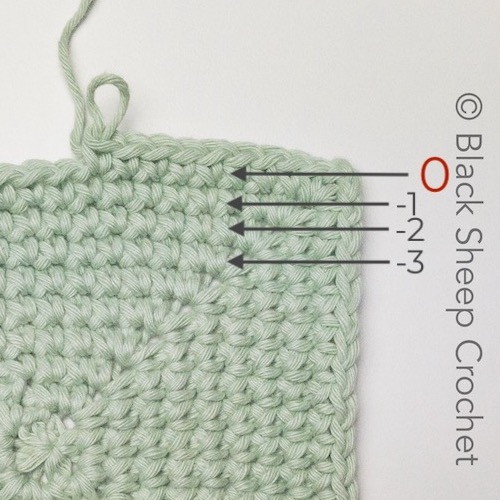
0 = current / working round
-1 = 1 round below the current round, the round you “normally” work into
-2 = 2 rounds below the current round
-3 = 3 rounds below the current round
Finding Free Front Loops
When we make a back loop stitch (“st in BLO”), the front loop of this stitch stays free. We will use this free front loop in a later round to ‘anchor’ a stitch (“st in FLO”).
Example with numbers:
Stitches you make in the current round are stitches in ‘Round 0’.
The stitches you made in the previous round are stitches in ‘Round -1’.
A stitch you work in BLO in the current round (+0-0) leaves a free front loop from the stitch in the previous round (+0-1). The front loop belongs to the stitch from ‘Round -1’. In the next round, this will be a free front loop of the stitch from ‘Round -2’ – the FLO of the st 2 rounds below. (+0-2).
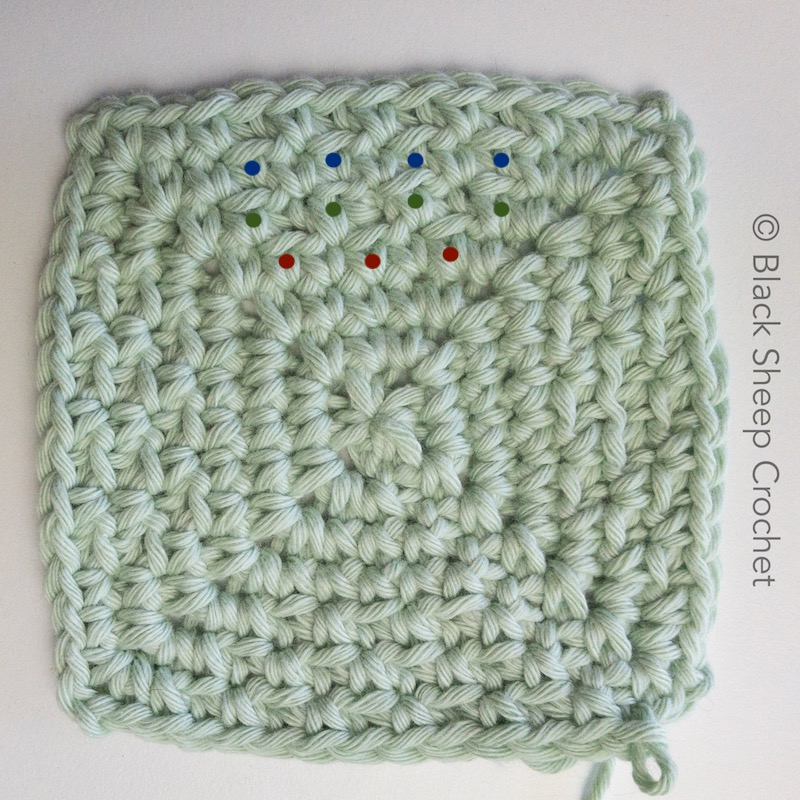
The last round finished (no dots underneath front loops) are front loops of the stitches 1 round below the current round (-1)
The blue dots underneath the free front loops indicate the front loops of the stitches 2 rounds below the current round (-2)
The green dots underneath the free front loops indicate the front loops of the stitches 3 rounds below the current round (-3)
The red dots underneath the free front loops indicate the front loops of the stitches 4 rounds below the current round (-4)
Placing stitch markers in the free front loops after you worked a sc in BLO in the current round will be helpful to find the front loops more easily later on.
Special Stitches - combining stitch and round counting
Knowing how to count stitches and rounds is the simple but essential secret to making Wrapped in Jamie squares. The placement for all special stitches used in the designs can easily be deciphered when we understand how to count stitches and rounds.
The photo shows an example for a special stitch and explains how to read the abbreviation
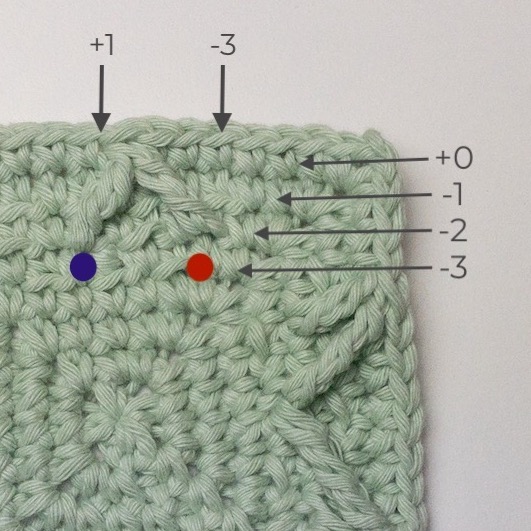
This is a tr_-3-3 in FLO/tr_+1-3 in FLO/<2tog, meaning 2 tr are worked together:
– the first leg is a tr in the front loop only of the st 3 behind and 3 rounds below the next stitch (red dot)
– the second leg is a tr in the front loop only of the st 1 ahead and 3 rounds below the next stitch (blue dot)
No rules without exceptions 🙂
In our “old Petranese” we used letters to explain the position of a stitch. We also introduced special abbreviations for “padding stitches”, the ones that are made behind special stitches to enhance the special 3D effect and/or to close gaps.
We will continue to use the abbreviations for hdcbb or dcbb (see next chapter “Stitch Variations”).
The padding stitches are made “behind” and “below” a special stitch, in the stitch that was skipped because of a special stitch.
This “behind” actually means “on the wrong side of the work”. The special stitch stays in front, the behind-below-stitch is made as a “padding” for it.
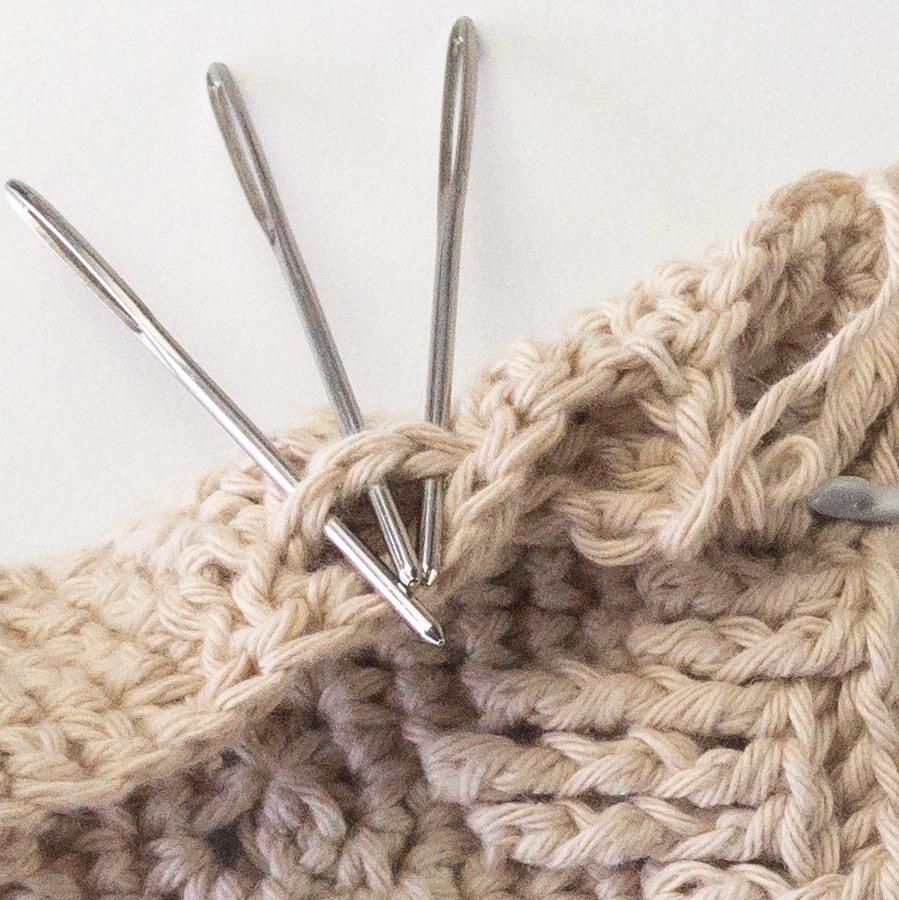
The hdcbb or dcbb will be worked into the top loops of the skipped stitch below = behind and below the special stitch (indicated loops, 2 rounds below)
Stitches Worked in Front Loops Only
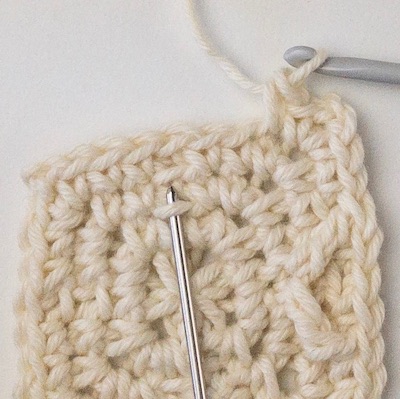
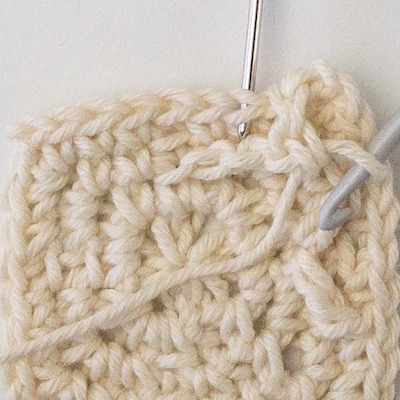
Example:
tr in FLO – treble crochet worked in the Front Loop Only of the indicated stitch
tr_+2-2 in FLO – treble crochet is worked in the front loop only of the stitch 2 ahead and 2 rounds below the next stitch (indicated)
The indicated stitch (behind the one we just made) is replaced by the special stitch must therefore be skipped (unless instructed otherwise)
Stitches Worked in Back Loops Only
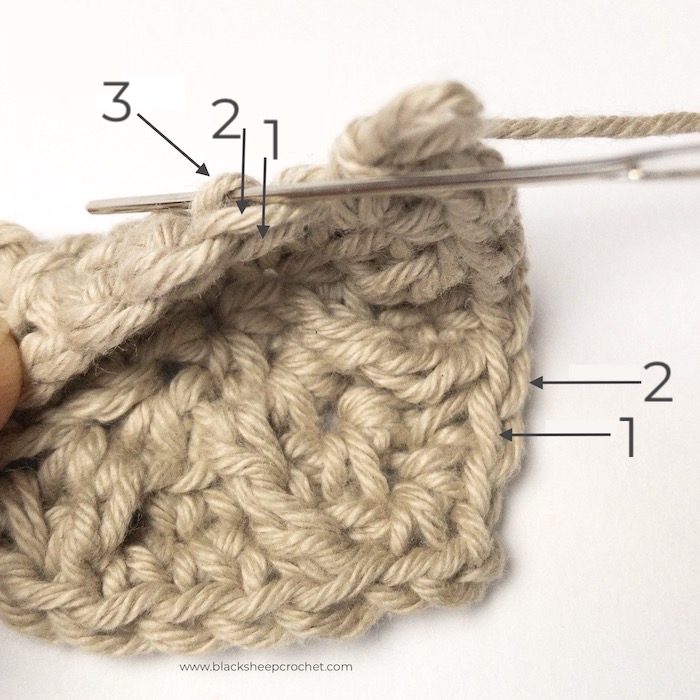
1 – indicates the front loop
2 – indicates the back loop
3 – indicates the 3rd loop
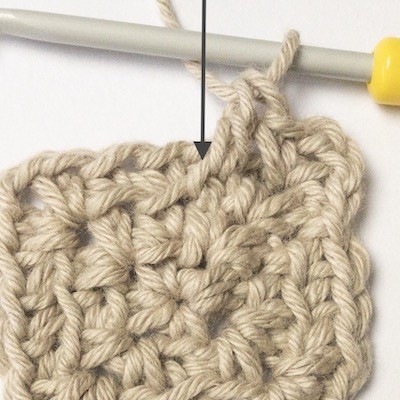
All four sides of the square show 3 sc that have been worked in back loops only in the previous round (-1)
The front loops from the round before (-2) are still available and can be used for a FLO stitch in one of the next rounds
The picture shows a dc_+1-2 in FLO worked in the free front loop 1 stitch ahead and 2 rounds below the next stitch – the back loop was used by a sc in BLO
Third Loop Stitches
Rounds 14 and 20 of the inside square and Round 30 of the border are always sc in the 3rd loop of the stitches (unless you choose to work it otherwise). They have a very distinctive and – in my humble opinion – gorgeous look, but they can be a bit more challenging to work. (See alternative suggestions below)
A stitch has 2 loops that form something like a V-shape, consisting of a Front Loop (FL) and a Back Loop (BL). The 3rd loop lies directly behind the back loop. It is the ‘bump’ at the open side of the V, a tiny bit left of center (for a right handed crocheter). Please refer to the pictures below for a visual reference.

Right side of work (RS)
1 – Front Loop (FL)
2 – Back Loop (BL)
3 – 3rd loop
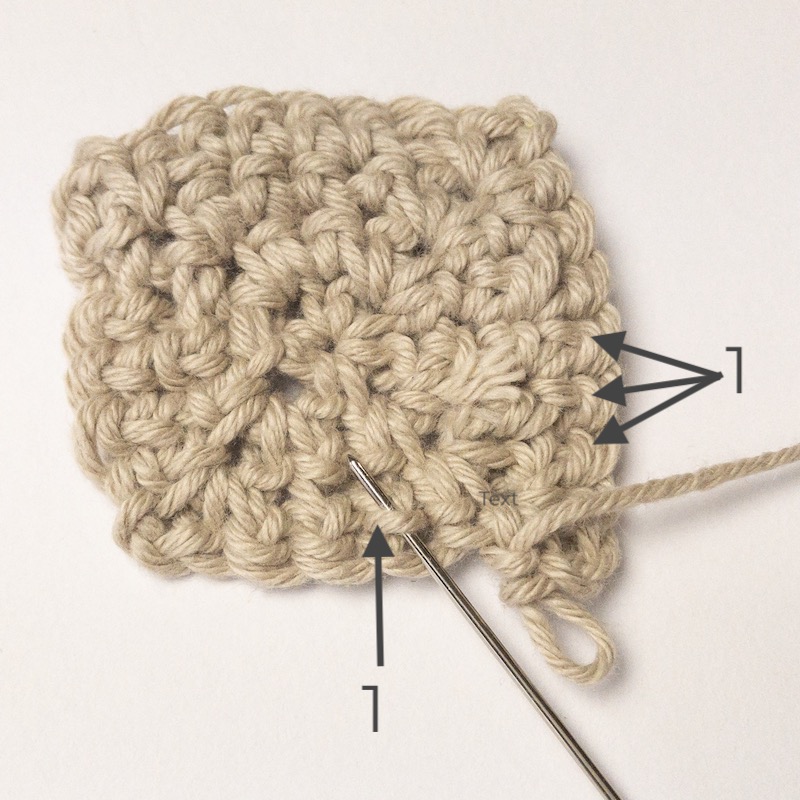
Wrong side of work (WS)
1 – 3rd loops
Hints for Rounds 13/14, 19/20 (and 29/30 of the Border)
If you find making sc in the 3rd loop (in Rounds 14, 20 and 30) difficult, here are some ideas on how to make it easier:
- use a bigger hook to work Rounds 13, 19 and 29,
- make an effort to work the sc loosely in Rounds 13, 19 and 29,
- use a smaller hook for Rounds 14, 20 and 30 or
- make hdc instead of sc in Rounds 13, 19 and 29. If you choose this option, please be aware that making hdcs may alter the height of the round and that you should work Rounds 13, 19 and 29 in the same manner in all squares.
Angular Stitches
Forward angular stitch
tr_
type of st
+2
st(s) ahead
-3
rounds below
treble 2 stitches ahead and 3 rounds below the next stitch = tr_+2-3
Backward angular stitch
tr_
type of st
-2
st(s) behind
-3
rounds below
treble 2 stitches behind and 3 rounds below the next stitch = tr_-2-3
tr_+1-2 in FLO
treble in FLO of the st 1 ahead and 2 rounds below the next stitch
tr_-1-2 in FLO
treble in FLO of the st 1 behind and 2 rounds below the next stitch
htr_+2-3 in FLO
or
tr_+2-3 in FLO
half treble or treble in FLO of the st 2 ahead and 3 rounds below the next stitch
htr_-2-3 in FLO
or
tr_-2-3 in FLO
half treble or treble in FLO of the st 2 behind and 3 rounds below the next stitch
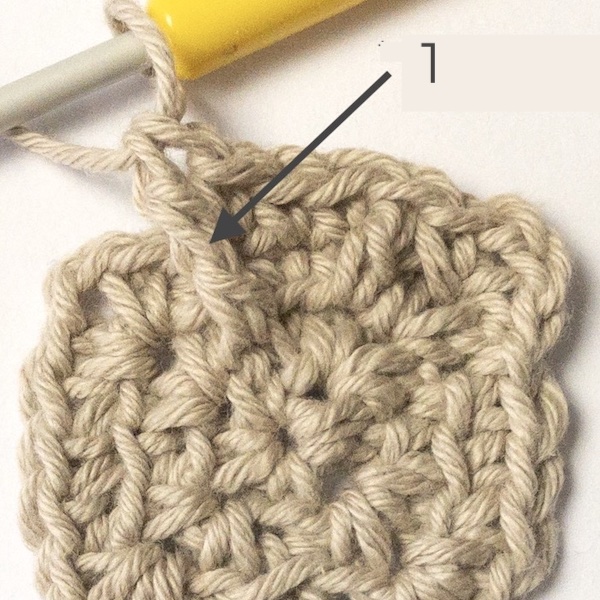
1: tr_-2-3 in FLO =
treble worked in the FLO of the st
2 behind (-2) and
3 rounds below (-3) the next stitch
